OVA-R Deployment Guide
The OVA-R virtual appliance allows users to deploy and integrate Red Hat Enterprise Linux OpenStack Platform 5 within an existing VMware vSphere environment. OVA-R uses the existing vSphere infrastructure (including hypervisors and datastores) to deploy and host instances. A handful of parameters set using a simple text-based interface is all that's required to configure the appliance.
Note: OVA-R is intended for deployment in non-production environments for evaluation purposes only. In addition, Red Hat does not offer product support for the OVA-R appliance.
OVA-R includes the Dashboard (horizon) user interface, and provides the necessary means to evaluate Red Hat Enterprise Linux OpenStack Platform running on ESX for Compute (nova) services, while using vSphere datastores for Image Service (glance) and Block Storage (cinder).
Prerequisites
OVA-R has specific VMware, datastore, and networking system requirements:
vSphere Environment
OVA-R requires VMware vCenter version 5.1 or newer. OVA-R may function with older environments by referring to the VCD driver for OpenStack community documentation, however, this is not recommended.
vSphere Networking
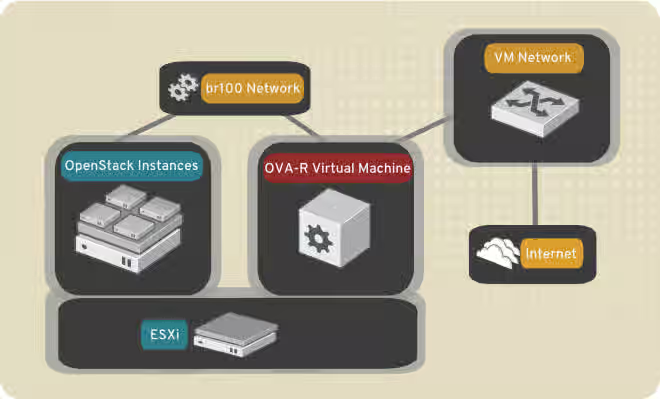
OVA-R uses nova-networking in a multi-homed configuration; one interface is allocated to a public network, and another to a private network.
Using the Virtual Infrastructure Client (VIC), create a port group named br100 and attach each participating ESX host. Instances are hosted on the private network, and ingress/egress traffic is handled by flatdhcpmanager.
vSphere Datastore
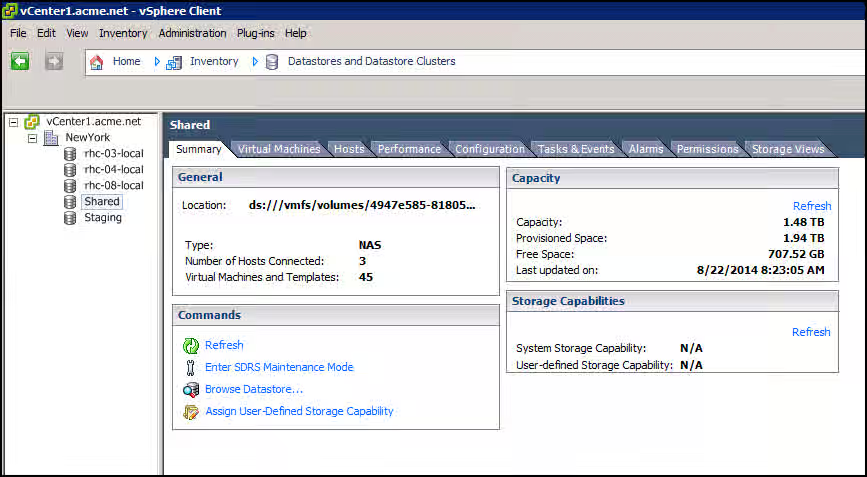
OVA-R uses the vCenter driver to enable access to the vSphere datastores for Image Service (glance). A nominated datastore must be present, including a directory for image storage. OVA-R automatically uploads a guest image for both Cirros and the Red Hat Enterprise Linux guest image to the datastore.
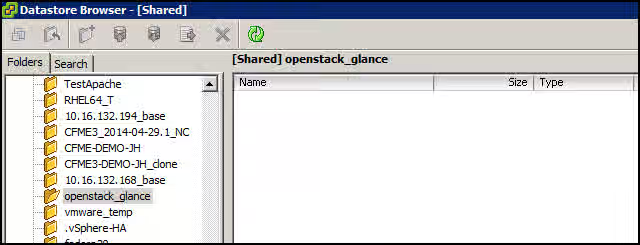
The screenshots below depict a datastore named Shared, and a datastore directory named /openstack_glance:
The /openstack_glance directory in the Shared datastore:
OVA-R Services
OVA-R includes the following Red Hat Enterprise Linux OpenStack Platform services:
- Compute (nova)
- Nova-compute
- Nova-network
- Nova-conductor
- Nova-scheduler
- Nova-api
- Nova-console-auth
- Nova-novncproxy
- Identity Service (keystone)
- Image Service (glance)
- Glance-registry
- Glance-api
- Block Storage (cinder)
- Cinder-api
- Cinder-scheduler
- Cinder-volume
- Dashboard (horizon)
- httpd
- memcached
- Orchestration (heat)
- Heat-api
- Heat-api-cfn
- Heat-api-cloudwatch
- Heat-engine
- Telemetry (ceilometer)
- ceilometer-compute
- ceilometer-central
- ceilometer-collector
- ceilometer-api
- ceilometer-alarm-evaluator
- ceilometer-alarm-notifier
Supporting services
In addition to the above, OVA-R includes these supporting services:
- libvirtd
- messagebus
- mariadb
- rabbitmq-server
Deploying OVA-R within VMware vCenter
While OVA-R can be deployed using the vSphere web client, this guide will provide details on using the VMware Virtual Infrastructure Client (VIC).
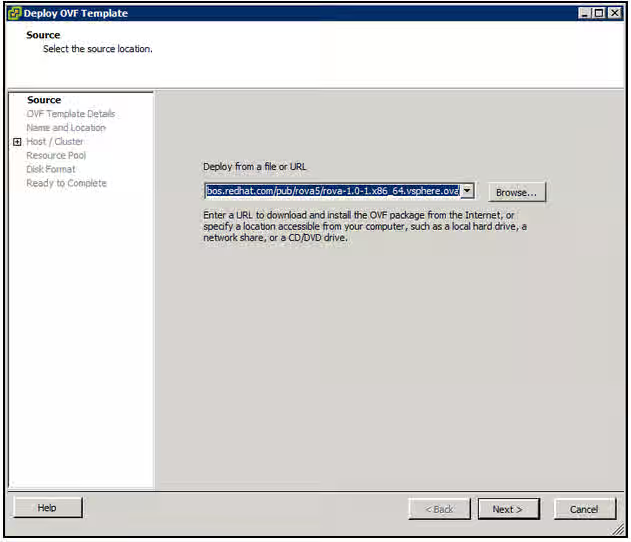
1. Login to the VIC and select File -> Deploy OVF Template.
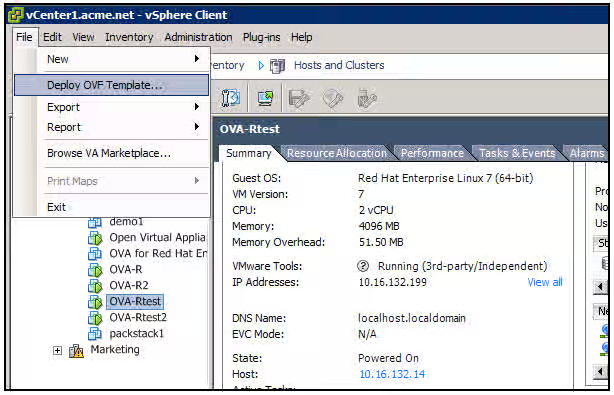
2. Enter the URL of the OVA file in the Deploy from a file or URL text field of the Deploy OVF Template screen.
Note: The URL for the OVA-R OVA file is available in the This content is not included.Red Hat customer portal.
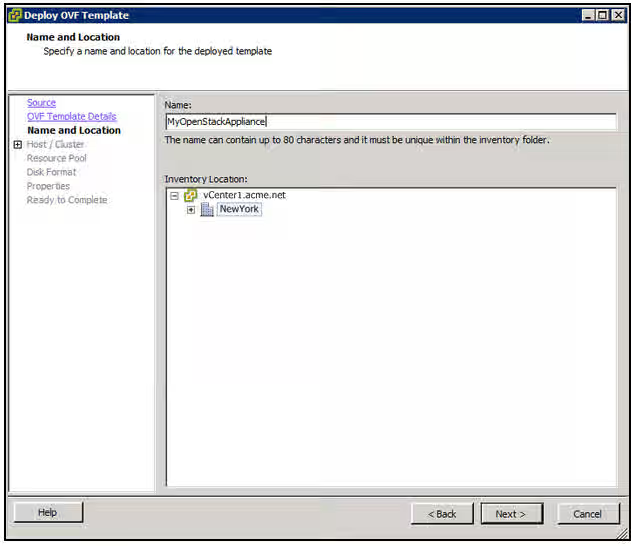
3. In the OVF Template Details screen you can view information about the appliance. Select Next to continue. Within the Name and Location screen enter a unique name for the appliance, and select the destination Datacenter and folder.
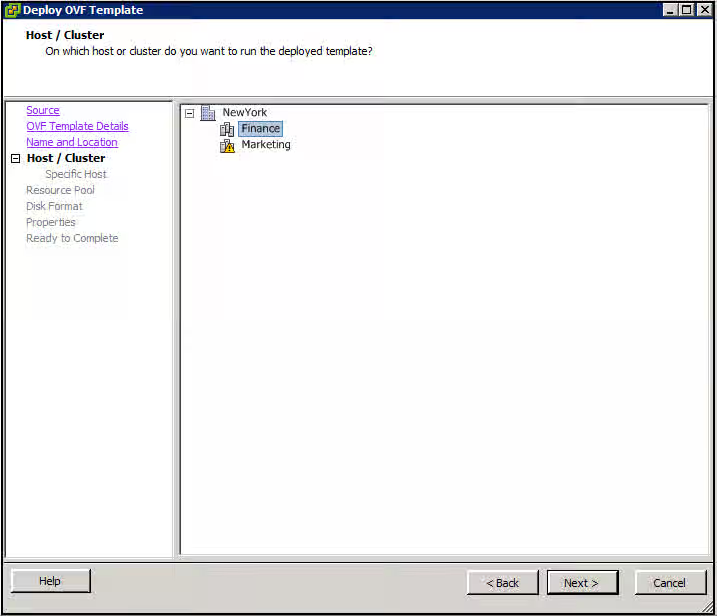
4. In the Host / Cluster screen, select the destination Cluster and/or Host:
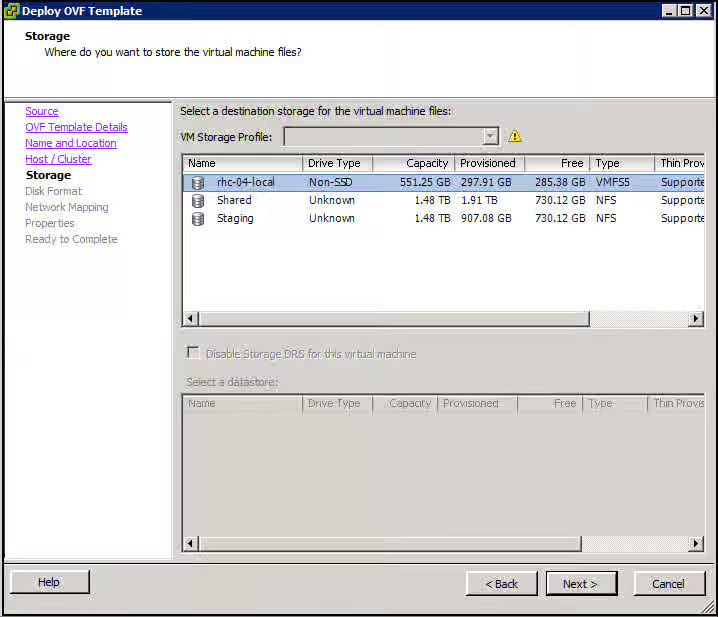
5. In the Storage screen select the storage destination:
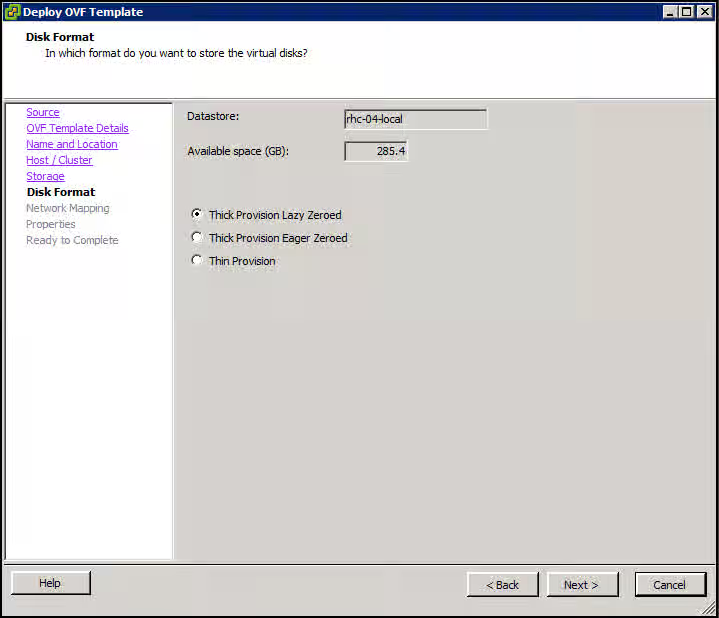
6. In the Disk Format screen select the preferred disk format:
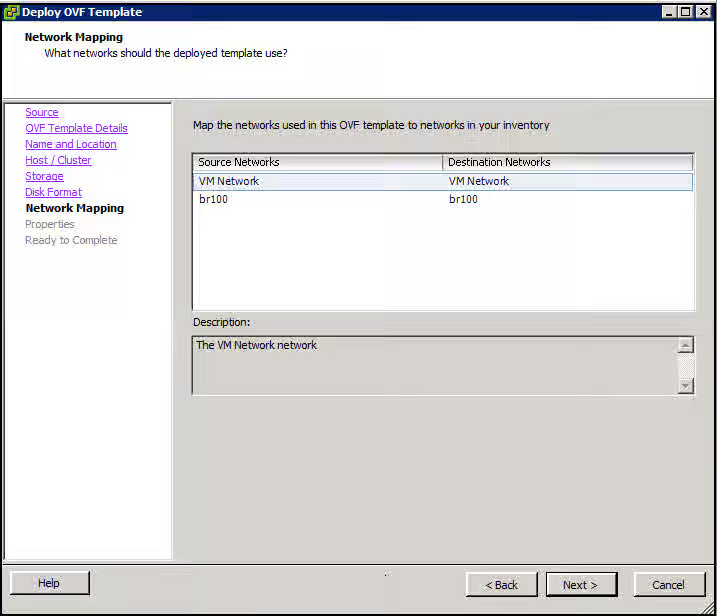
7. In the Network Mapping screen map the Source Networks to the destination networks. Please review the prerequisites section for the networks that are required in order to use the appliance:
8. The Properties screen allows you to set the appropriate options for your environment:
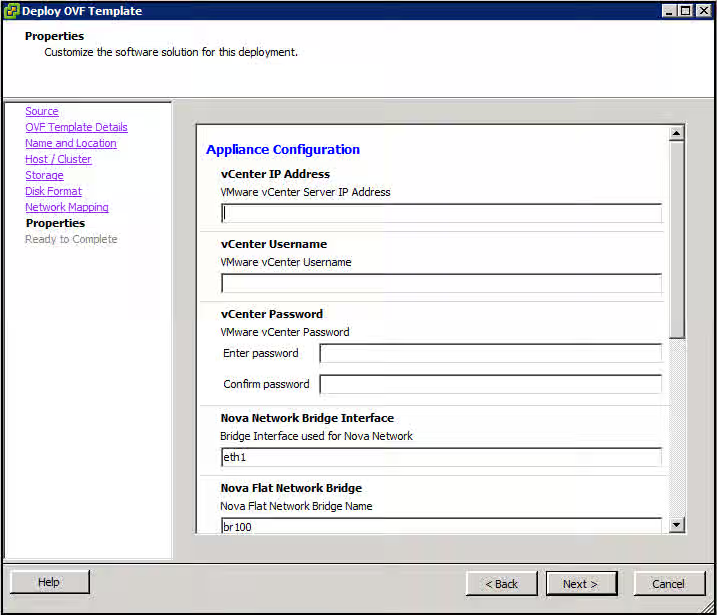
Below is a list of the available properties along with a brief explanation of their behavior. The appliance configuration options can be set now, and can be edited once the appliance is deployed, prior to final configuration.
Note: The examples provided in the textboxes may need to be modified for your environment.
| Field | Value | Example |
|---|---|---|
| vCenter IP Address | IP Address of the vCenter Server | 10.16.132.40 |
| Nova Network Bridge Interface | Interface that will be bridged on the private network. Also Interface that will serve as the flat network interface for nova-network. | eth1 |
| Nova Network Flat Network Bridge | Name for bridge that will be used for nova-network (it will be created on configure). This should match the name of the port group created in vSphere in the prerequisites section | br100 |
| Nova Network Public Interface | Interface that will carry public traffic | eth0 |
| vCenter Username | The username that can be used for the vCenter Server | administrator@vsphere.local |
| vCenter Password | The password associated with the vCenter Configuration Username. Please be sure to double escape passwords with special characters. For example, if a password for vCenter is âaw3!som3â you should enter âaw3\!some3â into this field. This will result in the password being displayed âaw3!someâ in the menu and being passed into configuration files appropriately. | |
| vCenter Cluster | The cluster within vSphere to be used by OpenStack Nova | Marketing |
| vCenter Datacenter | The datacenter within vSphere to be used by OpenStack Nova | NewYork |
| vCenter Datastore | The datastore name within vSphere to be used by OpenStack Cinder and OpenStack Glance | Shared |
| vCenter Datastore Image Directory | The directory name within the vCenter Configuration Datastore to store VMDK images with OpenStack Glance | /openstack_glance |
| Static IP | If checked (true) use the static information provided for networking. If unchecked (false) assumes DHCP will provide relevant network information | True |
| Public Interface IP Address | If Static IP is checked (true) this is the value that will be used as the IP address for the public interface | 10.16.132.99 |
| Public Interface Netmask | If Static IP is checked (true) this is the value that will be used as the netmask for the public interface | 255.255.255.0 |
| Public Interface Gateway | If Static IP is checked (true) this is the value that will be used as the gateway for the public interface | 10.16.132.254 |
| Public Interface DNS | If Static IP is checked (true) this is the value that will be used as the DNS server for the public interface | 10.16.132.10 |
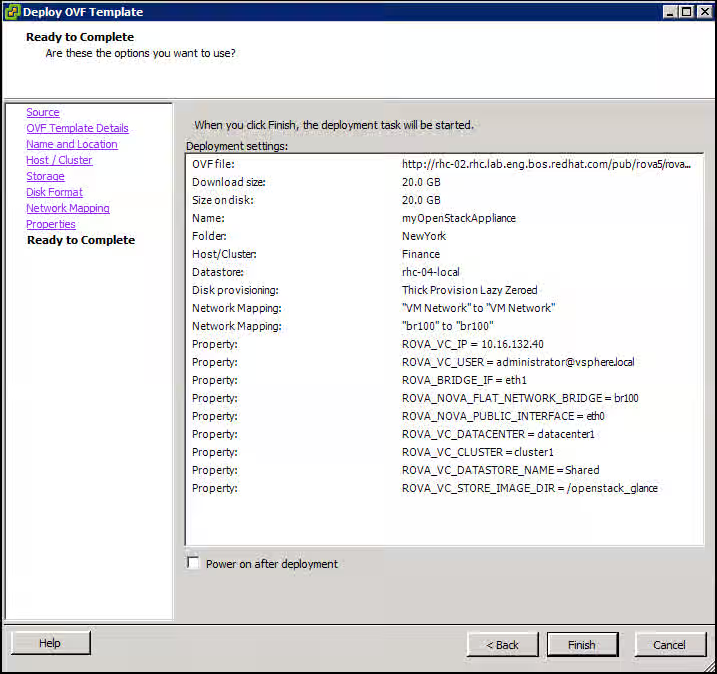
9. Once complete, you can review the appliance options and select Finish to deploy:
Starting and logging in to OVA-R
1. Power on the OVA-R virtual machine using VIC (if you did not select to power on the OVA after deployment).
2. Open the VM console and login with the username root and password redhat.
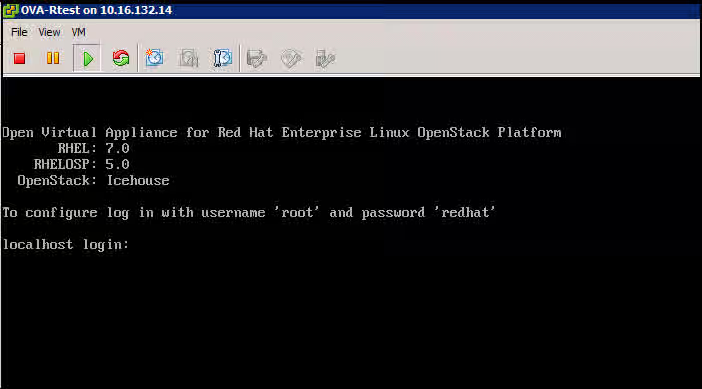
3. Press any key to continue past the warning.
4. The configuration menu displays options specified during the appliance deployment; they can be changed at this point.
Configuring OVA-R
After login you are presented with the OVA-R menu. This menu allows you to configure the OVA-R appliance and finalize the options.
The following options are configurable in the OVA-R menu:
| Option | Field | Value | Example |
|---|---|---|---|
| C | Configure Appliance | Proceed configuring the appliance with the specificed values | N/A |
| I | Print Interface Information | Displays interface details | N/A |
| E | Drop to shell | Exit the menu and go to a shell | N/A |
| 1 | Public Interface Static | Set the static value of Public Interface | N/A |
| 2 | Public Interface IP Address | IP Address of Public Interface | 10.16.132.40 |
| 3 | Public Interface Netmask | Subnet mask of Public Interface | 255.255.255.0 |
| 4 | Public Interface DNS | DNS server | 10.16.132.10 |
| 5 | Public Interface Gateway | Default gateway of the Public Interface | 10.16.132.1 |
| 6 | Public Interface | Interface that will carry public traffic | ens192 |
| 7 | Bridge Interface | Interface that will be bridged on the private network | ens224 |
| 8 | Nova-network Flat Network | Name of bridge that will be used for nova-network (it will be created on configure). This should match the name of the port group created in vSphere in the prerequisites section | br100 |
| 9 | vCenter Configuration - IP Address | The IP Address or hostname or the vCenter Server | 1.2.3.4 |
| 10 | vCenter Configuration - Username | The username that can be used for the vCenter Server | administrator@vsphere.local |
| 11 | vCenter Configuration - Password | The password associated with the vCenter Configuration Username | |
| 12 | vCenter Configuration - Cluster | The cluster within vSphere to be used by OpenStack Nova | Marketing |
| 13 | vCenter Configuration - Datacenter | The datacenter within vSphere to be used by OpenStack Nova | NewYork |
| 14 | vCenter Configuration - Datastore | The datastore name within vSphere to be used by OpenStack Cinder and OpenStack Glance | Shared |
| 15 | vCenter Configuration - Datastore Image Directory | The directory name within the vCenter Configuration Datastore to store VMDK images with OpenStack Glance | /openstack_glance |
Once satisfied with the configuration settings, you can enter C to configure the appliance for use.
Note: If using a Static IP Address for the public interface and connected to the appliance via SSH and not the VM console in VIC the user will be disconnected. You can ssh back to the appliance and view the progress of configuration of the appliance by watching the log file with the tail command:
tail -f /tmp/rova_configure*
Deploy a New Instance
The configuration of the appliance will take several minutes. Once complete, you can access the Dashboard by browsing to Content from public-ip is not included.http://public-ip/dashboard (where PUBLIC-IP is the IP address of the public interface).
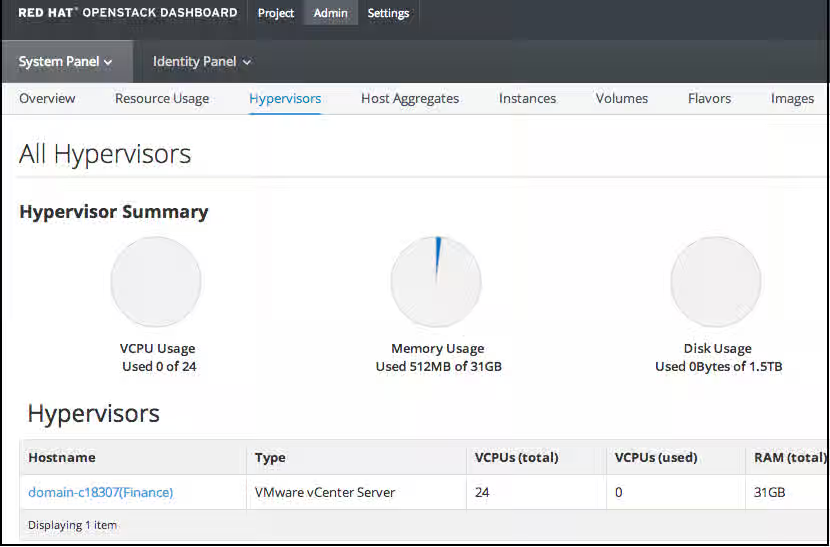
1. Login to the Dashboard with username admin and password redhat. You can view the vCenter resources by selecting Hypervisors from the Admin menu:
2. Launch a new instance by clicking Project and then Instances:

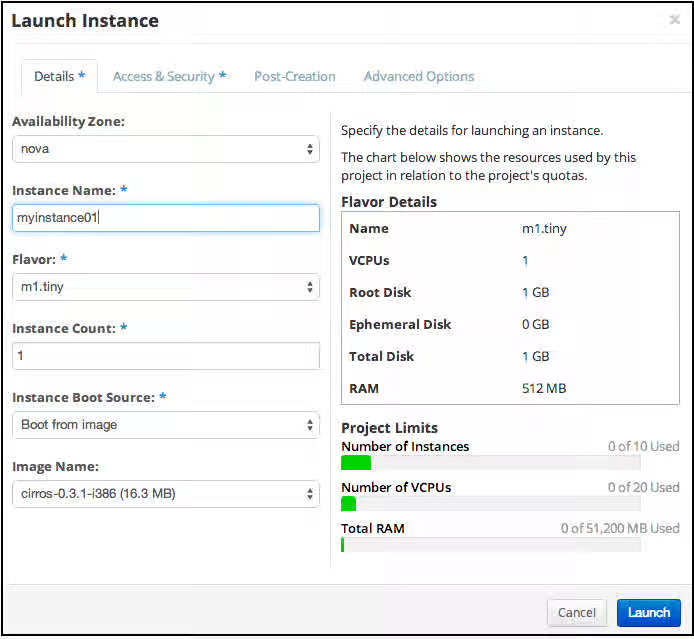
3. Create a new instance by selecting + Launch Instance. Complete the details of the launch instance menu and click Launch:
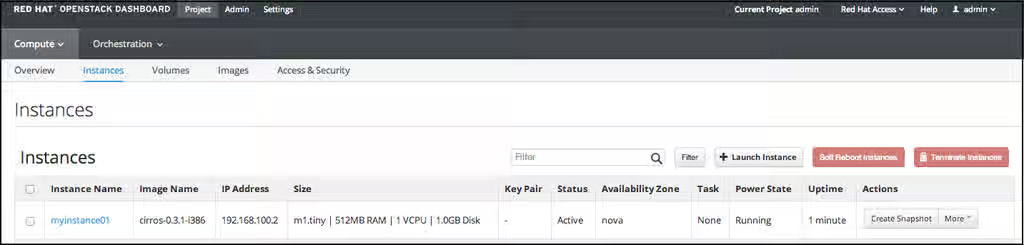
4. Once the build has completed, view the details of the new instance from the Instances screen:
5. View the Recent Tasks in the VMware Virtual Infrastructure Client (VIC) to confirm that Red Hat Enterprise Linux OpenStack Platform is using VMware vSphere resources to host the new instance:

References
[1] [http://docs.openstack.org/trunk/config-reference/content/vmware.html](http://docs.openstack.org/trunk/config-reference/content/vmware.html)