Converting physical machines to KVM virtual machines using virt-p2v in RHEL 7, RHEL 8, and RHEL 9
Red Hat Enterprise Linux 7, Red Hat Enterprise Linux 8, and Red Hat Enterprise Linux 9 support the virt-p2v tool. Using virt-p2v, it is possible to convert a physical machine into a KVM virtual machine (VM) that can be managed for example by libvirt, Red Hat OpenStack Platform, or Red Hat Virtualization (RHV).
This article describes how to perform the conversion.
Important: The virt-p2v tool is currently only supported on the AMD64 and Intel 64 architecture, also known as x86_64. On other architectures, including IBM Z, IBM POWER, and 64-bit ARM, virt-p2v is not available. In addition, Red Hat Enterprise Linux 10 no longer supports virt-p2v.
Note that only selected guest operating systems can be converted using virt-p2v. For a detailed list, see Supported conversions in Converting Virtual Machines from Other Hypervisors to KVM with virt-v2v in RHEL 7, RHEL 8, RHEL 9, and RHEL 10.
Prerequisites
-
Before starting the conversion, prepare a conversion server machine that has an up-to-date version of the virt-v2v package installed, and that can be reached through SSH by the physical machine intended for conversion (hereafter referred to as the p2v system). The VM created from the p2v system will be saved on the target.
-
For the p2v conversion to be supported by Red Hat, the conversion server has to be a Red Hat Enterprise Linux 7, Red Hat Enterprise Linux 8 or Red Hat Enterprise Linux 9 system.
-
Download the RHEL 7.9 virt-p2v tool image from This content is not included.the Customer Portal, and create a bootable medium from the image, such as by burning it to a CD-ROM disk.
Note: The RHEL 7.9 virt-p2v ISO image is supported for previous RHEL 7 minor versions. You can also use the virt-p2v ISO image of RHEL 7 for RHEL 8 and RHEL 9, because it has not been released in RHEL versions 8 and 9.
Procedure
Step 1
Reboot the p2v system, and set it to boot from the prepared p2v medium.
If the virt-p2v boot is successful, the virt-p2v boot screen is displayed:
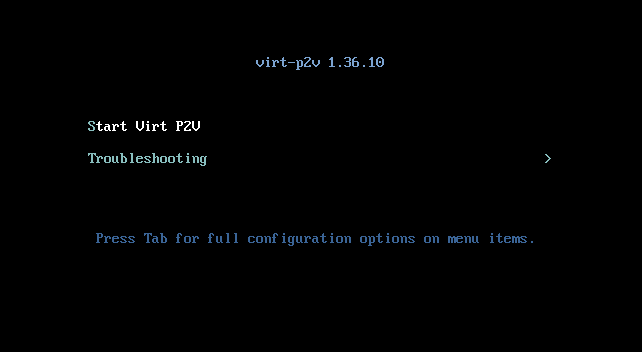
Step 2
Select *Start Virt P2V* and fill in the necessary information in the SSH configuration interface:
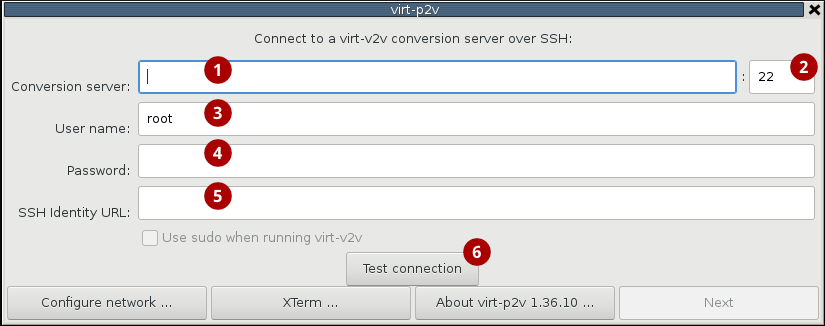
(1): Fill the host name of the conversion server. This can be obtained using the "hostname" command. Alternatively, you can use the IP address of the conversion server.
(2) requires the SSH port number on the conversion server. This is 22 by default, but may be different on your system. To verify this, see the content of the /etc/ssh/sshd_config file on the conversion server.
(3): Select which user will be logged in for the conversion operation logs, and enter their password (4). Non-root users must have sudo privileges on the conversion server, and must check the Use sudo when running virt-v2v check box. In addition, sudo access in the conversion server for non-root users must not require a password.
Note that only the selected user, along with the root user, will be able to access the created VM.
Instead of a password, a path name of a private SSH key file on the conversion server (5) can be used for a more secure way of authentication. For details, see the virt-p2v man page.
Step 3
Test the connection to the conversion server **(6)**. If this succeeds, you can proceed to disk and network configuration:
Step 4
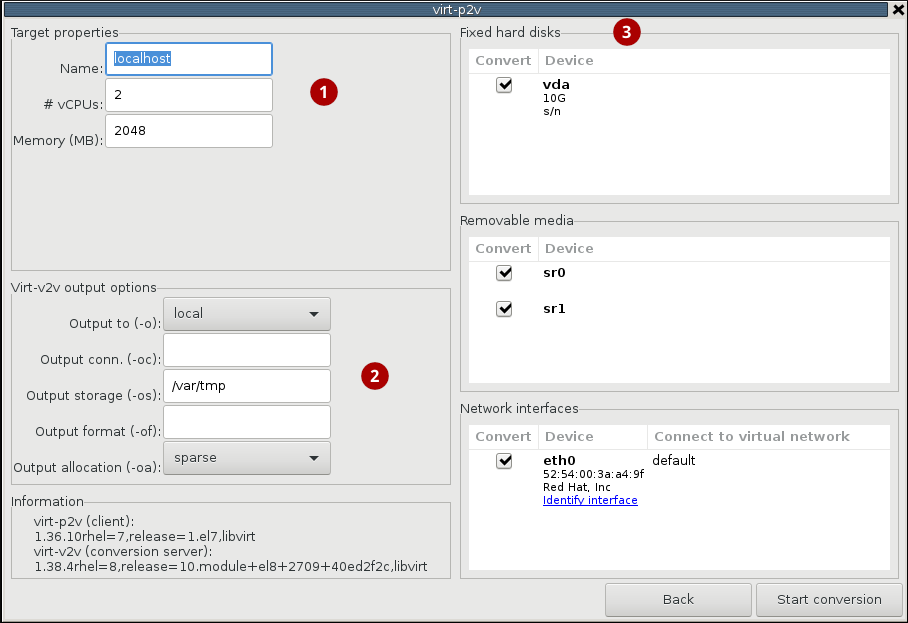
In the disk and network configuration interface, provide the intended parameters for the VM created by the conversion.
You can configure the name, number of virtual CPUs, and memory of the created VM (1), and also modify the location and format in which the VM will be generated (2). To have the VM immediately accessible after conversion, set "Output to (-o): libvirt". For details about the various output options, see the virt-v2v man page.
In addition, you can select which network interfaces, removable media, and storage disks will be converted (3). Note that the disk that contains the OS must always be selected.
Note: You can also configure the p2v conversion using the kernel command instead of the GUI. This can be useful for example when converting many physical machines that are booted using the pre-boot execution environment (PXE). For details about this configuration, see the virt-p2v man page.
Step 5
Click *Start conversion*. This displays the conversion diagnostics interface:
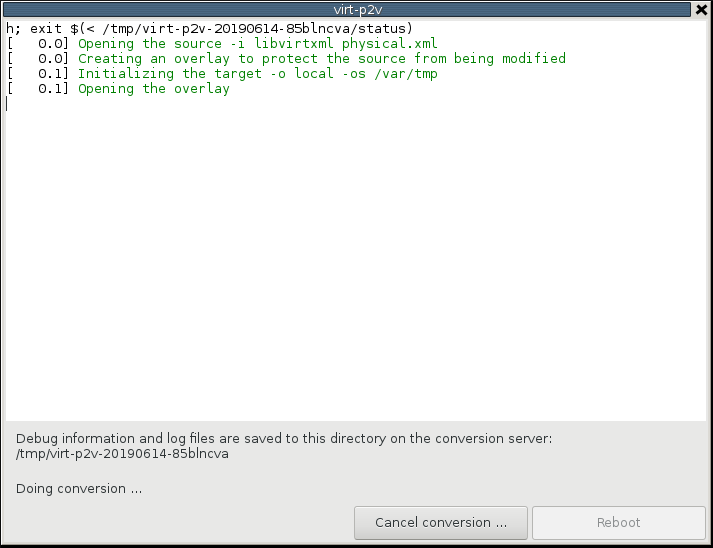
If the conversion succeeds, the virtual machine version of the p2v system is saved on the conversion server in accordance to your output options configuration. For example, if you configured Output to (-o): libvirt, the VM will immediately be available using virsh or virt-manager. If you used the default Output to (-o): local, the VM will be saved in the form of a domain XML file in the Output storage (-os) destination, and needs to be loaded using the "virsh define" command.
Step 6 [Optional]
Modify the network properties and security identifiers (SIDs) of the p2v system or the created VM. It is not recommended to start the physical machine after the conversion finishes, as it can cause network problems due to duplicated settings.