How to use the Red Hat Kickstart Generator to create a Microsoft Azure virtual machine
This article provides the information necessary to build a Kickstart configuration file using the Kickstart Generator application. This configuration file can then be used to automate the creation of Red Hat Enterprise Linux (RHEL) virtual machines (VMs) for Microsoft Azure.
Before You Start
Note the following:
-
This article is intended for those with experience using Kickstart. If you do not have experience using Kickstart, refer to This content is not included.How Do You Perform a Kickstart Installation? for details about Kickstart settings and options.
-
There are different methods that can be used to build and use a Kickstart configuration file to automate a Red Hat Enterprise Linux installation. This article provides one method. If you already have a Kickstart configuration file, you can use the information in this article to identify the required changes so you can use your Kickstart file to create RHEL VMs for Microsoft Azure.
-
To complete the procedures in this article, you need to have existing and unused subscriptions and be enrolled in the This content is not included.Red Hat Cloud Access program. For more information about the Red Hat Cloud Access program, refer to This content is not included.Red Hat Cloud Access and Migrating Your Subscriptions.
Build the Configuration File Using the Red Hat Kickstart Generator
The Red Hat Kickstart Generator is a web-based forms application that steps through building a Kickstart configuration file. Complete the following steps to build the Kickstart configuration file.
-
Launch the This content is not included.Red Hat Kickstart Generator.
-
Select Red Hat Enterprise Linux version 6 or 7 from the drop-down selection box. (Wait to download until all selections are made.)
-
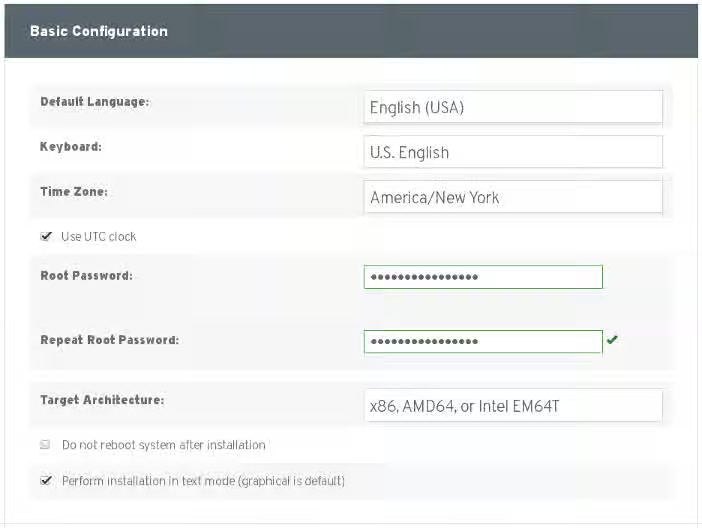
On the Basic Configuration panel:
- Set a root password.
- Check Perform installation in text mode (graphical is default).
-
On the Installation panel, select the location where the installation ISO image is stored and can be accessed from the installation system.
-
On the Partition panel, deselect Use Automatic Partitioning. Once deselected, two other methods for managing partitions appear.
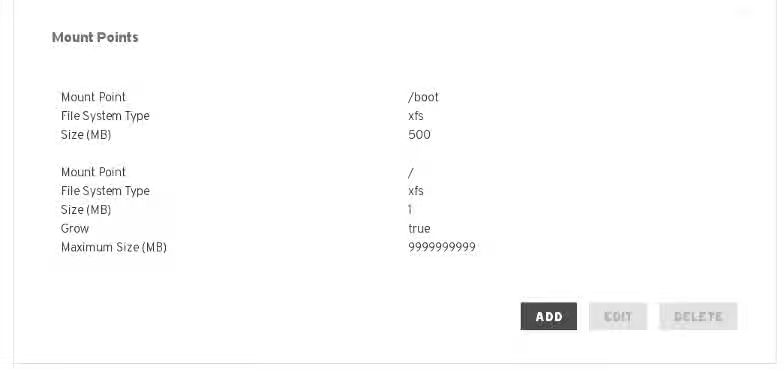
Click Add and create the
/bootmount point. On the Add Mount Point panel, enter the following options (you can disregard the other selections):- Mount Point:
/boot - File System Type: ext3 or ext4 (xfs can be used for RHEL 7.x)
- Size (MB): 500
Click Add and create the
/root mount point. On the panel, enter the following options (you can disregard the other selections):- Mount Point:
/ - File System Type: ext3 or ext4 (xfs can be used for RHEL 7.x)
- Select Grow
- Maximum Size (MB): 9999999999
The result should look like the example below.
- Mount Point:
-
On the BootLoader panel, both boxes should remain deselected. Replace the displayed kernel parameters with the following parameters:
For RHEL 7.x:
earlyprintk=ttys0 console=ttys0 rootdelay=300For RHEL 6.x:
earlyprintk=ttys0 console=ttys0 rootdelay=300 numa=offNote: The
rhgb,quiet, andchrashkernel=autokernel parameters are not supported in Microsoft Azure and should be removed. However, deleting the parameters here does not remove them from the Kickstart installation. These parameters are permanently removed in the post-installation script created in a later step.The result should look like the example below for RHEL 7.x. (For RHEL 6.x, the
numa=offparameter would also be present.)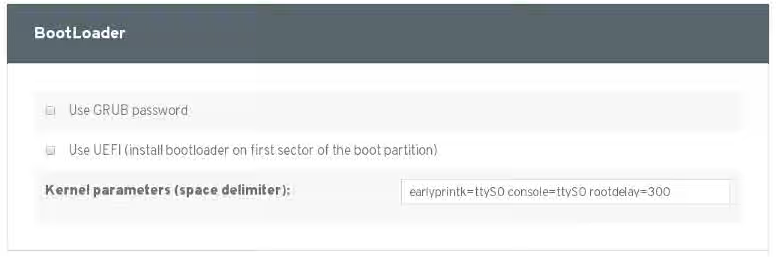
-
On the Packages panel, keep the default selections. Select any additional RHEL packages and options you want installed.
-
On the Authentication panel, keep the default selections. Do not select any additional options.
-
On the Network panel, deselect Use default networking (DHCP). Click Add and add
eth0as the Network Device. Keep DHCP as the Network Type. Leave the remaining configuration fields blank.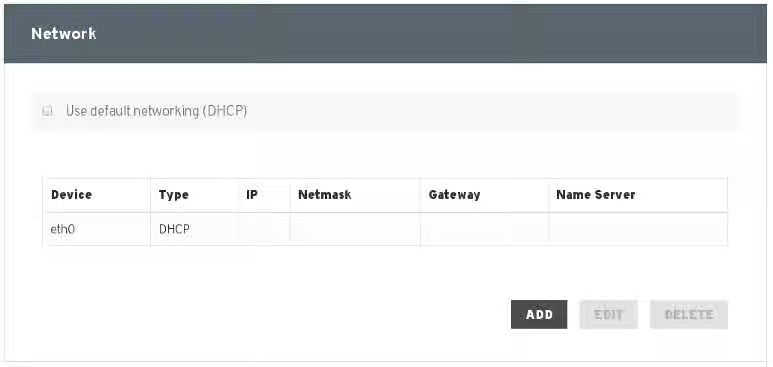
-
On the Security panel, keep the default selections and add the option Allow SSH through the firewall.
-
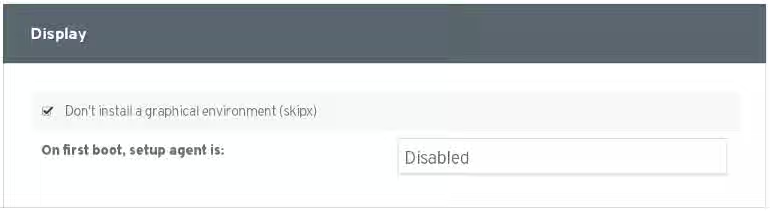
On the Display panel, select Don't install a graphical environment (skipx). Keep the default Disabled selection for the setup agent.
-
Do not define a Pre-Installation Script.
-
Select Define a script to execute after installation (for advanced users). Select Use an interpreter and enter
/bin/bash.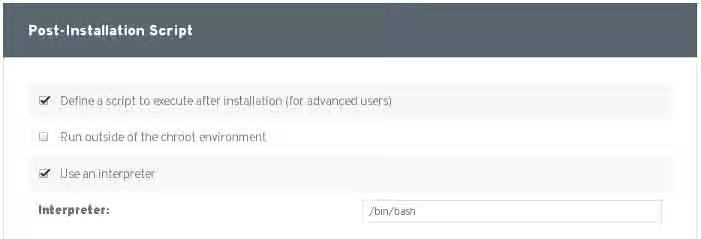
For RHEL 7.x, cut and paste the following script example into the space provided. For RHEL 6.x, skip to the next script example.
RHEL 7.x Post-Installation Script
    # Red Hat Enterprise Linux 7.x Post-Installation Script

    # Add the Hyper-V drivers
    echo "add_drivers+=\" hv_vmbus \" " >> /etc/dracut.conf
    echo "add_drivers+=\" hv_netvsc \" " >> /etc/dracut.conf
    echo "add_drivers+=\" hv_storvsc \" " >> /etc/dracut.conf
    dracut -f -v

    # Stop and remove cloud-init
    systemctl stop cloud-init
    yum remove -y cloud-init

    # Configure network
    cat << EOF > /etc/sysconfig/network-scripts/ifcfg-eth0
    DEVICE="eth0"
    BOOTPROTO="dhcp"
    ONBOOT="yes"
    TYPE="Ethernet"
    USERCTL="no"
    PEERDNS="yes"
    IPV6INIT="no"
    EOF

    # Remove any persistent network device rules
    rm -f /etc/udev/rules.d/70-persistent-net.rules
    rm -f /etc/udev/rules.d/75-persistent-net-generator.rules

    # Set the network service to start automatically
    chkconfig network on

    # Configure sshd
    systemctl enable sshd

    # Enable ssh keepalive
    sed -i 's/^#\(ClientAliveInterval\).*$/\1 180/g' /etc/ssh/sshd_config

    # Remove GRUB parameters: crashkernel=auto, rhgb, quiet
    export grub_cmdline=`grep -n 'GRUB_CMDLINE_LINUX' /etc/default/grub | awk -F ':' '{print $1}'`
    sed -i -e "${grub_cmdline}s:\(crashkernel=auto\|rhgb\|quiet\)::g" -e "${grub_cmdline}s:\" :\":" -e "${grub_cmdline}s: \":\":" -e "${grub_cmdline}s:\s\s\+: :g" /etc/default/grub
    grub2-mkconfig -o /boot/grub2/grub.cfg

    # Register with the Red Hat Subscription Manager
    subscription-manager register --auto-attach --username=USERNAME --password=PLAINTEXTPASSWORD
    pool=`subscription-manager list --available --matches="Red Hat Enterprise Linux Server" | grep '^Pool' | head -n 1 | awk '{print $3}'`
    subscription-manager attach --pool ${pool}

    # Enable the RHEL 7.x extras repo
    subscription-manager repos --enable=rhel-7-server-extras-rpms

    # Install the latest software update
    yum update -y

    # Install the Microsoft Azure Linux Agent
    yum install -y WALinuxAgent

    # Enable the Azure agent at boot-up
    systemctl enable waagent.service

    # Configure swap in WALinuxAgent
    sed -i 's/^\(ResourceDisk\.EnableSwap\)=[Nn]$/\1=y/g' /etc/waagent.conf
    sed -i 's/^\(ResourceDisk\.SwapSizeMB\)=[0-9]*$/\1=2048/g' /etc/waagent.conf
    sed -i 's/^\(Provisioning\.DeleteRootPassword\)=[Yy]$/\1=n/g' /etc/waagent.conf
    sed -i 's/^\(ResourceDisk\.Filesystem\)=.*$/\1=ext4/g' /etc/waagent.conf

    # Unregister with the Red Hat subscription manager
    subscription-manager unregister

    # Disable the root account
    usermod root -p '!!'

    # Deprovision and prepare for Azure
    waagent -force -deprovision
RHEL 6.x Post-Installation Script
# Red Hat Enterprise Linux 6.x Post-Installation Script # Add the Hyper-V drivers echo "add_drivers+=\" hv_vmbus \" " >> /etc/dracut.conf echo "add_drivers+=\" hv_netvsc \" " >> /etc/dracut.conf echo "add_drivers+=\" hv_storvsc \" " >> /etc/dracut.conf dracut -f -v # Stop and remove cloud-init /etc/init.d/cloud-init stop yum remove -y cloud-init # Disable Network Manager (if installed) service NetworkManager stop chkconfig NetworkManager off # Configure network cat << EOF > /etc/sysconfig/network-scripts/ifcfg-eth0 DEVICE="eth0" BOOTPROTO="dhcp" ONBOOT="yes" TYPE="Ethernet" USERCTL="no" PEERDNS="yes" IPV6INIT="no" EOF # Remove any persistent network device rules rm -f /etc/udev/rules.d/70-persistent-net.rules rm -f /etc/udev/rules.d/75-persistent-net-generator.rules # Set the network service to start automatically chkconfig network on # Configure sshd chkconfig sshd on # Enable ssh keepalive sed -i 's/^#\(ClientAliveInterval\).*$/\1 180/g' /etc/ssh/sshd_config # Remove GRUB parameters: crashkernel=auto, rhgb, quiet export grub_kline=`grep -n '^\s*kernel' /boot/grub/grub.conf | awk -F ':' '{print $1}'` sed -i -e "${grub_kline}s:\(crashkernel=auto\|rhgb\|quiet\)::g" -e "${grub_kline}s:\s\s\+: :g" /boot/grub/grub.conf # Register with the Red Hat Subscription Manager subscription-manager register --auto-attach --username=USERNAME --password=PLAINTEXTPASSWORD pool=`subscription-manager list --available --matches="Red Hat Enterprise Linux Server" | grep '^Pool' | head -n 1 | awk '{print $3}'` subscription-manager attach --pool ${pool} # Enable the RHEL 6.x extras repo subscription-manager repos --enable=rhel-6-server-extras-rpms # Install the latest software update yum update -y # Install the Microsoft Azure Linux Agent yum install -y WALinuxAgent # Enable the Azure agent at boot-up chkconfig waagent on # Configure swap in WALinuxAgent sed -i 's/^\(ResourceDisk\.EnableSwap\)=[Nn]$/\1=y/g' /etc/waagent.conf sed -i 's/^\(ResourceDisk\.SwapSizeMB\)=[0-9]*$/\1=2048/g' /etc/waagent.conf sed -i 's/^\(Provisioning\.DeleteRootPassword\)=[Yy]$/\1=n/g' /etc/waagent.conf sed -i 's/^\(ResourceDisk\.Filesystem\)=.*$/\1=ext4/g' /etc/waagent.conf # Unregister with the Red Hat subscription manager subscription-manager unregister # Disable the root account usermod root -p '!!' # Deprovision and prepare for Azure waagent -force -deprovision -
Edit the post-installation script and add Red Hat Subscription Manager login credentials to the section shown below.
# Register with the Red Hat Subscription Manager subscription-manager register --auto-attach --username=USERNAME --password=PLAINTEXTPASSWORD pool=`subscription-manager list --available --matches="Red Hat Enterprise Linux Server" | grep '^Pool' | head -n 1 | awk '{print $3}'` subscription-manager attach --pool ${pool} -
Click Download and save the file. Once the file is downloaded, you can rename it and add the
.cfgextension. You now have a Kickstart configuration file you can use (and reuse) to create one or more Microsoft Azure VMs.
Important: Make sure to secure this file. It contains the credentials for logging into Red Hat Subscription Manager.
Use the Kickstart Configuration File to Create the VM Image
-
Place the Kickstart configuration file in a location that can be accessed from the installation system. If this is a network installation, you can put the Kickstart configuration file in the same location as the ISO image.
-
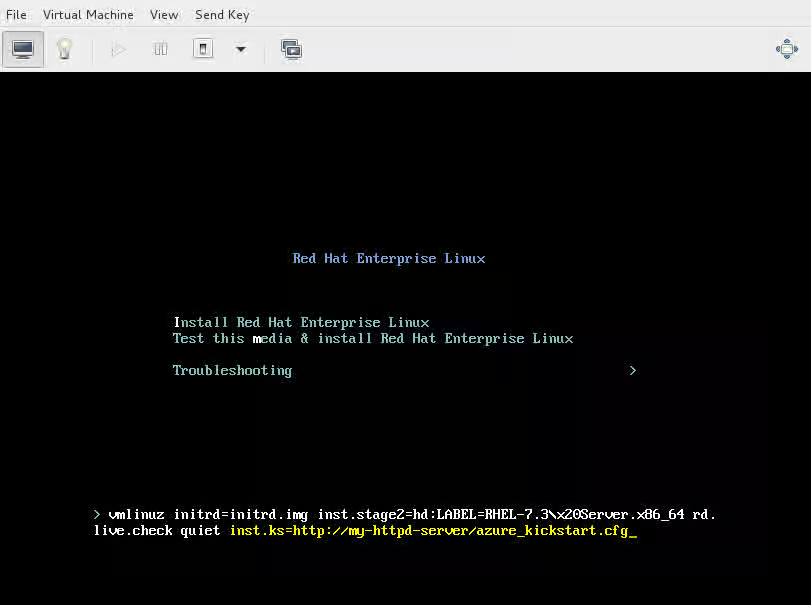
Create a new VM image using
virt-installorvirt-manager(see instructions below). If usingvirt-manager, make sure to interrupt the boot loader using the TAB key and enter the path to the Kickstart configuration file, as shown in the screen capture below.- Refer to the Kickstart section of the This content is not included.virt-install instructions for more information.
- Refer to the virt-manager instructions for more information.
The installation may take several minutes. Once the installation completes, the VM will reboot to a login prompt.
-
Shut down the VM and continue to the following section.
Important: After the installation completes, two files will be located in the /root directory: anaconda-ks.cfg and original-ks.cfg. These two files contain the Red Hat Subscription Manager login credentials used in the kickstart file. The files need to remain secure and can be deleted once the virtual machine is provisioned.
Convert the VM Image to VHD Format for Microsoft Azure
All Microsoft Azure VM images must be in VHD format. See Configure and Convert the Image to convert the image to the VHD format for Microsoft Azure. Once the image is converted to VHD, you can use the procedures in the linked article to provision the VM in Microsoft Azure.