Installing and Configuring a Red Hat Enterprise Linux 7.4 (and later) High-Availability Cluster on Amazon Web Services
Before you start
-
You must be enrolled in the This content is not included.Red Hat Cloud Access program and have unused Red Hat Enterprise Linux (RHEL) subscriptions. The attached subscription must include access to the following repositories for each Amazon Web Services (AWS) Elastic Cloud Compute (EC2) instance.
- Red Hat Enterprise Linux 7 Server (RPMS): rhel-7-server-rpms/7Server/x86_64
- Red Hat Enterprise Linux High Availability (for RHEL 7 Server) (RPMS): rhel-ha-for-rhel-7-server-rpms/7Server/x86_64
Note: One unused subscription migrated to AWS can be used for two RHEL EC2 instances. If you have two unused subscriptions, you can create four EC2 instances, and so on.
-
For concepts, references, and additional information about RHEL High Availability (HA), see the following Red Hat documents.
Set up the AWS environment
Complete the following activities using the procedures in Content from docs.aws.amazon.com is not included.Setting Up with Amazon EC2.
-
Content from docs.aws.amazon.com is not included.Sign up for AWS.
-
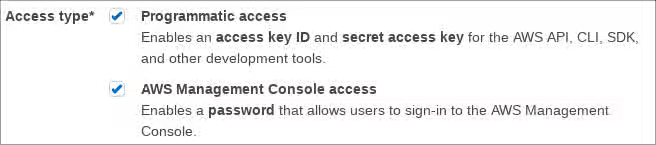
Content from docs.aws.amazon.com is not included.Create an IAM User.
Important: An IAM user must have Programmatic and AWS Management Console access to complete these procedures.
-
Content from docs.aws.amazon.com is not included.Create a Key Pair.
-
Content from docs.aws.amazon.com is not included.Create a Virtual Private Cloud (VPC).
-
Content from docs.aws.amazon.com is not included.Create a Security Group. Refer to the following information for inbound and outbound rules.
- Inbound:
- Open SSH TCP Port 22 from a trusted source IP or IP range. You may have the option to select My IP from the Source drop-down menu, or you can use Content from checkip.amazonaws.com is not included.AWS Check IP to get your public IP address.
- Allow all traffic between nodes in the cluster. For Source, enter the primary CIDR block for your VPC.
- Outbound: All traffic open.

- Inbound:
Create the RHEL HA EC2 instances (cluster nodes)
Complete the following steps to create the RHEL HA cluster nodes.
-
Launch the Content from console.aws.amazon.com is not included.AWS Console.
-
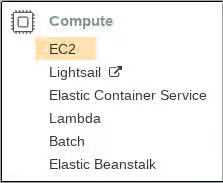
Select EC2 in the Compute category.
-
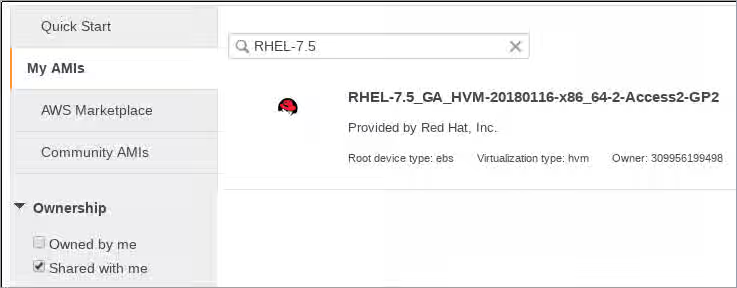
Click Launch Instance and select My AMIs.
-
Check the Shared with Me box. These images are Red Hat gold images made available through the Red Hat Cloud Access program.
-
Select the latest RHEL 7.4 (or later) image.
-
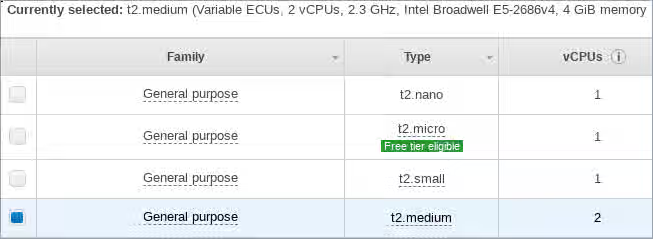
Choose an Instance Type that meets the requirements for your HA application. The recommended capacity for a basic RHEL instance is General purpose, t2.medium. Depending on your HA application, each instance may need to have higher capacity. See Content from aws.amazon.com is not included.Amazon EC2 Pricing for additional details.
-
Click Next: Configure Instance Details.
-
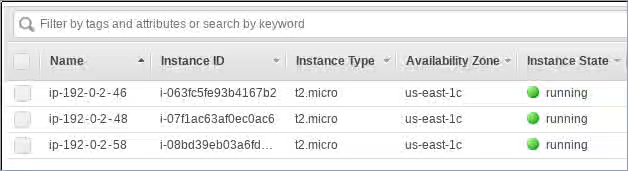
Enter the Number of instances you want to create for the cluster. In the example shown below, three cluster nodes are created. Do not launch into an Auto Scaling Group.

-
For Network, select the VPC you created in Set up the AWS environment. Select the subnet for the instance.
-
Select Enable for Auto-assign Public IP.
These are the minimum selections you need to make for Configure Instance Details. Depending on your specific RHEL HA application, you may need to make additional selections.
-
Click Next: Add Storage. Verify that the default storage is sufficient. You do not need to modify these settings unless your HA application requires other storage options.
-
Click Next: Add Tags. Add a label for the instances. This can be anything that is simple and easy to identify later. Make sure to adhere to AWS tagging guidelines. See Content from docs.aws.amazon.com is not included.Tag Restrictions.
-
Click Next: Configure Security Group. Select the existing security group you created in Set up the AWS environment.
-
Click Review and Launch. Review your selections and make any necessary changes.
-
Click Launch. You will be prompted to select an existing key pair or create a new key pair. Select your existing key pair created in Set up the AWS environment.
-
Click Launch Instances.
-
Click View Instances. Select each instance and add the RHEL host name for each instance. The RHEL host name is the Private DNS shown in the instance description.
Configure the private key
The private ssh key file (.pem) downloaded from AWS is not ready to be used immediately. You need to complete a few configuration tasks before it can be used in an SSH session.
-
Move the key file from the
Downloadsdirectory to yourHomedirectory or to your~/.sshdirectory. -
Change the permissions of the key file so that only the root user can read it.
# chmod 400 <KeyName>.pem
Create an AWS access key and secret access key
The fencing and resource agent APIs use the AWS access key and secret access key to connect to each node in the cluster.
Important: Your IAM user account must have Programmatic access to create the AWS Access Key and Secret Access Key. If you are in the Administrator group for your AWS account, you are already authorized to create these keys. See Set up the AWS Environment.
Complete the following steps to create these keys.
-
Launch the Content from console.aws.amazon.com is not included.AWS Console.
-
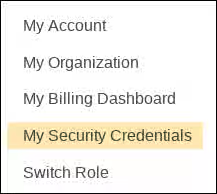
Click on your AWS Account ID to display the drop-down menu. Select My Security Credentials.
-
Click Users.
-
Select the user and open the Summary screen.
-
Click the Security credentials tab.
-
Click Create access key.
-
Download the .csv file (or otherwise save both keys). You need to enter these keys when creating the fencing device.
Connect to an instance (node)
Complete the following steps on all nodes.
-
Launch the Content from console.aws.amazon.com is not included.AWS Console and select the EC2 instance.
-
Click Connect and select A standalone SSH client.
-
From your terminal SSH session, connect to the instance using the AWS example provided in the pop-up window. Add the correct path to your
<KeyName>.pemfile if the path is not shown in the example.
Install the Red Hat high availability packages and agents
Complete the following steps on all nodes.
-
Remove the AWS Red Hat Update Infrastructure (RHUI) client. Because you are going to use a Red Hat Cloud Access subscription, you should not use AWS RHUI in addition to your subscription.
$ sudo -i
# yum -y remove rh-amazon-rhui-client*
-
Register the VM with Red Hat.
# subscription-manager register --auto-attachNote: If
--auto-attachfails, manually register the VM to your subscription. Enable a pool ID that contains the RHEL 7 Server and RHEL 7 Server HA repositories.
-
Disable all unnecessary repositories.
# subscription-manager repos --disable=*
-
Enable the RHEL 7 Server and RHEL 7 Server HA repositories.
# subscription-manager repos --enable=rhel-7-server-rpms
# subscription-manager repos --enable=rhel-ha-for-rhel-7-server-rpms
-
Update the RHEL AWS instance.
# yum update -y
-
Install the Red Hat High Availability Add-On software packages, along with all available fencing agents from the High Availability channel.
# yum install pcs pacemaker fence-agents-aws
-
The user hacluster was created in the previous step. Create a password for hacluster on all cluster nodes. Use the same password for all nodes.
Note: You must run all pcs commands as the root user.
# passwd hacluster
-
If
firewalld.serviceis installed, add the high availability service.# firewall-cmd --permanent --add-service=high-availability # firewall-cmd --reload
-
Start the pcs service and enable it to start on boot.
# systemctl start pcsd.service
# systemctl enable pcsd.service
Created symlink from /etc/systemd/system/multi-user.target.wants/pcsd.service to /usr/lib/systemd/system/pcsd.service.
-
Make sure the pcs service is running.
    # systemctl status pcsd.service
    ● pcsd.service - PCS GUI and remote configuration interface
      Loaded: loaded (/usr/lib/systemd/system/pcsd.service; enabled; vendor preset: disabled)
      Active: active (running) since Thu 2018-03-01 14:53:28 UTC; 28min ago
        Docs: man:pcsd(8)
              man:pcs(8)
    Main PID: 5437 (pcsd)
      CGroup: /system.slice/pcsd.service
           └─5437 /usr/bin/ruby /usr/lib/pcsd/pcsd > /dev/null &

    Mar 01 14:53:27 ip-10-0-0-48.ec2.internal systemd[1]: Starting PCS GUI and remote configuration interface...
    Mar 01 14:53:28 ip-10-0-0-48.ec2.internal systemd[1]: Started PCS GUI and remote configuration interface.
-
Edit
/etc/hostsand add RHEL host names and internal IP addresses. See How should the /etc/hosts file be set up on RHEL cluster nodes? for details.
Create the cluster
Complete the following steps to create the cluster of nodes.
1. On one of the nodes, enter the following command to authenticate the pcs user hacluster. Use the host name for each node in the cluster in the command.
```
# pcs cluster auth <hostname1> <hostname2> <hostname3>
Username: hacluster
Password:
<hostname1>: Authorized
<hostname2>: Authorized
<hostname3>: Authorized
```


Example:

```
[root@ip-10-0-0-48 ~]# pcs cluster auth ip-10-0-0-48 ip-10-0-0-58 ip-10-0-0-46
Username: hacluster
Password:
ip-10-0-0-48: Authorized
ip-10-0-0-58: Authorized
ip-10-0-0-46: Authorized
```

<br>
2. Create the cluster.
```
# pcs cluster setup --name <cluster-name> <hostname1> <hostname2> <hostname3>
```


Example:

```
    [root@ip-10-0-0-48 ~]# pcs cluster setup --name newcluster ip-10-0-0-48 ip-10-0-0-58 ip-10-0-0-46

    ... omitted

    Synchronizing pcsd certificates on nodes ip-10-0-0-48, ip-10-0-0-58, ip-10-0-0-46...
    ip-10-0-0-48: Success
    ip-10-0-0-58: Success
    ip-10-0-0-46: Success
    Restarting pcsd on the nodes in order to reload the certificates...
    ip-10-0-0-48: Success
    ip-10-0-0-58: Success
    ip-10-0-0-46: Success
```

<br>
3. Increase corosync token timeout
For AWS, it is recommended to follow https://access.redhat.com/solutions/221263 and increase corosync’s token timeout to 30000.
4. Enable and start the cluster.
Example:

```
[root@ip-10-0-0-48 ~]# pcs cluster enable --all
ip-10-0-0-46: Cluster Enabled
ip-10-0-0-48: Cluster Enabled
ip-10-0-0-58: Cluster Enabled
```


```
[root@ip-10-0-0-48 ~]# pcs cluster start --all
ip-10-0-0-46: Starting Cluster...
ip-10-0-0-48: Starting Cluster...
ip-10-0-0-58: Starting Cluster...
```

<br>
Configure fencing
Complete the following steps to configure fencing.
-
Enter the following AWS metadata query to get the Instance ID for each node. You need these IDs to configure the fence device.
# echo $(curl -s http://169.254.169.254/latest/meta-data/instance-id)Note: The AWS Metadata Service uses IP address 169.254.169.254. There are additional AWS metadata queries that you can run to gather information about an instance. See Content from docs.aws.amazon.com is not included.Instance Metadata and User Data for additional information.
Example:
[root@ip-10-0-0-48 ~]# echo $(curl -s http://169.254.169.254/latest/meta-data/instance-id)
i-07f1ac63af0ec0ac6
-
Use the following command to configure the fence device. Use
pcmk_host_mapto map the RHEL host name to the Instance ID. You need the Access Key and Secret Access Key you set up in Create an AWS Access Key and Secret Access Key.# pcs stonith create <name> fence_aws access_key=<access-key> secret_key=<secret-access-key> region=<region> pcmk_host_map="rhel-hostname-1:Instance-ID-1;rhel-hostname-2:Instance-ID-2;rhel-hostname-3:Instance-ID-3" power_timeout=240 pcmk_reboot_timeout=600 pcmk_reboot_retries=4 pcmk_delay_max=45 op start timeout=600 op stop timeout=600 op monitor interval=180Example:
[root@ip-10-0-0-48 ~]# pcs stonith create clusterfence fence_aws access_key=AKIAI*******6MRMJA secret_key=a75EYIG4RVL3h*******K7koQ8dzaDyn5yoIZ/ region=us-east-1 pcmk_host_map="ip-10-0-0-48:i-07f1ac63af0ec0ac6;ip-10-0-0-46:i-063fc5fe93b4167b2;ip-10-0-0-58:i-08bd39eb03a6fd2c7" power_timeout=240 pcmk_reboot_timeout=480 pcmk_reboot_retries=4This enables basic three-node fencing for your cluster. The timeout options ensure that the fencing agent does not timeout before a cluster node can reboot.
-
Test the fencing agent for one of the other nodes.
Note: The command response may take several minutes to display. If you watch the active terminal session for the node being fenced, you see that the terminal connection is immediately terminated after you enter the fence command.
# pcs stonith fence <hostname>Example:
    [root@ip-10-0-0-48 ~]# pcs stonith fence ip-10-0-0-58

    Node: ip-10-0-0-58 fenced
-
Check the status to verify that the node is fenced.
# pcs statusExample:
    [root@ip-10-0-0-48 ~]# pcs status
    Cluster name: newcluster
    Stack: corosync
    Current DC: ip-10-0-0-46 (version 1.1.18-11.el7-2b07d5c5a9) - partition with quorum
    Last updated: Fri Mar  2 19:55:41 2018
    Last change: Fri Mar  2 19:24:59 2018 by root via cibadmin on ip-10-0-0-46

    3 nodes configured
    1 resource configured

    Online: [ ip-10-0-0-46 ip-10-0-0-48 ]
    OFFLINE: [ ip-10-0-0-58 ]

    Full list of resources:

      clusterfence	(stonith:fence_aws):	Started ip-10-0-0-46

    Daemon Status:
      corosync: active/disabled
      pacemaker: active/disabled
      pcsd: active/enabled
-
Start the node that was fenced in the previous step.
# pcs cluster start <hostname>Note: Use
pcs cluster start --allif necessary.
-
Check the status to verify the node started.
# pcs statusExample:
    [root@ip-10-0-0-48 ~]# pcs status
    Cluster name: newcluster
    Stack: corosync
    Current DC: ip-10-0-0-46 (version 1.1.18-11.el7-2b07d5c5a9) - partition with quorum
    Last updated: Fri Mar  2 20:01:31 2018
    Last change: Fri Mar  2 19:24:59 2018 by root via cibadmin on ip-10-0-0-48

    3 nodes configured
    1 resource configured

    Online: [ ip-10-0-0-46 ip-10-0-0-48 ip-10-0-0-58 ]

    Full list of resources:

      clusterfence	(stonith:fence_aws):	Started ip-10-0-0-46

    Daemon Status:
      corosync: active/disabled
      pacemaker: active/disabled
      pcsd: active/enabled
-
To ensure immediate and complete fencing, disable ACPI Soft-Off on all cluster nodes. For information about disabling ACPI Soft-Off, see Configuring ACPI For Use with Integrated Fence Devices.
Install the AWS CLI
To configure AWS network resource agents, you must first install the AWS command-line interface (CLI). You can install the latest version by following the instructions provided by AWS. See Content from docs.aws.amazon.com is not included.Installing or updating the latest version of the AWS CLI.
Then follow the Content from docs.aws.amazon.com is not included.Quick setup instructions to configure the AWS CLI. For more details or more advanced configuration, refer to Content from docs.aws.amazon.com is not included.Configuring the AWS CLI.
Important: Install and configure the AWS CLI on all nodes.
Then run the following command each node to verify that the AWS CLI is configured properly. The instance IDs and instance names should display, as shown in the example output below.
[root@ip-10-0-0-48 ~]# aws ec2 describe-instances --output text --query 'Reservations[*].Instances[*].[InstanceId,Tags[?Key==`Name`].Value]'
i-07f1ac63af0ec0ac6
ip-10-0-0-48
i-063fc5fe93b4167b2
ip-10-0-0-46
i-08bd39eb03a6fd2c7
ip-10-0-0-58
Install AWS network resource agents
For high availability operations to work, the cluster uses AWS networking resource agents to enable failover functionality. If a node does not respond to a heartbeat check in a set time, the node is fenced and operations fail over to an additional node in the cluster. Network resource agents need to be configured for this to work.
We will be adding the 2 resources to the same group in order to enforce order and colocation constraints.
Create a secondary Private IP resource and Virtual IP resource
Complete the following procedure to add a secondary private IP address and create a virtual IP. You can complete this procedure from any node in the cluster.
-
Enter the following command to view the AWS Secondary Private IP Address resource agent (awsvip) description. This shows the options and default operations for this agent.
# pcs resource describe awsvip
-
Create the Secondary Private IP address using an unused private IP address in the VPC CIDR block.
Note: You also create a pcs resource group with this command. This ensures that the grouped resources start in the correct order and on the same node.
# pcs resource create privip awsvip secondary_private_ip=<Unused-IP-Address> --group <group-name>Example:
[root@ip-10-0-0-48 ~]# pcs resource create privip awsvip secondary_private_ip=10.0.0.68 --group networking-group
Assumed agent name 'ocf:heartbeat:awsvip' (deduced from 'awsvip')
-
Create a virtual IP resource. This is a VPC IP address that can be rapidly remapped from the fenced node to the failover node, masking the failure of the fenced node within the subnet.
# pcs resource create vip IPaddr2 ip=<secondary-private-IP> --group <group-name>Example:
root@ip-10-0-0-48 ~]# pcs resource create vip IPaddr2 ip=10.0.0.68 --group networking-group
Assumed agent name 'ocf:heartbeat:IPaddr2' (deduced from 'IPaddr2')
-
Enter the
pcs statuscommand to verify that the resources are running.# pcs statusExample:
    [root@ip-10-0-0-48 ~]# pcs status
    Cluster name: newcluster
    Stack: corosync
    Current DC: ip-10-0-0-46 (version 1.1.18-11.el7-2b07d5c5a9) - partition with quorum
    Last updated: Fri Mar  2 22:34:24 2018
    Last change: Fri Mar  2 22:14:58 2018 by root via cibadmin on ip-10-0-0-46

    3 nodes configured
    3 resources configured

    Online: [ ip-10-0-0-46 ip-10-0-0-48 ip-10-0-0-58 ]

    Full list of resources:

    clusterfence	(stonith:fence_aws):	Started ip-10-0-0-46
     Resource Group: networking-group
         privip	(ocf::heartbeat:awsvip):	Started ip-10-0-0-48
         vip	(ocf::heartbeat:IPaddr2):	Started ip-10-0-0-58

    Daemon Status:
      corosync: active/disabled
      pacemaker: active/disabled
      pcsd: active/enabled
Create an elastic IP address
An elastic IP address is a public IP address that can be rapidly remapped from the fenced node to the failover node, masking the failure of the fenced node. Note that this is different from the virtual IP resource created earlier, in that the elastic IP address is used for public-facing Internet connections instead of subnet connections.
We will be adding the 2 resources to the same group that was previously created in order to enforce order and colocation constraints.
-
Enter the following AWS CLI command to create an elastic IP address.
[root@ip-10-0-0-48 ~]# aws ec2 allocate-address --domain vpc --output text
eipalloc-4c4a2c45	vpc	35.169.153.122
-
Enter the following command to view the AWS Secondary Elastic IP Address resource agent (awseip) description. This shows the options and default operations for this agent.
# pcs resource describe awseip
-
Create the Secondary Elastic IP address resource using the allocated IP address created in Step 1.
# pcs resource create elastic awseip elastic_ip=<Elastic-IP-Address> allocation_id=<Elastic-IP-Association-ID> --group networking-groupExample:
# pcs resource create elastic awseip elastic_ip=35.169.153.122 allocation_id=eipalloc-4c4a2c45 --group networking-group
-
Enter the
pcs statuscommand to verify that the resource is running.# pcs statusExample:
    [root@ip-10-0-0-58 ~]# pcs status
    Cluster name: newcluster
    Stack: corosync
    Current DC: ip-10-0-0-58 (version 1.1.18-11.el7-2b07d5c5a9) - partition with quorum
    Last updated: Mon Mar  5 16:27:55 2018
    Last change: Mon Mar  5 15:57:51 2018 by root via cibadmin on ip-10-0-0-46

    3 nodes configured
    4 resources configured

    Online: [ ip-10-0-0-46 ip-10-0-0-48 ip-10-0-0-58 ]

    Full list of resources:

     clusterfence	(stonith:fence_aws):    Started ip-10-0-0-46
     Resource Group: networking-group
         privip	(ocf::heartbeat:awsvip):  Started ip-10-0-0-48
         vip	(ocf::heartbeat:IPaddr2):    Started ip-10-0-0-48
         elastic (ocf::heartbeat:awseip):    Started ip-10-0-0-48

    Daemon Status:
      corosync: active/disabled
      pacemaker: active/disabled
      pcsd: active/enabled
Test the elastic IP address
Verify the virtual IP (awsvip) and elastic IP (awseip) resources are working.
-
Launch an SSH session from your local workstation to the elastic IP address previously created.
$ ssh -l ec2-user -i ~/.ssh/<KeyName>.pem <elastic-IP>Example:
$ ssh -l ec2-user -i ~/.ssh/cluster-admin.pem 35.169.153.122
-
Verify that the host you connected to via SSH is the host associated with the
elasticresource created. Using the previous examples, the connected host would beip-10-0-0-48as shown using thepcs statuscommand.
Additional information
For concepts, references, and additional information about RHEL High Availability, see the following Red Hat documents.
- High Availability Add-On Overview
- High Availability Add-On Administration
- High Availability Add-On Reference
If you add an additional node, you need to update the agent. For example, if you add a fourth node, update the fencing agent using the following command.
# pcs stonith update pcmk_host_map="rhel-hostname-1:Instance-ID-1;rhel-hostname-2:Instance-ID-2;rhel-hostname-3:Instance-ID-3:rhel-hostname-4:Instance-ID-4"
Use the following commands to view the help and the additional options you can set for the Azure fencing agent.
# pcs stonith describe fence_aws
# fence_aws -h