Manage Red Hat Quay
Preface
After you deploy a Red Hat Quay registry, you can configure advanced settings, secure logs, mirror images, authenticate users, and manage geo-replication and quotas.
The following topics are covered in this section:
- Advanced Red Hat Quay configuration
- Programmatic OAuth token provisioning
- Setting notifications to alert you of a new Red Hat Quay release
- Securing connections with SSL/TLS certificates
- Directing action logs storage to Elasticsearch
- Configuring image security scanning with Clair
- Scan pod images with the Container Security Operator
- Integrate Red Hat Quay into OpenShift Container Platform with the Quay Bridge Operator
- Mirroring images with repository mirroring
- Authenticating users with LDAP and OIDC, including Microsoft Entra ID v2 tokens
- Enabling Quay for Prometheus and Grafana metrics
- Setting up geo-replication
- Troubleshooting Red Hat Quay
Chapter 1. Advanced Red Hat Quay configuration
After you deploy Red Hat Quay, you can change advanced settings by editing the config.yaml file or by using the API. You can use these methods to tune the registry and enable features beyond the initial deployment.
-
Editing the
config.yamlfile. Theconfig.yamlfile contains most configuration information for the Red Hat Quay cluster. Editing theconfig.yamlfile directly is the primary method for advanced tuning and enabling specific features. - Using the Red Hat Quay API. Some Red Hat Quay features can be configured through the API.
Additional resources
1.1. Obtaining configuration information for Red Hat Quay on OpenShift Container Platform
To obtain configuration information for your Red Hat Quay deployment and troubleshoot issues, you can use oc exec, oc cp, or oc rsync for Operator deployments, or podmobtaining-configuration-information-quay-standalonean cp or podman exec for standalone deployments. You can then update your config.yaml file, search the Red Hat Knowledgebase, or file a support ticket.
Procedure
To obtain configuration information on Red Hat Quay Operator deployments, you can use
oc exec,oc cp, oroc rsync.To use the
oc execcommand, enter the following command:$ oc exec -it <quay_pod_name> -- cat /conf/stack/config.yaml
This command returns your
config.yamlfile directly to your terminal.To use the
oc copycommand, enter the following commands:$ oc cp <quay_pod_name>:/conf/stack/config.yaml /tmp/config.yaml
To display this information in your terminal, enter the following command:
$ cat /tmp/config.yaml
To use the
oc rsynccommand, enter the following commands:oc rsync <quay_pod_name>:/conf/stack/ /tmp/local_directory/
To display this information in your terminal, enter the following command:
$ cat /tmp/local_directory/config.yaml
Example output
DISTRIBUTED_STORAGE_CONFIG:
local_us:
- RHOCSStorage
- access_key: redacted
  bucket_name: lht-quay-datastore-68fff7b8-1b5e-46aa-8110-c4b7ead781f5
  hostname: s3.openshift-storage.svc.cluster.local
  is_secure: true
  port: 443
  secret_key: redacted
  storage_path: /datastorage/registry
DISTRIBUTED_STORAGE_DEFAULT_LOCATIONS:
- local_us
DISTRIBUTED_STORAGE_PREFERENCE:
- local_us
1.2. Obtaining configuration information for Red Hat Quay
To obtain configuration information for your Red Hat Quay deployment and troubleshoot issues, you can use podman cp or podman exec for standalone deployments. You can then update your config.yaml file, search the Red Hat Knowledgebase, or file a support ticket.
Procedure
To obtain configuration information on standalone Red Hat Quay deployments, you can use
podman cporpodman exec.To use the
podman copycommand, enter the following commands:$ podman cp <quay_container_id>:/conf/stack/config.yaml /tmp/local_directory/
To display this information in your terminal, enter the following command:
$ cat /tmp/local_directory/config.yaml
To use
podman exec, enter the following commands:$ podman exec -it <quay_container_id> cat /conf/stack/config.yaml
Example output
BROWSER_API_CALLS_XHR_ONLY: false
ALLOWED_OCI_ARTIFACT_TYPES:
    application/vnd.oci.image.config.v1+json:
        - application/vnd.oci.image.layer.v1.tar+zstd
    application/vnd.sylabs.sif.config.v1+json:
        - application/vnd.sylabs.sif.layer.v1+tar
AUTHENTICATION_TYPE: Database
AVATAR_KIND: local
BUILDLOGS_REDIS:
    host: quay-server.example.com
    password: strongpassword
    port: 6379
DATABASE_SECRET_KEY: 05ee6382-24a6-43c0-b30f-849c8a0f7260
DB_CONNECTION_ARGS: {}
---
Chapter 2. Programmatic OAuth token provisioning
To create and manage organization application tokens without the UI, you can use programmatic OAuth token provisioning through the REST API. You can also enable a Tech Preview bootstrap token for zero-touch automation.
Organization OAuth applications previously required administrators to create API tokens in the Red Hat Quay UI. With programmatic token provisioning, automation tools can manage the token life cycle.
When FEATURE_PROGRAMMATIC_BOOTSTRAP is enabled, Red Hat Quay also creates a high-privilege bootstrap OAuth token on startup and writes it to a local file or Kubernetes Secret. Use the bootstrap token to create organizations, applications, and narrower-scoped tokens without interactive UI access.
Programmatic bootstrap token provisioning is a Tech Preview feature in Red Hat Quay 3.18. Tech Preview features are not supported with Red Hat production service-level agreements (SLAs) and might not be functionally complete. Red Hat does not recommend using Tech Preview features in production environments. These features provide early access to upcoming product features, enabling customers to test functionality and provide feedback during the development process.
Additional resources
2.1. Programmatic bootstrap configuration fields
Use these configuration fields to control bootstrap OAuth token provisioning for automated Red Hat Quay deployments. The feature remains disabled until you enable it. Standalone deployments store the token in a local file. Red Hat Quay on OpenShift Container Platform Operator deployments store the token in a Kubernetes Secret that the Operator creates and mounts.
Table 2.1. Programmatic bootstrap fields
| Field | Type | Description |
|---|---|---|
| FEATURE_PROGRAMMATIC_BOOTSTRAP | Boolean |
Enables programmatic bootstrap token provisioning. When
Default: |
| BOOTSTRAP_TOKEN_OWNER | String |
Username that owns the bootstrap OAuth application and token. Required when |
| BOOTSTRAP_TOKEN_PATH | String |
Filesystem path where the bootstrap token JSON is written on standalone and virtual machine deployments. In containerized deployments, use a mounted path that the Red Hat Quay process can write, for example
Default: |
| BOOTSTRAP_TOKEN_EXPIRATION | Integer | Bootstrap token lifetime in seconds.
Default: |
| BOOTSTRAP_TOKEN_SCOPE | String | Space-separated OAuth scopes assigned to the bootstrap token.
Default: |
| PROGRAMMATIC_TOKEN_K8S_SECRET | String |
Kubernetes Secret name used to store the bootstrap token when Red Hat Quay runs in Kubernetes. When set, Red Hat Quay writes the token to this Secret instead of |
| PROGRAMMATIC_TOKEN_K8S_KEY | String |
Secret data key that stores the bootstrap token JSON. On Red Hat Quay on OpenShift Container Platform, the Operator sets this field to
Default: |
| PROGRAMMATIC_TOKEN_K8S_NAMESPACE | String |
Kubernetes namespace that contains the bootstrap token Secret. When unset, Red Hat Quay uses the pod service account namespace. On Red Hat Quay on OpenShift Container Platform, the Operator uses the |
| PROGRAMMATIC_TOKEN_PATH | String |
Operator-rendered mount path for configuration compatibility. On Red Hat Quay on OpenShift Container Platform, the Operator sets this field to |
Programmatic bootstrap example YAML (standalone)
FEATURE_PROGRAMMATIC_BOOTSTRAP: true
SUPER_USERS:
  - quayadmin
BOOTSTRAP_TOKEN_OWNER: quayadmin
BOOTSTRAP_TOKEN_PATH: /var/lib/quay/quay-machine-token.json
BOOTSTRAP_TOKEN_EXPIRATION: 7776000
BOOTSTRAP_TOKEN_SCOPE: "org:admin repo:admin repo:create repo:read repo:write super:user user:admin user:read"
Programmatic bootstrap example YAML (Red Hat Quay on OpenShift Container Platform configBundleSecret)
FEATURE_PROGRAMMATIC_BOOTSTRAP: true
SUPER_USERS:
  - quayadmin
BOOTSTRAP_TOKEN_OWNER: quayadmin
BOOTSTRAP_TOKEN_EXPIRATION: 7776000
BOOTSTRAP_TOKEN_SCOPE: "org:admin repo:admin repo:create repo:read repo:write super:user user:admin user:read"
For Operator deployments, omit BOOTSTRAP_TOKEN_PATH and the PROGRAMMATIC_TOKEN_K8S_* fields from the configBundleSecret. The Operator injects PROGRAMMATIC_TOKEN_K8S_SECRET, PROGRAMMATIC_TOKEN_K8S_KEY, and PROGRAMMATIC_TOKEN_PATH, and creates the <quayregistry_name>-bootstrap-token Secret, Role, and RoleBinding automatically.
Always quote BOOTSTRAP_TOKEN_SCOPE. Unquoted values that contain : can be misparsed by YAML.
The bootstrap token is a high-privilege credential. Use it only to provision organizations, applications, and narrower-scoped OAuth tokens for automation. Do not use the bootstrap token for routine API operations.
For regulated environments, set BOOTSTRAP_TOKEN_EXPIRATION according to your token rotation policy and renew the token by using POST /api/v1/bootstrap/renew.
2.2. Configuring programmatic bootstrap on standalone deployments
To configure filesystem-based bootstrap OAuth token provisioning in a standalone Red Hat Quay deployment, you can set FEATURE_PROGRAMMATIC_BOOTSTRAP and related fields in the config.yaml file, then restart the registry.
Prerequisites
- You have a standalone Red Hat Quay deployment with at least one superuser account created.
-
You can modify the Red Hat Quay
config.yamlfile.
Procedure
Set the following fields in your Red Hat Quay
config.yamlfile:FEATURE_PROGRAMMATIC_BOOTSTRAP: true SUPER_USERS: - quayadmin BOOTSTRAP_TOKEN_OWNER: quayadmin BOOTSTRAP_TOKEN_EXPIRATION: 7776000 BOOTSTRAP_TOKEN_SCOPE: "org:admin repo:admin repo:create repo:read repo:write super:user user:admin user:read" BOOTSTRAP_TOKEN_PATH: /datastorage/bootstrap-token.json
Set
BOOTSTRAP_TOKEN_PATHto a directory that the Red Hat Quay process can write. In containerized standalone deployments, use a mounted storage path such as/datastorage/bootstrap-token.json. Quote theBOOTSTRAP_TOKEN_SCOPEvalue so YAML does not misparse scopes that contain:.Restart Red Hat Quay after you update the configuration.
NoteIf you enable
FEATURE_PROGRAMMATIC_BOOTSTRAPon a deployment that is already running, you must restart Red Hat Quay so the bootstrap token is provisioned and thePOST /api/v1/bootstrap/renewendpoint is registered. A full restart is required; reloading configuration without restarting does not register the bootstrap API endpoints.Verify bootstrap provisioning:
-
Check Red Hat Quay startup logs for a
Bootstrap token provisionedmessage. Confirm that the bootstrap token file exists at the configured storage location. For example:
$ ls -l <BOOTSTRAP_TOKEN_PATH>
-
Check Red Hat Quay startup logs for a
2.3. Configuring programmatic bootstrap on OpenShift Container Platform
To enable filesystem-independent bootstrap OAuth token provisioning for Red Hat Quay on OpenShift Container Platform, you can add the programmatic bootstrap fields to the configBundleSecret resource. The Red Hat Quay Operator creates the bootstrap token Secret, Role, and RoleBinding, injects the Kubernetes storage fields, and restarts the Quay pods.
Programmatic bootstrap token provisioning is a Tech Preview feature in Red Hat Quay 3.18. Tech Preview features are not supported with Red Hat production service-level agreements (SLAs) and might not be functionally complete. Red Hat does not recommend using Tech Preview features in production environments. These features provide early access to upcoming product features, enabling customers to test functionality and provide feedback during the development process.
Prerequisites
- You have deployed a Red Hat Quay registry on OpenShift Container Platform by using the Red Hat Quay Operator.
- You have created at least one superuser account. For more information, see Creating the first user.
-
You can edit the
configBundleSecretresource that is referenced by yourQuayRegistrycustom resource (CR).
Procedure
Retrieve the name of the
configBundleSecretresource:$ oc get quayregistry <quayregistry_name> -n <quay_namespace> \ -o jsonpath='{.spec.configBundleSecret}{"\n"}'Example output
example-registry-config-bundle-abc12
Export the current
config.yamlfile from the secret:$ oc get secret -n <quay_namespace> <config_bundle_secret_name> \ -o jsonpath='{.data.config\.yaml}' | base64 -d > config.yamlEdit
config.yamland add the programmatic bootstrap fields. For example:FEATURE_PROGRAMMATIC_BOOTSTRAP: true SUPER_USERS: - quayadmin BOOTSTRAP_TOKEN_OWNER: quayadmin BOOTSTRAP_TOKEN_EXPIRATION: 7776000 BOOTSTRAP_TOKEN_SCOPE: "org:admin repo:admin repo:create repo:read repo:write super:user user:admin user:read"
Important-
BOOTSTRAP_TOKEN_OWNERmust be an existing superuser that is also listed underSUPER_USERS. -
Quote the
BOOTSTRAP_TOKEN_SCOPEvalue. Unquoted scope strings that contain:can be misparsed by YAML. -
Do not set
BOOTSTRAP_TOKEN_PATHfor Operator deployments. The Operator stores the token in a Kubernetes Secret. -
You do not need to set
PROGRAMMATIC_TOKEN_K8S_SECRET,PROGRAMMATIC_TOKEN_K8S_KEY, orPROGRAMMATIC_TOKEN_K8S_NAMESPACE. The Operator injects those values and creates the Secret named<quayregistry_name>-bootstrap-token.
-
Create a new config bundle secret that includes the updated
config.yamlfile:$ oc create secret generic <new_config_bundle_secret_name> \ --from-file=config.yaml=./config.yaml \ -n <quay_namespace>
Update the
QuayRegistryCR to reference the new secret:$ oc patch quayregistry <quayregistry_name> -n <quay_namespace> \ --type=merge -p '{"spec":{"configBundleSecret":"<new_config_bundle_secret_name>"}}'The Operator reconciles the change, creates the
<quayregistry_name>-bootstrap-tokenSecret with accompanying Role and RoleBinding resources, mounts the Secret into the Quay application pods, and restarts Quay-related pods.Wait for the Quay application pods to become ready:
$ oc get pods -n <quay_namespace> -l quay-component=quay-app
Verify that the Operator created the bootstrap token Secret:
$ oc get secret <quayregistry_name>-bootstrap-token -n <quay_namespace>
Read the bootstrap token from the Secret:
$ BOOTSTRAP_TOKEN=$(oc get secret <quayregistry_name>-bootstrap-token -n <quay_namespace> \ -o jsonpath='{.data.token\.json}' | base64 -d | jq -r '.access_token')NoteSecret propagation can take up to 60 seconds after the Quay pods start. If
token.jsonis missing, wait and retry the command.Optional. Confirm that Quay startup logs include a bootstrap provisioning message:
$ oc logs -n <quay_namespace> deploy/<quayregistry_name>-quay-app -c quay-app \
  | grep -i 'bootstrap token'
2.4. Reading the bootstrap token
To obtain the bootstrap OAuth token after Red Hat Quay starts with programmatic bootstrap enabled, you can read the token from the configured local file or Kubernetes Secret.
Procedure
For standalone or virtual machine deployments, read the token from the
BOOTSTRAP_TOKEN_PATHfile:$ BOOTSTRAP_TOKEN=$(jq -r '.access_token' /var/lib/quay/quay-machine-token.json)
NoteRed Hat Quay writes the bootstrap token file with
0600permissions owned by the Red Hat Quay process user. If you cannot read the file from the host, read it from inside the Red Hat Quay container instead. For example:$ BOOTSTRAP_TOKEN=$(docker exec quay cat /datastorage/bootstrap-token.json | jq -r '.access_token')
For Red Hat Quay on OpenShift Container Platform Operator deployments, read the token from the Operator-managed Secret. The Secret name is
<quayregistry_name>-bootstrap-token:$ BOOTSTRAP_TOKEN=$(oc get secret <quayregistry_name>-bootstrap-token -n <quay_namespace> \ -o jsonpath='{.data.token\.json}' | base64 -d | jq -r '.access_token')Example
$ BOOTSTRAP_TOKEN=$(oc get secret example-registry-bootstrap-token -n quay-operator \ -o jsonpath='{.data.token\.json}' | base64 -d | jq -r '.access_token')NoteSecret propagation can take up to 60 seconds after renewal or initial provisioning. If the
token.jsonkey is missing, wait for the Quay application pods to finish starting and retry the command.
2.5. Using the bootstrap token for zero-touch deployment
To provision Red Hat Quay resources without using the UI, you can use the bootstrap OAuth token as Bearer authentication for organization, application, and token API calls.
Procedure
Export the bootstrap token. For example:
$ export BOOTSTRAP_TOKEN=<bootstrap_token_value>
Create an organization:
$ curl -H "Authorization: Bearer $BOOTSTRAP_TOKEN" -X POST \ -H "Content-Type: application/json" \ -d '{"name": "myorg", "email": "admin@example.com"}' \ https://<quay-server.example.com>/api/v1/organization/Create an OAuth application in the organization:
$ curl -H "Authorization: Bearer $BOOTSTRAP_TOKEN" -X POST \ -H "Content-Type: application/json" \ -d '{"name": "ci-automation", "description": "CI/CD token source"}' \ https://<quay-server.example.com>/api/v1/organization/myorg/applicationsCreate a scoped OAuth API token for the application:
$ curl -H "Authorization: Bearer $BOOTSTRAP_TOKEN" -X POST \ -H "Content-Type: application/json" \ -d '{"name": "ci-job-token", "scope": "repo:read repo:write", "expiration": 2592000}' \ https://<quay-server.example.com>/api/v1/organization/myorg/applications/<client_id>/tokens-
Store the
tokenvalue from the response for your automation workflow. The token secret is returned only in the create response.
2.6. Managing OAuth application tokens by using the API
To manage organization application OAuth tokens without using the UI, you can list, create, and revoke tokens through the Red Hat Quay REST API when your token has org:admin scope.
The bootstrap token includes org:admin by default. Scoped tokens that you create for automation must also include org:admin to list, create, or revoke application tokens through these endpoints.
Procedure
List existing tokens for an application:
$ curl -H "Authorization: Bearer <access_token>" -X GET \
  https://<quay-server.example.com>/api/v1/organization/myorg/applications/<client_id>/tokens
Create a token with a custom expiration and scope:
$ curl -H "Authorization: Bearer <access_token>" -X POST \ -H "Content-Type: application/json" \ -d '{"name": "short-lived-token", "scope": "repo:read", "expiration": 3600}' \ https://<quay-server.example.com>/api/v1/organization/myorg/applications/<client_id>/tokensRevoke a token by UUID:
$ curl -H "Authorization: Bearer <access_token>" -X DELETE \
  https://<quay-server.example.com>/api/v1/organization/myorg/applications/<client_id>/tokens/<token_uuid>
2.7. Renewing the bootstrap token
To keep automation running when the bootstrap OAuth token approaches expiry, you can renew it through the Red Hat Quay REST API before the previous token is invalidated.
Procedure
Renew the token by using the bootstrap token as Bearer authentication:
$ curl -H "Authorization: Bearer $BOOTSTRAP_TOKEN" -X POST \
  https://<quay-server.example.com>/api/v1/bootstrap/renew
The following example shows a successful response:
{"status": "rotated"}Read the new token value from
BOOTSTRAP_TOKEN_PATHor the configured Kubernetes Secret. The previous bootstrap token is invalidated immediately.NoteIf the bootstrap token is already expired, renewal is accepted only from localhost. On Kubernetes and OpenShift Container Platform, use port forwarding to send the renewal request through the local ingress path.
2.8. Revoking the bootstrap token
You can revoke the Red Hat Quay bootstrap OAuth token by disabling FEATURE_PROGRAMMATIC_BOOTSTRAP and restarting the registry. Red Hat Quay does not provide a separate API endpoint for instant revocation.
To revoke the bootstrap token, set FEATURE_PROGRAMMATIC_BOOTSTRAP: false and restart Red Hat Quay. Red Hat Quay deletes bootstrap-managed applications and tokens during startup.
2.9. Security considerations for programmatic bootstrap
Apply these practices when you use the Red Hat Quay bootstrap OAuth token so that automation remains limited to provisioning and uses narrower-scoped tokens for day-to-day work.
- Use the bootstrap token only for initial provisioning and token minting. Create narrower-scoped OAuth tokens for CI/CD and day-2 automation.
-
Set
BOOTSTRAP_TOKEN_EXPIRATIONaccording to your security policy. The default is 60 minutes. -
On standalone deployments, the bootstrap token file is written with
0600permissions. Restrict access to the directory that contains the token file. - On Kubernetes and OpenShift Container Platform, store the bootstrap token in a dedicated Secret with scoped RBAC.
-
Schedule bootstrap token renewal by using
POST /api/v1/bootstrap/renewbefore expiry. - Monitor Red Hat Quay action logs for bootstrap and OAuth token life cycle events.
2.10. Troubleshooting programmatic bootstrap
Use these checks when programmatic bootstrap token provisioning fails in Red Hat Quay, including missing token files, authorization errors, and renewal failures.
If the token file or Secret is empty after startup:
-
Verify that
FEATURE_PROGRAMMATIC_BOOTSTRAPistrue. -
Verify that
BOOTSTRAP_TOKEN_OWNERis set and listed inSUPER_USERS. - Verify that the bootstrap token owner exists in the Red Hat Quay database.
- Check Red Hat Quay startup logs for bootstrap provisioning errors.
-
If the bootstrap token file or Secret is still missing after the first restart, restart Red Hat Quay again or run
python3 /quay-registry/boot.pyinside the Red Hat Quay container after confirmingBOOTSTRAP_TOKEN_OWNERexists in the database. -
On Red Hat Quay on OpenShift Container Platform, confirm that the Operator created the
<quayregistry_name>-bootstrap-tokenSecret, Role, and RoleBinding, and that Quay application pods have rolled out with the updatedconfigBundleSecret. An empty Secret before the pods restart is expected; the Quay process writestoken.jsonafter startup. -
Confirm that
BOOTSTRAP_TOKEN_SCOPEis a quoted YAML string. Unquoted scope values that contain:can be misparsed.
If you receive 403 Forbidden when using the bootstrap token:
- Confirm that the token has not expired.
- Confirm that bootstrap provisioning was not disabled and the token revoked.
- Confirm that the target API endpoint is authorized by the bootstrap token scope.
If renewal returns 401 Unauthorized:
- If the token is expired, send the renewal request from localhost or through a port-forwarded local ingress path.
- Confirm that you are passing the bootstrap token value, not a different OAuth token.
If rate limiting returns 429 Too Many Requests:
-
Bootstrap and token management endpoints are subject to existing rate limiting when
FEATURE_RATE_LIMITSis enabled. Adjust request frequency or review your rate limit configuration.
Chapter 3. Getting Red Hat Quay release notifications
To keep up with the latest Red Hat Quay releases and other changes related to Red Hat Quay, you can sign up for update notifications on the Red Hat Customer Portal.
Procedure
- Log into the Red Hat Customer Portal with your Red Hat customer account credentials.
-
Select your user name (upper-right corner) to see Red Hat Account and Customer Portal selections:
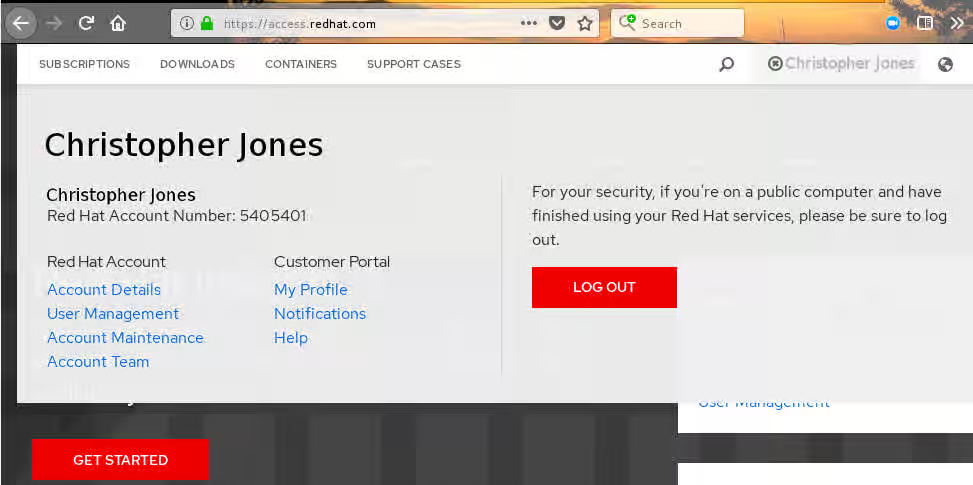
- Select Notifications. Your profile activity page appears.
- Select the Notifications tab.
- Select Manage Notifications.
- Select Follow, then choose Products from the drop-down box.
-
From the drop-down box next to the Products, search for and select Red Hat Quay:
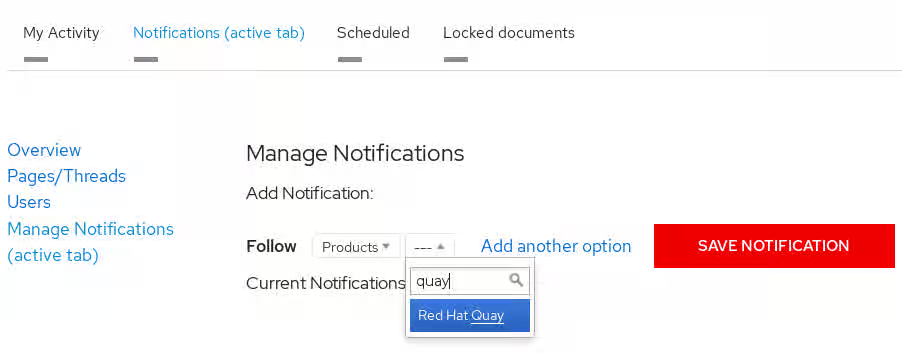
- Select the SAVE NOTIFICATION button. Going forward, you will receive notifications when there are changes to the Red Hat Quay product, such as a new release.
Chapter 4. Configuring action log storage for Elasticsearch and Splunk
By default, usage logs are stored in the Red Hat Quay database and exposed through the web UI on organization and repository levels.
Appropriate administrative privileges are required to see log entries. For deployments with a large amount of logged operations, you can store the usage logs in Elasticsearch and Splunk instead of the Red Hat Quay database backend.
4.1. Configuring action log storage for Elasticsearch
To store Red Hat Quay action logs in Elasticsearch, you can update the LOGS_MODEL settings in your config.yaml file and restart the registry. Usage logs remain available in the web UI for repositories and organizations.
To configure action log storage for Elasticsearch, you must provide your own Elasticsearch stack; Red Hat Quay does not include Elasticsearch as a customizable component.
Procedure
- Obtain an Elasticsearch account.
Update your Red Hat Quay
config.yamlfile to include the following information:# ... LOGS_MODEL: elasticsearch LOGS_MODEL_CONFIG: producer: elasticsearch elasticsearch_config: host: http://<host.elasticsearch.example>:<port> port: 9200 access_key: <access_key> secret_key: <secret_key> use_ssl: True index_prefix: <logentry> aws_region: <us-east-1> # ...where:
LOGS_MODEL- Specifies the method for handling log data.
LOGS_MODEL_CONFIG.producer- Specifies either Elasticsearch or Kinesis to direct logs to an intermediate Kinesis stream on AWS. You need to configure your own pipeline to send logs from Kinesis to Elasticsearch, for example, Logstash.
LOGS_MODEL_CONFIG.elasticsearch_config.host- Specifies the hostname or IP address of the system providing the Elasticsearch service.
LOGS_MODEL_CONFIG.elasticsearch_config.port-
Specifies the port number providing the Elasticsearch service on the host you just entered. Note that the port must be accessible from all systems running the Red Hat Quay registry. The default is TCP port
9200. LOGS_MODEL_CONFIG.elasticsearch_config.access_key- Specifies the access key needed to gain access to the Elasticsearch service, if required.
LOGS_MODEL_CONFIG.elasticsearch_config.secret_key- Specifies the secret key needed to gain access to the Elasticsearch service, if required.
LOGS_MODEL_CONFIG.elasticsearch_config.use_ssl-
Specifies whether to use SSL/TLS for Elasticsearch. Defaults to
True. LOGS_MODEL_CONFIG.elasticsearch_config.index_prefix- Specifies a prefix to attach to log entries.
LOGS_MODEL_CONFIG.elasticsearch_config.aws_region- Specifies the AWS region if you are running on AWS. Otherwise, leave it blank.
Optional. If you are using Kinesis as your logs producer, you must include the following fields in your
config.yamlfile:kinesis_stream_config: stream_name: <kinesis_stream_name> access_key: <aws_access_key> secret_key: <aws_secret_key> aws_region: <aws_region>where:
kinesis_stream_config.stream_name- Specifies the name of the Kinesis stream.
kinesis_stream_config.access_key- Specifies the name of the AWS access key needed to gain access to the Kinesis stream, if required.
kinesis_stream_config.secret_key- Specifies the name of the AWS secret key needed to gain access to the Kinesis stream, if required.
kinesis_stream_config.aws_region- Specifies the Amazon Web Services (AWS) region.
-
Save your
config.yamlfile and restart your Red Hat Quay deployment.
4.2. Configuring action log storage for Splunk
Splunk is an alternative to Elasticsearch for storing and analyzing Red Hat Quay action logs. You can forward logs directly to Splunk or to the Splunk HTTP Event Collector (HEC) during or after deployment.
Additional resources
4.2.1. Installing and creating a username for Splunk
To prepare Splunk for Red Hat Quay action log storage, you can install Splunk Enterprise and create an administrator username and password.
Procedure
- Create a Splunk account by navigating to Content from www.splunk.com is not included.Splunk and entering the required credentials.
- Navigate to the Content from www.splunk.com is not included.Splunk Enterprise Free Trial page, select your platform and installation package, and then click Download Now.
-
Install the Splunk software on your machine. When prompted, create a username, for example,
splunk_adminand password. -
After creating a username and password, a localhost URL will be provided for your Splunk deployment, for example,
Content from <sample_url>.remote.csb is not included.http://<sample_url>.remote.csb:8000/. Open the URL in your preferred browser. - Log in with the username and password you created during installation. You are directed to the Splunk UI.
4.2.2. Generating a Splunk bearer token
You can generate a Splunk bearer token for Red Hat Quay action log forwarding by using the Splunk UI or the CLI.
4.2.2.1. Generating a Splunk bearer token using the Splunk UI
To create a Splunk bearer token for Red Hat Quay from the Splunk UI, you can enable token authentication and create a new token.
Prerequisites
- You have installed Splunk and created a username.
Procedure
- On the Splunk UI, navigate to Settings → Tokens.
- Click Enable Token Authentication.
- Ensure that Token Authentication is enabled by clicking Token Settings and selecting Token Authentication if necessary.
- Optional: Set the expiration time for your token. This defaults at 30 days.
- Click Save.
- Click New Token.
- Enter information for User and Audience.
- Optional: Set the Expiration and Not Before information.
Click Create. Your token appears in the Token box. Copy the token immediately.
ImportantIf you close out of the box before copying the token, you must create a new token. The token in its entirety is not available after closing the New Token window.
4.2.2.2. Generating a Splunk bearer token using the CLI
To create a Splunk bearer token for Red Hat Quay from the CLI, you can enable token authentication and request a token with curl.
Prerequisites
- You have installed Splunk and created a username.
Procedure
In your CLI, enter the following
CURLcommand to enable token authentication, passing in your Splunk username and password:$ curl -k -u <username>:<password> -X POST <scheme>://<host>:<port>/services/admin/token-auth/tokens_auth -d disabled=false
Create a token by entering the following
CURLcommand, passing in your Splunk username and password.$ curl -k -u <username>:<password> -X POST <scheme>://<host>:<port>/services/authorization/tokens?output_mode=json --data name=<username> --data audience=Users --data-urlencode expires_on=+30d
- Save the generated bearer token.
4.2.2.3. Generating an HEC ingest token
To forward Red Hat Quay action logs to Splunk through the HTTP Event Collector (HEC), you can generate an HEC ingest token in the Splunk web UI or by using the Splunk REST API.
Splunk HEC tokens are ingest-only and cannot search.
Prerequisites
- You have installed Splunk and created a username.
Procedure
To create an HEC token using the Splunk web UI:
- Log in to the Splunk via the web UI.
- Click Settings → Data Inputs → HTTP Event Collector.
- Click New Token.
-
Name the token, for example,
quay-hec, and select the target index, for example,quay_logs. - Click Submit and copy the token value.
To create an HEC token using the Splunk REST API:
Enable HEC by entering the following command:
$ curl -k -u <username>:<password> \
 https://<splunk.example.com>:8089/servicesNS/admin/splunk_httpinput/data/inputs/http/http \
 -d "disabled=0"
Create an HEC token by entering the following command:
$ curl -k -u <username>:<password> \
 "https://<splunk.example.com>:8089/servicesNS/admin/splunk_httpinput/data/inputs/http?output_mode=json" \
 -d "name=quay-hec" -d "index=quay_logs"
Example output:
{"entry":[{"content":{"token":"<your_bearer_token>"}}]}
4.2.3. Configuring Red Hat Quay to use Splunk
To send Red Hat Quay action logs to Splunk or the Splunk HTTP Event Collector (HEC), you can add the Splunk settings to your config.yaml file and restart the registry.
Prerequisites
- You have installed Splunk and created a username.
- You have generated a Splunk bearer token.
Procedure
Configure Red Hat Quay to use Splunk or the Splunk HTTP Event Collector (HEC).
If opting to use Splunk, open your Red Hat Quay
config.yamlfile and add the following configuration fields:# ... LOGS_MODEL: splunk LOGS_MODEL_CONFIG: producer: splunk splunk_config: host: http://<user_name>.remote.csb port: 8089 bearer_token: <bearer_token> url_scheme: <http/https> verify_ssl: False index_prefix: <splunk_log_index_name> ssl_ca_path: <location_to_ssl-ca-cert.pem> search_timeout: 60 max_results: 10000 export_batch_size: 5000 # ...where:
LOGS_MODEL_CONFIG.splunk_config.host- Specifies the Splunk cluster endpoint.
LOGS_MODEL_CONFIG.splunk_config.port- Specifies the Splunk management cluster endpoint port. Differs from the Splunk GUI hosted port. Can be found on the Splunk UI under Settings → Server Settings → General Settings.
LOGS_MODEL_CONFIG.splunk_config.bearer_token- Specifies the generated bearer token for Splunk.
LOGS_MODEL_CONFIG.splunk_config.url_scheme-
Specifies the URL scheme for access the Splunk service. If Splunk is configured to use TLS/SSL, this must be
https. LOGS_MODEL_CONFIG.splunk_config.verify_ssl-
Specifies whether to enable TLS/SSL. Defaults to
True. LOGS_MODEL_CONFIG.splunk_config.index_prefix- Specifies the Splunk index prefix. Can be a new, or used, index. Can be created from the Splunk UI.
LOGS_MODEL_CONFIG.splunk_config.ssl_ca_path-
Specifies the relative container path to a single
.pemfile containing a certificate authority (CA) for TLS/SSL validation. LOGS_MODEL_CONFIG.splunk_config.search_timeout- Specifies the timeout for Splunk search queries in seconds. Increase for slow Splunk clusters or complex queries.
LOGS_MODEL_CONFIG.splunk_config.max_results- Specifies the maximum number of results to return per search query. Larger values require more memory.
LOGS_MODEL_CONFIG.splunk_config.export_batch_size- Specifies the batch size for log export operations.
If opting to use Splunk HEC, open your Red Hat Quay
config.yamlfile and add the following configuration fields:# ... LOGS_MODEL: splunk LOGS_MODEL_CONFIG: producer: splunk_hec splunk_hec_config: host: prd-p-aaaaaq.splunkcloud.com port: 8088 hec_token: 12345678-1234-1234-1234-1234567890ab url_scheme: https verify_ssl: False index: quay splunk_host: quay-dev splunk_sourcetype: quay_logs timeout: 10 search_token: <bearer_token> search_host: <splunk.example.com> search_port: 8089 search_timeout: 60 max_results: 10000 export_batch_size: 5000 # ...where:
LOGS_MODEL_CONFIG.producer-
Specifies
splunk_hecwhen configuring Splunk HEC. LOGS_MODEL_CONFIG.splunk_hec_config- Specifies the logs model configuration for Splunk HTTP Event Collector action logs configuration.
LOGS_MODEL_CONFIG.splunk_hec_config.host- Specifies the Splunk cluster endpoint.
LOGS_MODEL_CONFIG.splunk_hec_config.port- Specifies the Splunk management cluster endpoint port.
LOGS_MODEL_CONFIG.splunk_hec_config.hec_token- Specifies the HEC token for Splunk.
LOGS_MODEL_CONFIG.splunk_hec_config.url_scheme-
Specifies the URL scheme for access the Splunk service. If Splunk is behind SSL/TLS, must be
https. LOGS_MODEL_CONFIG.splunk_hec_config.verify_ssl-
Specifies whether to enable (
true) or disable (false) SSL/TLS verification for HTTPS connections. LOGS_MODEL_CONFIG.splunk_hec_config.index- Specifies the Splunk index to use.
LOGS_MODEL_CONFIG.splunk_hec_config.splunk_host- Specifies the host name to log this event.
LOGS_MODEL_CONFIG.splunk_hec_config.splunk_sourcetype-
Specifies the name of the Splunk
sourcetypeto use. LOGS_MODEL_CONFIG.splunk_hec_config.timeout- Specifies the timeout in seconds for HTTP requests to the Splunk HEC endpoint. Prevents requests from hanging indefinitely when Splunk is unresponsive.
LOGS_MODEL_CONFIG.splunk_hec_config.search_token- Specifies an optional bearer token for the Splunk search API. Required because HEC tokens are ingest-only and cannot search.
LOGS_MODEL_CONFIG.splunk_hec_config.search_host- Specifies the Splunk management host for the search API. Defaults to the HEC host if not specified.
LOGS_MODEL_CONFIG.splunk_hec_config.search_port-
Specifies the Splunk management port for the search API. Defaults to
8089if not specified. LOGS_MODEL_CONFIG.splunk_hec_config.search_timeout- Specifies the timeout for Splunk search queries in seconds. Increase for slow Splunk clusters or complex queries.
LOGS_MODEL_CONFIG.splunk_hec_config.max_results- Specifies the maximum number of results to return per search query. Larger values require more memory.
LOGS_MODEL_CONFIG.splunk_hec_config.export_batch_size- Specifies the batch size for log export operations.
If you are configuring
ssl_ca_path, you must configure the SSL/TLS certificate so that Red Hat Quay trusts it.-
If you are using a standalone deployment of Red Hat Quay, SSL/TLS certificates can be provided by placing the certificate file inside of the
extra_ca_certsdirectory, or inside of the relative container path and specified byssl_ca_path. If you are using the Red Hat Quay Operator, create a config bundle secret, including the certificate authority (CA) of the Splunk server. For example:
$ oc create secret generic --from-file config.yaml=./config_390.yaml --from-file extra_ca_cert_splunkserver.crt=./splunkserver.crt config-bundle-secret
Specify the
conf/stack/extra_ca_certs/splunkserver.crtfile in yourconfig.yaml. For example:# ... LOGS_MODEL: splunk LOGS_MODEL_CONFIG: producer: splunk splunk_config: host: ec2-12-345-67-891.us-east-2.compute.amazonaws.com port: 8089 bearer_token: eyJra url_scheme: https verify_ssl: true index_prefix: quay123456 ssl_ca_path: conf/stack/splunkserver.crt # ...
-
If you are using a standalone deployment of Red Hat Quay, SSL/TLS certificates can be provided by placing the certificate file inside of the
Additional resources
4.2.4. Creating an action log
To verify that Red Hat Quay is forwarding action logs to Splunk, you can create a robot account in an organization and search the Splunk index for the forwarded JSON log entries.
Prerequisites
- You have installed Splunk and created a username.
- You have generated a Splunk bearer token.
-
You have configured your Red Hat Quay
config.yamlfile to enable Splunk.
Procedure
- Log in to your Red Hat Quay deployment.
- Click on the name of the organization that you use to create an action log for Splunk.
- In the navigation pane, click Robot Accounts → Create Robot Account.
-
When prompted, enter a name for the robot account, for example
splunkrobotaccount, then click Create robot account. - On your browser, open the Splunk UI.
- Click Search and Reporting.
In the search bar, enter the name of your index, for example,
<splunk_log_index_name>and press Enter.The search results populate on the Splunk UI. Logs are forwarded in JSON format. A response might look similar to the following:
{ "log_data": { "kind": "authentication", "account": "quayuser123", "performer": "John Doe", "repository": "projectQuay", "ip": "192.168.1.100", "metadata_json": {...}, "datetime": "2024-02-06T12:30:45Z" } }where:
kind-
Specifies the type of log event. In this example,
authenticationindicates that the log entry relates to an authentication event. account- Specifies the user account involved in the event.
performer- Specifies the individual who performed the action.
repository- Specifies the repository associated with the event.
ip- Specifies the IP address from which the action was performed.
metadata_json- Specifies additional metadata related to the event, when present.
datetime- Specifies the timestamp of when the event occurred.
4.2.5. Displaying Splunk audit logs in the Red Hat Quay UI
To view Splunk audit logs in the Red Hat Quay UI, you can configure Splunk or Splunk HEC credentials in your config.yaml file and restart the registry. Then open the Logs panel for an organization, repository, or superuser view.
Prerequisites
You have created an
hec_token.NoteFor the HEC producer, two tokens are required:
hec_tokenfor writing logs andsearch_tokenfor reading logs in the UI. Thesearch_tokenis a bearer token (the same type you create when generating a Splunk bearer token). HEC tokens are ingest-only and cannot run searches.- You have configured Red Hat Quay to forward action logs to Splunk.
Procedure
Update your
config.yamlfile:To display Splunk SDK audit logs on the Red Hat Quay UI, use the following reference:
LOGS_MODEL: splunk LOGS_MODEL_CONFIG: producer: splunk splunk_config: host: <splunk.example.com> port: 8089 bearer_token: <your_bearer_token> url_scheme: https verify_ssl: false index_prefix: quay_logs search_timeout: 60 max_results: 10000 export_batch_size: 5000where:
LOGS_MODEL_CONFIG.splunk_config.host- Specifies the host name of your Splunk instance.
LOGS_MODEL_CONFIG.splunk_config.bearer_token- Specifies the bearer token you generated for Splunk.
LOGS_MODEL_CONFIG.splunk_config.index_prefix- Specifies the Splunk index prefix.
To display Splunk HEC logs on the Red Hat Quay UI, include the generated
search_tokenandhec_token. For example:LOGS_MODEL: splunk LOGS_MODEL_CONFIG: producer: splunk_hec splunk_hec_config: host: <splunk.example.com> port: 8088 hec_token: <your_hec_token> search_token: <your_bearer_token> url_scheme: https verify_ssl: true ssl_ca_path: conf/stack/ca.pem index: quay_logs splunk_host: <quay-server.example.com> splunk_sourcetype: access_combined timeout: 10 search_host: <splunk.example.com> search_port: 8089 search_timeout: 60 max_results: 10000 export_batch_size: 5000where:
LOGS_MODEL_CONFIG.splunk_hec_config.host- Specifies the host name of your Splunk instance (used for both the HEC endpoint and the search API).
LOGS_MODEL_CONFIG.splunk_hec_config.port- Specifies the port number for the Splunk HEC endpoint.
LOGS_MODEL_CONFIG.splunk_hec_config.hec_token- Specifies the HEC token you generated for Splunk.
LOGS_MODEL_CONFIG.splunk_hec_config.search_token- Specifies the bearer token you generated for Splunk search. This field is optional.
LOGS_MODEL_CONFIG.splunk_hec_config.splunk_host- Specifies the host name of your Red Hat Quay instance.
- Restart your Red Hat Quay instance to apply the changes.
Push an example image to your Red Hat Quay instance to generate an audit log by entering the following command. Note that you can push to an organization or a repository.
$ podman push <quay-server.example.com>/<organization_name>/busybox:test
On the Red Hat Quay UI, open the Logs view in one of these places:
- Organizations → <organization_name> → Logs
- Repositories → <organization_name> / <repository_name> → Logs
- Superuser → Usage Logs
Results
-
The
busybox:testSplunk audit is available.
4.3. Understanding usage logs
By default, Red Hat Quay stores usage logs in its database and shows them in the web UI. You can query those logs in PostgreSQL and map action types by kind_id.
Usage logs appear at the organization and repository levels, and in the Superuser Admin Panel. Database logs capture a wide range of events in Red Hat Quay, such as account plan changes, user actions, and general operations. Log entries include information such as the action performed (kind_id), the user who performed the action (account_id or performer_id), the timestamp (datetime), and other relevant data associated with the action (metadata_json).
4.3.1. Viewing database logs
To view repository usage logs stored in the Red Hat Quay PostgreSQL database, you can query the logentry tables with the psql CLI tool.
Prerequisites
- You have administrative privileges.
-
You have installed the
psqlCLI tool.
Procedure
Enter the following command to log in to your Red Hat Quay PostgreSQL database:
$ psql -h <quay-server.example.com> -p 5432 -U <user_name> -d <database_name>
Example output
psql (16.1, server 13.7)
Type "help" for help.
Optional. Enter the following command to display the tables list of your PostgreSQL database:
quay=> \dt
Example output
                   List of relations
 Schema |            Name            | Type  |  Owner
--------+----------------------------+-------+----------
 public | logentry                   | table | quayuser
 public | logentry2                  | table | quayuser
 public | logentry3                  | table | quayuser
 public | logentrykind               | table | quayuser
...
Enter the following command to return a list of
repository_idsthat are required to return log information:quay=> SELECT id, name FROM repository;
Example output
 id |        name
----+---------------------
  3 | new_repository_name
  6 | api-repo
  7 | busybox
...
Enter the following command to use the
logentry3relation to show log information about one of your repositories:SELECT * FROM logentry3 WHERE repository_id = <repository_id>;
Example output
id | kind_id | account_id | performer_id | repository_id | datetime | ip | metadata_json 59 | 14 | 2 | 1 | 6 | 2024-05-13 15:51:01.897189 | 192.168.1.130 | {"repo": "api-repo", "namespace": "test-org"}In this example, the following information is returned:
{ "log_data": { "id": 59 "kind_id": "14", "account_id": "2", "performer_id": "1", "repository_id": "6", "ip": "192.168.1.100", "metadata_json": {"repo": "api-repo", "namespace": "test-org"} "datetime": "2024-05-13 15:51:01.897189" } }where:
id- Specifies the unique identifier for the log entry.
kind_id-
Specifies the action that was performed. In this example,
14maps to creating a repository (create_repo). account_id- Specifies the account that performed the action.
performer_id- Specifies the performer of the action.
repository_id-
Specifies the repository that the action was performed on. In this example,
6correlates to theapi-reporepository from the previous step. ip- Specifies the IP address where the action was performed.
metadata_json- Specifies metadata information, including the name of the repository and its namespace.
datetime- Specifies the time when the action was performed.
4.3.2. Log entry kind_ids
The kind_id value in a Red Hat Quay usage log entry identifies the type of action that was recorded. You can use this table to map each kind_id to its action name and description.
| kind_id | Action | Description |
|---|---|---|
| 1 | account_change_cc | Change of credit card information. |
| 2 | account_change_password | Change of account password. |
| 3 | account_change_plan | Change of account plan. |
| 4 | account_convert | Account conversion. |
| 5 | add_repo_accesstoken | Adding an access token to a repository. |
| 6 | add_repo_notification | Adding a notification to a repository. |
| 7 | add_repo_permission | Adding permissions to a repository. |
| 8 | add_repo_webhook | Adding a webhook to a repository. |
| 9 | build_dockerfile | Building a Dockerfile. |
| 10 | change_repo_permission | Changing permissions of a repository. |
| 11 | change_repo_visibility | Changing the visibility of a repository. |
| 12 | create_application | Creating an application. |
| 13 | create_prototype_permission | Creating permissions for a prototype. |
| 14 | create_repo | Creating a repository. |
| 15 | create_robot | Creating a robot (service account or bot). |
| 16 | create_tag | Creating a tag. |
| 17 | delete_application | Deleting an application. |
| 18 | delete_prototype_permission | Deleting permissions for a prototype. |
| 19 | delete_repo | Deleting a repository. |
| 20 | delete_repo_accesstoken | Deleting an access token from a repository. |
| 21 | delete_repo_notification | Deleting a notification from a repository. |
| 22 | delete_repo_permission | Deleting permissions from a repository. |
| 23 | delete_repo_trigger | Deleting a repository trigger. |
| 24 | delete_repo_webhook | Deleting a webhook from a repository. |
| 25 | delete_robot | Deleting a robot. |
| 26 | delete_tag | Deleting a tag. |
| 27 | manifest_label_add | Adding a label to a manifest. |
| 28 | manifest_label_delete | Deleting a label from a manifest. |
| 29 | modify_prototype_permission | Modifying permissions for a prototype. |
| 30 | move_tag | Moving a tag. |
| 31 | org_add_team_member | Adding a member to a team. |
| 32 | org_create_team | Creating a team within an organization. |
| 33 | org_delete_team | Deleting a team within an organization. |
| 34 | org_delete_team_member_invite | Deleting a team member invitation. |
| 35 | org_invite_team_member | Inviting a member to a team in an organization. |
| 36 | org_remove_team_member | Removing a member from a team. |
| 37 | org_set_team_description | Setting the description of a team. |
| 38 | org_set_team_role | Setting the role of a team. |
| 39 | org_team_member_invite_accepted | Acceptance of a team member invitation. |
| 40 | org_team_member_invite_declined | Declining of a team member invitation. |
| 41 | pull_repo | Pull from a repository. |
| 42 | push_repo | Push to a repository. |
| 43 | regenerate_robot_token | Regenerating a robot token. |
| 44 | repo_verb | Generic repository action (specifics might be defined elsewhere). |
| 45 | reset_application_client_secret | Resetting the client secret of an application. |
| 46 | revert_tag | Reverting a tag. |
| 47 | service_key_approve | Approving a service key. |
| 48 | service_key_create | Creating a service key. |
| 49 | service_key_delete | Deleting a service key. |
| 50 | service_key_extend | Extending a service key. |
| 51 | service_key_modify | Modifying a service key. |
| 52 | service_key_rotate | Rotating a service key. |
| 53 | setup_repo_trigger | Setting up a repository trigger. |
| 54 | set_repo_description | Setting the description of a repository. |
| 55 | take_ownership | Taking ownership of a resource. |
| 56 | update_application | Updating an application. |
| 57 | change_repo_trust | Changing the trust level of a repository. |
| 58 | reset_repo_notification | Resetting repository notifications. |
| 59 | change_tag_expiration | Changing the expiration date of a tag. |
| 60 | create_app_specific_token | Creating an application-specific token. |
| 61 | revoke_app_specific_token | Revoking an application-specific token. |
| 62 | toggle_repo_trigger | Toggling a repository trigger on or off. |
| 63 | repo_mirror_enabled | Enabling repository mirroring. |
| 64 | repo_mirror_disabled | Disabling repository mirroring. |
| 65 | repo_mirror_config_changed | Changing the configuration of repository mirroring. |
| 66 | repo_mirror_sync_started | Starting a repository mirror sync. |
| 67 | repo_mirror_sync_failed | Repository mirror sync failed. |
| 68 | repo_mirror_sync_success | Repository mirror sync succeeded. |
| 69 | repo_mirror_sync_now_requested | Immediate repository mirror sync requested. |
| 70 | repo_mirror_sync_tag_success | Repository mirror tag sync succeeded. |
| 71 | repo_mirror_sync_tag_failed | Repository mirror tag sync failed. |
| 72 | repo_mirror_sync_test_success | Repository mirror sync test succeeded. |
| 73 | repo_mirror_sync_test_failed | Repository mirror sync test failed. |
| 74 | repo_mirror_sync_test_started | Repository mirror sync test started. |
| 75 | change_repo_state | Changing the state of a repository. |
| 76 | create_proxy_cache_config | Creating proxy cache configuration. |
| 77 | delete_proxy_cache_config | Deleting proxy cache configuration. |
| 78 | start_build_trigger | Starting a build trigger. |
| 79 | cancel_build | Canceling a build. |
| 80 | org_create | Creating an organization. |
| 81 | org_delete | Deleting an organization. |
| 82 | org_change_email | Changing organization email. |
| 83 | org_change_invoicing | Changing organization invoicing. |
| 84 | org_change_tag_expiration | Changing organization tag expiration. |
| 85 | org_change_name | Changing organization name. |
| 86 | user_create | Creating a user. |
| 87 | user_delete | Deleting a user. |
| 88 | user_disable | Disabling a user. |
| 89 | user_enable | Enabling a user. |
| 90 | user_change_email | Changing user email. |
| 91 | user_change_password | Changing user password. |
| 92 | user_change_name | Changing user name. |
| 93 | user_change_invoicing | Changing user invoicing. |
| 94 | user_change_tag_expiration | Changing user tag expiration. |
| 95 | user_change_metadata | Changing user metadata. |
| 96 | user_generate_client_key | Generating a client key for a user. |
| 97 | login_success | Successful login. |
| 98 | logout_success | Successful logout. |
| 99 | permanently_delete_tag | Permanently deleting a tag. |
| 100 | autoprune_tag_delete | Auto-pruning tag deletion. |
| 101 | create_namespace_autoprune_policy | Creating namespace auto-prune policy. |
| 102 | update_namespace_autoprune_policy | Updating namespace auto-prune policy. |
| 103 | delete_namespace_autoprune_policy | Deleting namespace auto-prune policy. |
| 104 | login_failure | Failed login attempt. |
Chapter 5. About Clair
Clair scans container images for known vulnerabilities in Red Hat Quay. You can use National Vulnerability Database (NVD) enrichment, including CVSS severity scores, to prioritize remediation.
The NVD is a United States government repository of security-related information, including known vulnerabilities and security issues in various software components and systems. NVD scores provide the following benefits:
- Data synchronization. Clair can periodically synchronize its vulnerability database with the NVD. This ensures that it has the latest vulnerability data.
- Matching and enrichment. Clair compares the metadata and identifiers of vulnerabilities it discovers in container images with the data from the NVD. This process involves matching the unique identifiers, such as Common Vulnerabilities and Exposures (CVE) IDs, to the entries in the NVD. When a match is found, Clair can enrich its vulnerability information with additional details from NVD, such as severity scores, descriptions, and references.
- Severity scores. The NVD assigns severity scores to vulnerabilities, such as the Common Vulnerability Scoring System (CVSS) score, to indicate the potential impact and risk associated with each vulnerability. By incorporating NVD severity scores, Clair can provide more context on the seriousness of the vulnerabilities it detects.
If Clair finds vulnerabilities from NVD, a detailed and standardized assessment of the severity and potential impact of vulnerabilities detected within container images is reported to users on the UI. CVSS enrichment data provides the following benefits:
- Vulnerability prioritization. By using CVSS scores, you can prioritize vulnerabilities based on their severity and address the most critical issues first.
- Assess risk. CVSS scores can help you understand the potential risk a vulnerability poses to your containerized applications.
- Communicate severity. CVSS scores provide a standardized way to communicate the severity of vulnerabilities across teams and organizations.
- Inform remediation strategies. CVSS enrichment data can guide Quay.io users in developing appropriate remediation strategies.
- Compliance and reporting. Integrating CVSS data into reports generated by Clair can help organizations demonstrate their commitment to addressing security vulnerabilities and complying with industry standards and regulations.
Documentation for installing and configuring Clair can be found in the Additional resources section.
Additional resources
Chapter 6. Mirroring images with Red Hat Quay
With repository mirroring in Red Hat Quay, you can copy images from an external registry into your cluster. You sync by repository or organization name and tag, set intervals, and filter architectures.
From your Red Hat Quay cluster with mirroring enabled, you can perform the following actions:
- Choose a repository or organization from an external registry to mirror
- Add credentials to access the external registry
- Identify specific container image repository or organization names and tags to sync
- Set intervals at which a repository or organization is synced
- Check the current state of synchronization
- Filter the architectures that are mirrored
To use repository mirroring, complete the following actions:
- Enable mirroring in the Red Hat Quay configuration file
- Run a mirroring worker
- Create mirrored repositories
You can configure mirroring by editing the Red Hat Quay configuration file or by using the Red Hat Quay API.
6.1. Mirroring compared to geo-replication
Mirroring and geo-replication solve different distribution needs in Red Hat Quay. Mirroring syncs selected repositories between separate registries; geo-replication shares one database and replicates blob storage across regions.
For example, a geo-replicated Red Hat Quay registry can use two different blob storage endpoints.
The primary use cases for geo-replication include the following:
- Speeding up access to the binary blobs for geographically dispersed setups
- Guaranteeing that the image content is the same across regions
Mirroring synchronizes selected repositories, or subsets of repositories, from one registry to another. The registries are distinct, with each registry having a separate database and separate image storage.
The primary use cases for mirroring include the following:
- Independent registry deployments in different data centers or regions, where a certain subset of the overall content is supposed to be shared across the data centers and regions
- Automatic synchronization or mirroring of selected (allowlisted) upstream repositories from external registries into a local Red Hat Quay deployment
Mirroring and geo-replication can be used simultaneously.
Table 6.1. Red Hat Quay mirroring and geo-replication comparison
| Feature / Capability | Geo-replication | Mirroring |
|---|---|---|
| What is the feature designed to do? | A shared, global registry | Distinct, different registries |
| What happens if replication or mirroring has not been completed yet? | The remote copy is used (slower) | No image is served |
| Is access to all storage backends in both regions required? | Yes (all Red Hat Quay nodes) | No (distinct storage) |
| Can users push images from both sites to the same repository or organization? | Yes | No |
| Is all registry content and configuration identical across all regions (shared database)? | Yes | No |
| Can users select individual namespaces or repositories to be mirrored? | No | Yes |
| Can users apply filters to synchronization rules? | No | Yes |
| Are individual / different role-based access control configurations allowed in each region | No | Yes |
6.2. Using mirroring
Repository mirroring in Red Hat Quay syncs images for a repository or organization from an external registry. Filters, robot accounts, and sync intervals control what is copied and when.
The following list shows features and limitations of Red Hat Quay mirroring for a repository or organization.
The word entity is used in the mirroring documentation to refer to either a repository or organization.
- With mirroring, you can mirror an entire entity or selectively limit which images are synced. Filters can be based on a comma-separated list of tags, a range of tags, or other means of identifying tags through Unix shell-style wildcards.
- After you set mirroring for an entity, you cannot manually add other images to that entity.
- Because the mirrored entity is based on the entity and the tags that you set, the entity holds only the content represented by the entity and tag pair. For example, if you change the tag so that some images in the entity no longer match, those images are deleted.
- Only the designated robot can push images to a mirrored entity, superseding any role-based access control permissions set on the entity.
- Mirroring can be configured to roll back on failure, or to run on a best-effort basis.
- With a mirrored entity, a user with read permissions can pull images from the entity but cannot push images to the entity.
- Changing settings on your mirrored entity can be performed in the Red Hat Quay user interface.
- Images are synced at set intervals, but can also be synced on demand.
In the current implementation of organization-level repository mirroring, Red Hat Quay does not replicate deletions from the source registry. If any of the following entities are removed or absent in the upstream source, they persist in the local Red Hat Quay mirror:
- Source namespaces or organizations and their repositories. If the entire upstream source namespace (for example, a Harbor project or Red Hat Quay organization) is removed, all previously mirrored repositories and their content remain in the local mirror.
- Individual repositories. Repositories previously discovered and synced continue to be tracked and served even if removed from the upstream source.
- Image tags. Tags that existed at the time of the last sync persist in the mirror even if deleted upstream.
- Referrers. OCI Referrers API artifacts, such as Cosign signatures and SBOMs, are not currently mirrored. When present locally, they are not cleaned up automatically.
The downstream mirror acts as a cumulative archive. If an upstream namespace is emptied or its repositories and tags are removed, the mirror continues to serve the last successfully synchronized versions of those objects. This might lead to higher storage consumption in the mirror than in the source.
NoteThis behavior differs from repository-level mirroring, which automatically removes local tags that are no longer present in the source registry.
Manual deletion by using the Red Hat Quay UI or API is required to remove these entities from the mirror. A future release can introduce a configurable option to automatically delete absent items, including organizations, repositories, tags, referrers, and manifest list children from the local mirror.
Additional resources
6.3. Creating a mirroring worker
To run repository mirroring in a standalone Red Hat Quay deployment, you can start a Podman container with the repomirror option.
Procedure
If you have not configured TLS communications by using a
/root/ca.crtcertificate, enter the following command to start a mirroring worker:$ sudo podman run -d --name mirroring-worker \ -v $QUAY/config:/conf/stack:Z \ registry.redhat.io/quay/quay-rhel9:v3.18.0 repomirror
If you have configured TLS communications by using a
/root/ca.crtcertificate, enter the following command to start the repository mirroring worker:$ sudo podman run -d --name mirroring-worker \ -v $QUAY/config:/conf/stack:Z \ -v /root/ca.crt:/etc/pki/ca-trust/source/anchors/ca.crt:Z \ registry.redhat.io/quay/quay-rhel9:v3.18.0 repomirror
6.4. Enabling organization mirroring for Red Hat Quay
To enable organization mirroring in Red Hat Quay, you can set FEATURE_ORG_MIRROR to true in your config.yaml file and restart the registry.
Procedure
To enable organization mirroring, set the following configuration fields in your
config.yamlfile:# ... FEATURE_PROXY_CACHE: true FEATURE_REPO_MIRROR: true FEATURE_ORG_MIRROR: true ORG_MIRROR_INTERVAL: 60 ORG_MIRROR_BATCH_SIZE: 100 ORG_MIRROR_MAX_SYNC_DURATION: 3600 ORG_MIRROR_DEFAULT_SKOPEO_TIMEOUT: 600 ORG_MIRROR_DISCOVERY_TIMEOUT: 600 ORG_MIRROR_MAX_REPOS_PER_ORG: 5000 ORG_MIRROR_MAX_RETRIES: 3 SSRF_ALLOWED_HOSTS: - harbor.example.lab # ...where:
FEATURE_PROXY_CACHE-
Specifies whether to enable or disable proxy caching. This field must be set to
trueto use the organization mirroring feature. FEATURE_REPO_MIRROR-
Specifies whether to enable or disable repository-level mirroring. This field must be set to
trueto use the organization mirroring feature. FEATURE_ORG_MIRROR- Specifies whether to enable or disable organization-level mirroring.
ORG_MIRROR_INTERVAL- Specifies the worker processing interval in seconds.
ORG_MIRROR_BATCH_SIZE- Specifies the number of organization mirrors to process for each iteration.
ORG_MIRROR_MAX_SYNC_DURATION- Specifies the maximum sync duration in seconds.
ORG_MIRROR_DEFAULT_SKOPEO_TIMEOUT- Specifies the default skopeo timeout in seconds.
ORG_MIRROR_DISCOVERY_TIMEOUT- Specifies the discovery timeout in seconds.
ORG_MIRROR_MAX_REPOS_PER_ORG- Specifies the maximum repositories to discover for each organization.
ORG_MIRROR_MAX_RETRIES- Specifies the maximum sync retries for a failure operation.
SSRF_ALLOWED_HOSTS- Specifies the allowed hosts for Server-Side Request Forgery (SSRF) protection. Use this optional field to allow specific hosts to be accessed by the registry.
- Restart your Red Hat Quay registry.
6.5. Creating a mirroring organization by using the UI
To automatically synchronize container images between registries, you can use the Red Hat Quay UI to create a mirroring organization.
Organization-level mirroring cannot be configured on an existing organization that already contains repositories. A dedicated organization must be created specifically to serve as a mirror target, with all repositories within the organization managed exclusively by the mirroring configuration.
Prerequisites
- You have a Red Hat Quay organization with sufficient permissions.
- You have created a robot account.
You have access to a source Harbor instance.
- You have Harbor credentials, such as a username and a password or an API token.
-
You have set
FEATURE_ORG_MIRROR: truein yourconfig.yamlfile. -
You have set
FEATURE_PROXY_CACHE: truein yourconfig.yamlfile. -
You have set
FEATURE_REPO_MIRROR: truein yourconfig.yamlfile. - For standalone Red Hat Quay deployments, you have created a mirroring worker.
If you are using an OAuth token to mirror from Quay to Quay, your token must have the following permissions:
- Administer Repositories
- View all visible repositories
- Read/Write to any accessible repositories
- Administer User
Procedure
- On the Red Hat Quay v2 UI, click Organizations in the navigation pane.
- Find your organization listed under the Name column and then click the name of the organization.
- Click Settings → Organization state.
- Click the Mirror radio button to set the organization state to mirroring.
- Click Submit. Completion of this step takes you to the Mirroring tab.
Under the Source Registry section, complete the following settings:
- For Source Registry Type, select Quay or Harbor.
-
In the Source Registry URL field, enter a valid URL, for example,
Content from registry.example.com is not included.https://registry.example.com. -
For Source Namespace, enter the namespace or project name on the source registry. For example,
my-project. - Select Private or Public for Repository Visibility.
-
For Start Date, set the date in
yyyy-mm-ddformat and set the time. - Set the Sync interval. Set the integer in the box and select seconds, minutes, hours, days, or weeks from the drop-down menu.
- Set the Skopeo Timeout value for Skopeo operations.
- Select a Robot User from the drop-down menu.
- Set any desired Filter Patterns.
In the Credentials section, do one of the following actions:
- If you specified Harbor for Source Registry Type, enter your username and password for the source registry.
-
If you specified Quay for Source Registry Type, enter
$oauthtokenfor the Username field and your OAuth token for the Password field.
Optional: In Advanced Settings, complete any of the following options:
- For Verify TLS, select the checkbox to verify certificates.
- Set an HTTP Proxy URL.
- Set an HTTPS Proxy URL.
- Set a No Proxy URL.
- When you have configured the desired settings, click Enable Organization Mirror.
Verification
- On the Red Hat Quay web console, click Organizations → the organization name → Mirroring.
- Scroll to the Status section to view the status and verify the connection.
6.6. Creating a mirrored organization by using the API
To create a mirrored organization in Red Hat Quay by using the API, you can send HTTP requests to the organization mirror endpoints with curl and an OAuth bearer token.
Organization-level mirroring cannot be configured on an existing organization that already contains repositories. A dedicated organization must be created specifically to serve as a mirror target, with all repositories within the organization managed exclusively by the mirroring configuration.
Prerequisites
- You have generated an OAuth access token.
Procedure
Use the
POST /api/v1/organization/{orgname}/mirrorendpoint to create a new organization-level mirroring configuration:$ curl -X POST "https://<quay-server.example.com>/api/v1/organization/<orgname>/mirror" \ -H "Authorization: Bearer <access_token>" \ -H "Accept: application/json" \ -H "Content-Type: application/json" \ -d '{ "external_registry_type": "quay", "external_registry_url": "https://quay.io", "external_namespace": "<external_namespace>", "robot_username": "<orgname>+<robot_account>", "visibility": "private", "sync_interval": 3600, "sync_start_date": "2025-01-01T00:00:00Z", "is_enabled": true }'Use the
GET /api/v1/organization/{orgname}/mirrorendpoint to retrieve the organization-level mirroring configuration:$ curl -X GET \ -H "Authorization: Bearer <bearer_token>" \ -H "Accept: application/json" \ https://<quay-server.example.com>/api/v1/organization/<orgname>/mirror
Example output
{"is_enabled": true, "external_registry_type": "quay", "external_registry_url": "http://quay.io", "external_namespace": "test", "external_registry_username": null, "external_registry_config": {}, "repository_filters": [], "robot_username": "example+test", "visibility": "private", "sync_interval": 3600, "sync_start_date": "2025-01-01T00:00:00Z", "sync_expiration_date": null, "sync_status": "NEVER_RUN", "sync_retries_remaining": 3, "skopeo_timeout": 300, "creation_date": "2026-03-09T18:39:21.993431Z"}Use the
GET /api/v1/organization/{orgname}/mirror/repositoriesendpoint to obtain a list of repositories that are being mirrored in the organization:$ curl -X GET \ -H "Authorization: Bearer <bearer_token>" \ -H "Accept: application/json" \ "https://<quay-server.example.com>/api/v1/organization/<orgname>/mirror/repositories?page=1&limit=100"
Example output
{"repositories": [], "page": 1, "limit": 100, "total": 0, "has_next": false}Use the
POST /api/v1/organization/{orgname}/mirror/sync-nowendpoint to trigger an immediate sync of all repositories in the organization:$ curl -X POST \ -H "Authorization: Bearer <bearer_token>" \ -H "Accept: application/json" \ https://<quay-server.example.com>/api/v1/organization/<orgname>/mirror/sync-now
This command does not return output in the CLI.
Use the
POST /api/v1/organization/{orgname}/mirror/sync-cancelendpoint to cancel a pending sync of all repositories in the organization:$ curl -X POST \ -H "Authorization: Bearer <bearer_token>" \ -H "Accept: application/json" \ https://<quay-server.example.com>/api/v1/organization/<orgname>/mirror/sync-cancel
This command does not return output in the CLI.
Use the
PUT /api/v1/organization/{orgname}/mirrorendpoint to update the organization-level mirroring configuration:$ curl -X PUT \ -H "Authorization: Bearer <bearer_token>" \ -H "Accept: application/json" \ -H "Content-Type: application/json" \ -d '{"is_enabled": true, "sync_interval": 7200}' \ https://<quay-server.example.com>/api/v1/organization/<orgname>/mirrorExample output
" "
Use the
POST /api/v1/organization/{orgname}/mirror/verifyendpoint to verify the connection to the external registry for the organization-level mirroring configuration:$ curl -X POST \ -H "Authorization: Bearer <bearer_token>" \ -H "Accept: application/json" \ https://<quay-server.example.com>/api/v1/organization/<orgname>/mirror/verify
Example output
{"success": false, "message": "Unexpected response: 301"}Use the
DELETE /api/v1/organization/{orgname}/mirrorendpoint to delete the organization-level mirroring configuration:$ curl -X DELETE \ -H "Authorization: Bearer <bearer_token>" \ -H "Accept: application/json" \ https://<quay-server.example.com>/api/v1/organization/<orgname>/mirror
This command does not return output in the CLI.
6.7. Enabling repository mirroring for Red Hat Quay
To enable repository mirroring in Red Hat Quay, you can set FEATURE_REPO_MIRROR to true in your config.yaml file and restart the registry.
Procedure
To enable mirroring for repositories, set
FEATURE_REPO_MIRROR: truein yourconfig.yamlfile:# ... FEATURE_REPO_MIRROR: true REPO_MIRROR_INTERVAL: 30 REPO_MIRROR_SERVER_HOSTNAME: "openshift-quay-service" REPO_MIRROR_TLS_VERIFY: true REPO_MIRROR_ROLLBACK: false FEATURE_SPARSE_INDEX: true REPO_MIRROR_MAX_MANIFEST_LIST_SIZE: 10485760 REPO_MIRROR_MAX_MANIFEST_ENTRIES: 1000 # ...
where:
FEATURE_REPO_MIRROR- Specifies whether to enable or disable repository-level mirroring.
REPO_MIRROR_INTERVAL- Specifies the worker processing interval in seconds.
REPO_MIRROR_SERVER_HOSTNAME- Specifies the hostname of the server hosting the mirrored repository.
REPO_MIRROR_TLS_VERIFY- Specifies whether to verify the TLS certificate of the mirrored repository.
REPO_MIRROR_ROLLBACK- Specifies whether to roll back the repository if a mirroring operation fails.
FEATURE_SPARSE_INDEX- Specifies whether to allow sparse manifest indexes.
REPO_MIRROR_MAX_MANIFEST_LIST_SIZE- Specifies the maximum size of the manifest list in bytes.
REPO_MIRROR_MAX_MANIFEST_ENTRIES- Specifies the maximum number of manifest entries to process.
- Restart your Red Hat Quay registry.
6.8. Creating a mirrored repository by using the UI
To mirror a repository from an external registry into Red Hat Quay, you can create a private repository and configure mirroring settings in the UI.
When mirroring a repository from an external container registry, you must create a new private repository. Typically, the same name is used as the target repository, for example, quay-rhel9.
Prerequisites
-
You have set
FEATURE_REPO_MIRROR: truein yourconfig.yamlfile. - For standalone Red Hat Quay deployments, you have created a mirroring worker.
- You have created a robot account.
Procedure
- Navigate to the Repositories page of your registry and click the name of a repository, for example, test-mirror.
- Click Settings → Repository state.
- Click Mirror.
- Click the Mirroring tab and enter the details for connecting to the external registry, along with the tags, scheduling, and access information.
Enter the details as required in the following fields:
-
Registry Location: The external repository you want to mirror, for example,
registry.redhat.io/quay/quay-rhel8. - Tags: Enter a comma-separated list of individual tags or tag patterns. You can use Unix shell-style wildcards.
-
Architecture Filter: Select the architectures that you want to mirror. For example, select
AMD64 (x86_64)to mirror only thex86_64architecture. By default, all architectures are mirrored. - Start Date: The date on which mirroring begins. By default, the current date and time are used.
- Sync Interval: Defaults to syncing every 24 hours. You can change that based on hours or days.
-
Skopeo timeout interval: Defaults to
300seconds (5 minutes). The maximum timeout length is43200seconds (12 hours). - Robot User: Create a new robot account or choose an existing robot account to do the mirroring.
- Username: The username for accessing the external registry holding the repository you are mirroring.
-
Password: The password associated with the username. Note that the password cannot include characters that require an escape character (
\).
-
Registry Location: The external repository you want to mirror, for example,
In the Advanced Settings section, you can optionally configure SSL/TLS and proxy with the following options:
- Verify TLS: Select this option if you want to require HTTPS and to verify certificates when communicating with the target remote registry.
- Accept Unsigned Images: Selecting this option allows unsigned images to be mirrored.
- HTTP Proxy: Identify the HTTP proxy server needed to access the remote site, if a proxy server is needed.
- HTTPS Proxy: Identify the HTTPS proxy server needed to access the remote site, if a proxy server is needed.
- No Proxy: List of locations that do not require a proxy.
- After filling out all information, click Enable Mirror.
6.9. Starting a mirroring synchronization
To start a mirroring sync immediately in Red Hat Quay, you can open the Mirroring tab for your repository or organization and click Sync Now.
Procedure
- Navigate to the Mirroring tab of your repository or organization.
- Click Sync Now.
Verification
- Click the Logs tab to view available logs.
- When mirroring is complete, the images appear in the Tags tab.
6.10. Event notifications for mirroring
Red Hat Quay repository mirroring supports three event notifications: Mirror Started, Mirror Success, and Mirror Unsuccessful. You can configure them per repository in the Settings tab and deliver them by email, Slack, the UI, or webhooks.
The events can be configured inside of the Settings tab for each repository, and all existing notification methods such as email, Slack, Quay UI, and webhooks are supported.
Additional resources
6.11. Working with mirrored repositories
After you create a mirrored repository in Red Hat Quay, you can enable or disable mirroring, sync on demand, update credentials, and manage robot account permissions.
Select your mirrored repository from the Repositories page to do any of the following actions:
- Enable or disable the repository: Select Mirroring in the left column, then toggle the Enabled check box to enable or disable the repository temporarily.
- Check mirror logs: To make sure the mirrored repository is working properly, you can check the mirror logs. Select Usage Logs in the left column.
- Sync mirror now: To immediately sync the images in your repository, select Sync Now.
- Change credentials: To change the username and password, select DELETE from the Credentials line. Then select None and add the username and password needed to log into the external registry when prompted.
- Cancel mirroring: To stop mirroring, which keeps the current images available but stops new ones from being synced, select CANCEL.
Set robot permissions: Red Hat Quay robot accounts are named tokens that hold credentials for accessing external repositories. By assigning credentials to a robot, that robot can be used across multiple mirrored repositories that need to access the same external registry.
You can assign an existing robot to a repository by navigating to Organizations → Robot accounts. On this page, you can view the following information:
- Check which repositories are assigned to that robot.
-
Assign
Read,Write, orAdminprivileges to that robot from the PERMISSION field.
- Change robot credentials: Robots can hold credentials such as Kubernetes secrets, Docker login information, and Podman login information. To change robot credentials, select the Options gear on the robot account line on the Robot Accounts window and choose View Credentials. Add the appropriate credentials for the external repository the robot needs to access.
- Check and change general settings: Select Settings (gear icon) from the left column on the mirrored repository page. On the resulting page, you can change settings associated with the mirrored repository. In particular, you can change user and robot permissions to specify exactly which users and robots can read from or write to the repository.
6.12. Repository mirroring recommendations
For Red Hat Quay repository mirroring, you can run mirroring pods on any node and size the number of workers to how many repositories you want to sync in parallel.
Best practices for repository mirroring include the following:
- Repository mirroring pods can run on any node. This means that you can run mirroring on nodes where Red Hat Quay is already running.
- Repository mirroring is scheduled in the database and runs in batches. As a result, repository workers check each repository mirror configuration and read when the next sync needs to run. More mirror workers means more repositories can be mirrored at the same time. For example, running 10 mirror workers means that a user can run 10 mirroring operations in parallel. If a user only has 2 workers with 10 mirror configurations, only 2 operations can run at once.
The optimal number of mirroring pods depends on the following conditions:
- The total number of repositories to be mirrored
- The number of images and tags in the repositories and the frequency of changes
Parallel batching
For example, if a user is mirroring a repository that has 100 tags, one worker completes the mirror. Users must consider how many repositories they want to mirror in parallel, and base the number of workers around that.
Multiple tags in the same repository cannot be mirrored in parallel.
Chapter 7. IPv6 and dual-stack deployments
You can deploy standalone Red Hat Quay on IPv6-only or dual-stack (IPv4 and IPv6) networks. Set FEATURE_LISTEN_IP_VERSION in your config.yaml file to enable the protocol family that your environment supports.
Some storage backends have known limitations on IPv6-only networks.
7.1. Enabling the IPv6 protocol family
To enable IPv6 support on your standalone Red Hat Quay deployment, you can set FEATURE_LISTEN_IP_VERSION to IPv6 in your config.yaml file and restart the registry.
If your environment is configured for IPv4, but the FEATURE_LISTEN_IP_VERSION configuration field is set to IPv6, Red Hat Quay fails to deploy.
Prerequisites
- Your host and container software platform (Docker, Podman) must be configured to support IPv6.
Procedure
In your deployment’s
config.yamlfile, add theFEATURE_LISTEN_IP_VERSIONparameter and set it toIPv6, for example:FEATURE_GOOGLE_LOGIN: false FEATURE_INVITE_ONLY_USER_CREATION: false FEATURE_LISTEN_IP_VERSION: IPv6 FEATURE_MAILING: false FEATURE_NONSUPERUSER_TEAM_SYNCING_SETUP: false
- Start, or restart, your Red Hat Quay deployment.
Check that your deployment is listening to IPv6 by entering the following command:
$ curl <quay_endpoint>/health/instance
Example output
{"data":{"services":{"auth":true,"database":true,"disk_space":true,"registry_gunicorn":true,"service_key":true,"web_gunicorn":true}},"status_code":200}
Results
-
After you enable IPv6 in your deployment’s
config.yamlfile, you can use all Red Hat Quay features as usual when your environment is configured for IPv6 and is not affected by known IPv6 limitations.
7.2. Enabling the dual-stack protocol family
To enable dual-stack (IPv4 and IPv6) support on your standalone Red Hat Quay deployment, you can set FEATURE_LISTEN_IP_VERSION to dual-stack in your config.yaml file and restart the registry.
Prerequisites
- Your host and container software platform (Docker, Podman) must be configured to support IPv6.
Procedure
In your deployment’s
config.yamlfile, add theFEATURE_LISTEN_IP_VERSIONparameter and set it todual-stack, for example:FEATURE_GOOGLE_LOGIN: false FEATURE_INVITE_ONLY_USER_CREATION: false FEATURE_LISTEN_IP_VERSION: dual-stack FEATURE_MAILING: false FEATURE_NONSUPERUSER_TEAM_SYNCING_SETUP: false
- Start, or restart, your Red Hat Quay deployment.
Check that your deployment is listening on both channels by entering the following commands:
For IPv4, enter the following command:
$ curl --ipv4 <quay_endpoint>
Example output
{"data":{"services":{"auth":true,"database":true,"disk_space":true,"registry_gunicorn":true,"service_key":true,"web_gunicorn":true}},"status_code":200}For IPv6, enter the following command:
$ curl --ipv6 <quay_endpoint>
Example output
{"data":{"services":{"auth":true,"database":true,"disk_space":true,"registry_gunicorn":true,"service_key":true,"web_gunicorn":true}},"status_code":200}
Results
-
After you enable dual-stack in your deployment’s
config.yamlfile, you can use all Red Hat Quay features as usual when your environment is configured for dual-stack.
7.3. IPv6 and dual-stack limitations
On IPv6 single-stack environments, Azure Blob Storage and Amazon S3 CloudFront endpoints that do not support IPv6 prevent those storage configurations from working with Red Hat Quay.
- Currently, attempting to configure your Red Hat Quay deployment with the common Azure Blob Storage configuration does not work on IPv6 single-stack environments. Because the endpoint of Azure Blob Storage does not support IPv6, no workaround exists for this issue.
- Currently, attempting to configure your Red Hat Quay deployment with Amazon S3 CloudFront does not work on IPv6 single-stack environments. Because the endpoint of Amazon S3 CloudFront does not support IPv6, no workaround exists for this issue.
Additional resources
Chapter 8. LDAP authentication setup for Red Hat Quay
You can configure Lightweight Directory Access Protocol (LDAP) authentication for Red Hat Quay in your config.yaml file. LDAP can create users on first login and can map selected users as restricted users or superusers.
8.1. Considerations when enabling LDAP
Before you enable LDAP for Red Hat Quay, review how existing local usernames interact with directory accounts and how FEATURE_USER_CREATION affects first login.
Existing Red Hat Quay deployments
Conflicts between usernames can arise when you enable LDAP for an existing Red Hat Quay deployment that already has users configured. For example, one user, alice, was manually created in Red Hat Quay prior to enabling LDAP. If the username alice also exists in the LDAP directory, Red Hat Quay automatically creates a new user, alice-1, when alice logs in for the first time using LDAP. Red Hat Quay then automatically maps the LDAP credentials to the alice account. For consistency reasons, this might be erroneous for your Red Hat Quay deployment. Remove any potentially conflicting local account names from Red Hat Quay prior to enabling LDAP.
Manual user creation and LDAP authentication
When Red Hat Quay is configured for LDAP, LDAP-authenticated users are automatically created in the Red Hat Quay database on first log in, if the configuration option FEATURE_USER_CREATION is set to true. If this option is set to false, the automatic user creation for LDAP users fails, and the user is not allowed to log in. In this scenario, the superuser needs to create the desired user account first. Conversely, if FEATURE_USER_CREATION is set to true, a user can still create an account from the Red Hat Quay login screen, even if an equivalent user exists in LDAP.
8.2. Configuring LDAP for Red Hat Quay
To configure LDAP authentication for Red Hat Quay, you can update your config.yaml file with the required LDAP fields and restart the registry.
Procedure
Update your
config.yamlfile directly to include the following relevant information:# ... AUTHENTICATION_TYPE: LDAP # ... LDAP_ADMIN_DN: uid=<name>,ou=Users,o=<organization_id>,dc=<example_domain_component>,dc=com LDAP_ADMIN_PASSWD: ABC123 LDAP_ALLOW_INSECURE_FALLBACK: false LDAP_BASE_DN: - dc=example - dc=com LDAP_EMAIL_ATTR: mail LDAP_UID_ATTR: uid LDAP_URI: ldap://<example_url>.com LDAP_USER_FILTER: (memberof=cn=developers,ou=Users,dc=<domain_name>,dc=com) LDAP_USER_RDN: - ou=people LDAP_SECONDARY_USER_RDNS: - ou=<example_organization_unit_one> - ou=<example_organization_unit_two> - ou=<example_organization_unit_three> - ou=<example_organization_unit_four> FEATURE_LDAP_CACHING: true LDAP_CACHE_TTL: 10 # ...where:
AUTHENTICATION_TYPE-
Specifies the authentication type. This field is required and must be set to
LDAP. LDAP_ADMIN_DN- Specifies the admin DN for LDAP authentication. This field is required.
LDAP_ADMIN_PASSWD- Specifies the admin password for LDAP authentication. This field is required.
LDAP_ALLOW_INSECURE_FALLBACK- Specifies whether to allow SSL/TLS insecure fallback for LDAP authentication. This field is required.
LDAP_BASE_DN- Specifies the base DN for LDAP authentication. This field is required.
LDAP_EMAIL_ATTR- Specifies the email attribute for LDAP authentication. This field is required.
LDAP_UID_ATTR- Specifies the UID attribute for LDAP authentication. This field is required.
LDAP_URI- Specifies the LDAP URI. This field is required.
LDAP_USER_FILTER- Specifies the user filter for LDAP authentication. This field is required.
LDAP_USER_RDN- Specifies the user RDN for LDAP authentication. This field is required.
LDAP_SECONDARY_USER_RDNS- Optional. Specifies secondary user relative DNs when user objects are located in multiple organizational units.
FEATURE_LDAP_CACHING-
Optional. Specifies whether to enable in-memory caching for LDAP permission check results (superuser, restricted user). Caching reduces LDAP server load. Defaults to
false. LDAP_CACHE_TTL-
Specifies the time-to-live, in seconds, for cached LDAP permission results. Defaults to
60.
- After you have added all required LDAP fields, save the changes and restart your Red Hat Quay deployment.
8.3. Enabling the LDAP_RESTRICTED_USER_FILTER configuration field
To mark selected LDAP users as restricted in Red Hat Quay, you can set FEATURE_RESTRICTED_USERS and LDAP_RESTRICTED_USER_FILTER in your config.yaml file and restart the registry.
The LDAP_RESTRICTED_USER_FILTER configuration field is a subset of the LDAP_USER_FILTER configuration field. When configured, this option allows Red Hat Quay administrators to configure LDAP users as restricted users when Red Hat Quay uses LDAP as its authentication provider.
Prerequisites
- Your Red Hat Quay deployment uses LDAP as its authentication provider.
-
You have configured the
LDAP_USER_FILTERfield in yourconfig.yamlfile.
Procedure
In your deployment’s
config.yamlfile, add theLDAP_RESTRICTED_USER_FILTERparameter and specify the group of restricted users, for example,members:# ... AUTHENTICATION_TYPE: LDAP # ... FEATURE_RESTRICTED_USERS: true # ... LDAP_ADMIN_DN: uid=<name>,ou=Users,o=<organization_id>,dc=<example_domain_component>,dc=com LDAP_ADMIN_PASSWD: ABC123 LDAP_ALLOW_INSECURE_FALLBACK: false LDAP_BASE_DN: - o=<organization_id> - dc=<example_domain_component> - dc=com LDAP_EMAIL_ATTR: mail LDAP_UID_ATTR: uid LDAP_URI: ldap://<example_url>.com LDAP_USER_FILTER: (memberof=cn=developers,ou=Users,o=<example_organization_unit>,dc=<example_domain_component>,dc=com) LDAP_RESTRICTED_USER_FILTER: (<filterField>=<value>) LDAP_USER_RDN: - ou=<example_organization_unit> - o=<organization_id> - dc=<example_domain_component> - dc=com FEATURE_LDAP_CACHING: true LDAP_CACHE_TTL: 10 # ...where:
FEATURE_RESTRICTED_USERS-
Specifies whether restricted users are enabled. Must be set to
truewhen configuring an LDAP restricted user. LDAP_RESTRICTED_USER_FILTER- Specifies the filter that configures selected users as restricted users.
- Start, or restart, your Red Hat Quay deployment.
Results
-
After enabling the
LDAP_RESTRICTED_USER_FILTERfeature, your LDAP Red Hat Quay users are restricted from reading and writing content, and creating organizations.
8.4. Enabling the LDAP_SUPERUSER_FILTER configuration field
To grant selected LDAP users superuser privileges in Red Hat Quay, you can set LDAP_SUPERUSER_FILTER in your config.yaml file and restart the registry.
Prerequisites
- Your Red Hat Quay deployment uses LDAP as its authentication provider.
-
You have configured the
LDAP_USER_FILTERfield in yourconfig.yamlfile.
Procedure
In your deployment’s
config.yamlfile, add theLDAP_SUPERUSER_FILTERparameter and add the group of users you want configured as superusers, for example,root:# ... AUTHENTICATION_TYPE: LDAP # ... LDAP_ADMIN_DN: uid=<name>,ou=Users,o=<organization_id>,dc=<example_domain_component>,dc=com LDAP_ADMIN_PASSWD: ABC123 LDAP_ALLOW_INSECURE_FALLBACK: false LDAP_BASE_DN: - o=<organization_id> - dc=<example_domain_component> - dc=com LDAP_EMAIL_ATTR: mail LDAP_UID_ATTR: uid LDAP_URI: ldap://<example_url>.com LDAP_USER_FILTER: (memberof=cn=developers,ou=Users,o=<example_organization_unit>,dc=<example_domain_component>,dc=com) LDAP_SUPERUSER_FILTER: (<filterField>=<value>) LDAP_USER_RDN: - ou=<example_organization_unit> - o=<organization_id> - dc=<example_domain_component> - dc=com FEATURE_LDAP_CACHING: true LDAP_CACHE_TTL: 10 # ...where:
LDAP_SUPERUSER_FILTER- Specifies the filter that configures selected users as superusers.
- Start, or restart, your Red Hat Quay deployment.
Results
After enabling the
LDAP_SUPERUSER_FILTERfeature, your LDAP Red Hat Quay users have superuser privileges. The following options are available to superusers:- Manage users
- Manage organizations
- Manage service keys
- View the change log
- Query the usage logs
- Create globally visible user messages
8.5. Common LDAP configuration issues
Invalid LDAP settings in Red Hat Quay can return errors such as invalid credentials, failed superuser verification, or an inability to find the logged-in user.
The following errors might be returned with an invalid configuration.
- Invalid credentials. If you receive this error, the Administrator DN or Administrator DN password values are incorrect. Ensure that you are providing accurate Administrator DN and password values.
Verification of superuser %USERNAME% failed. This error is returned for the following reasons:
- The username has not been found.
- The user does not exist in the remote authentication system.
- LDAP authorization is configured improperly.
Cannot find the current logged in user. When configuring LDAP for Red Hat Quay, situations can occur where the LDAP connection is established successfully using the username and password provided in the Administrator DN fields. However, if the current logged-in user cannot be found within the specified User Relative DN path using the UID Attribute or Mail Attribute fields, two potential reasons typically apply:
- The current logged in user does not exist in the User Relative DN path.
The Administrator DN does not have rights to search or read the specified LDAP path.
To fix this issue, ensure that the logged in user is included in the User Relative DN path, or provide the correct permissions to the Administrator DN account.
8.6. LDAP configuration fields
You can find the full list of LDAP configuration fields for Red Hat Quay in the Configure Red Hat Quay documentation.
Additional resources
Chapter 9. Configuring OIDC for Red Hat Quay
OpenID Connect (OIDC) allows users to authenticate to Red Hat Quay by using their existing credentials from an OIDC provider, such as Red Hat Single Sign-On, Google, GitHub, Microsoft, or others. Other benefits of OIDC include centralized user management, enhanced security, and single sign-on (SSO).
The following procedures show you how to configure Microsoft Entra ID on a standalone deployment of Red Hat Quay, and how to configure Red Hat Single Sign-On on an Operator-based deployment of Red Hat Quay. These procedures are interchangeable depending on your deployment type.
By following these procedures, you can add any OIDC provider to Red Hat Quay, regardless of which identity provider you choose to use.
Additional resources
9.1. Configuring Microsoft Entra ID OIDC on a standalone deployment of Red Hat Quay
To configure Microsoft Entra ID OIDC on a standalone Red Hat Quay deployment, you can add an AZURE_LOGIN_CONFIG block to your config.yaml file and restart the registry.
By integrating Microsoft Entra ID authentication with Red Hat Quay, your organization can take advantage of the centralized user management and security features offered by Microsoft Entra ID. Some features include the ability to manage user access to Red Hat Quay repositories based on their Microsoft Entra ID roles and permissions, and the ability to enable multi-factor authentication and other security features provided by Microsoft Entra ID.
Azure Active Directory (Microsoft Entra ID) authentication for Red Hat Quay allows users to authenticate and access Red Hat Quay by using their Microsoft Entra ID credentials.
- By using the following procedure, you can add any OIDC provider to Red Hat Quay, regardless of which identity provider is being added.
-
If your system has a firewall in use, or a proxy enabled, you must allowlist all Azure API endpoints for each OAuth application that is created. Otherwise, the following error is returned:
x509: certificate signed by unknown authority.
Procedure
Use the following reference and update your
config.yamlfile with your desired OIDC provider’s credentials:AUTHENTICATION_TYPE: OIDC # ... AZURE_LOGIN_CONFIG: CLIENT_ID: <client_id> CLIENT_SECRET: <client_secret> OIDC_SERVER: https://login.microsoftonline.com/<tenant-id>/v2.0/ SERVICE_NAME: Microsoft Entra ID OIDC_DISABLE_USER_ENDPOINT: true VERIFIED_EMAIL_CLAIM_NAME: <verified_email> USE_PKCE: True PKCE_METHOD: "S256" PUBLIC_CLIENT: True # ...where:
AZURE_LOGIN_CONFIG-
Specifies the parent key that holds the OIDC configuration settings. In this example, the parent key used is
AZURE_LOGIN_CONFIG. However, the stringAZUREcan be replaced with any arbitrary string based on your specific needs, for exampleABC123. The following strings are not accepted:GOOGLE,GITHUB. These strings are reserved for their respective identity platforms and require a specificconfig.yamlentry contingent upon which platform you are using. CLIENT_ID- Specifies the client ID of the application that is being registered with the identity provider.
CLIENT_SECRET- Specifies the client secret of the application that is being registered with the identity provider.
OIDC_SERVER-
Specifies the OIDC discovery base URL. The URL must end with a trailing
/because Red Hat Quay uses path joining for OIDC discovery. For new deployments, use the Entra ID v2.0 endpoint. To accept both v1.0 and v2.0 tokens during migration, configure multi-issuer OIDC. SERVICE_NAME- Specifies the name of the service that is being authenticated.
OIDC_DISABLE_USER_ENDPOINT-
Specifies whether to disable the
/userinfoendpoint. Set totruefor Microsoft Entra ID because Azure obtains user information from the token instead of calling the/userinfoendpoint. VERIFIED_EMAIL_CLAIM_NAME- Specifies the name of the claim that is used to verify the email address of the user.
USE_PKCE-
Specifies whether to enable Proof Key for Code Exchange (PKCE) for OIDC authentication. Defaults to
false. PKCE_METHOD-
Specifies the code challenge method used to generate the
code_challengesent in the initial authorization request. Defaults toS256. PUBLIC_CLIENT-
Specifies whether to omit
client_secretduring the token request when the client is public. Defaults tofalse.
Proper configuration of Microsoft Entra ID results in three redirects with the following format:
-
https://QUAY_HOSTNAME/oauth2/<name_of_service>/callback -
https://QUAY_HOSTNAME/oauth2/<name_of_service>/callback/attach -
https://QUAY_HOSTNAME/oauth2/<name_of_service>/callback/cli
-
- Restart your Red Hat Quay deployment.
9.2. Configuring Microsoft Entra ID v2 and multi-issuer OIDC
To accept Microsoft Entra ID v2.0 tokens and On-Behalf-Of API flows in Red Hat Quay, you can configure multi-issuer and multi-audience settings in your OIDC *_LOGIN_CONFIG block. This support enables Microsoft Entra ID v2.0 access tokens, dual v1.0 and v2.0 acceptance during migration, and On-Behalf-Of (OBO) API flows used by integrations such as Red Hat Developer Hub (RHDH).
Prerequisites
- You have an Entra ID app registration for Red Hat Quay with a client secret and redirect URIs for your Red Hat Quay hostname.
-
You can edit the Red Hat Quay
config.yamlfile or OperatorconfigBundleSecretresource.
Procedure
In the Azure Portal, open your Red Hat Quay app registration and set
requestedAccessTokenVersionto2in the app manifest. The field might appear asapi.requestedAccessTokenVersion.For OBO flows, expose an API on the Red Hat Quay app registration, for example
api://quay-api, and grant the upstream application permission to that scope.Update your
*_LOGIN_CONFIGblock with the v2.0 discovery endpoint and multi-issuer settings. For example:AUTHENTICATION_TYPE: OIDC # ... AZURE_LOGIN_CONFIG: CLIENT_ID: <quay_app_client_id> CLIENT_SECRET: <quay_app_client_secret> OIDC_SERVER: https://login.microsoftonline.com/<tenant-id>/v2.0/ SERVICE_NAME: Microsoft Entra ID OIDC_DISABLE_USER_ENDPOINT: true OIDC_ISSUERS: - https://sts.windows.net/<tenant-id>/ - https://login.microsoftonline.com/<tenant-id>/v2.0 OIDC_AUDIENCES: - <quay_app_client_id> - api://quay-api OIDC_ALLOWED_CLIENTS: - <quay_app_client_id> - <upstream_app_client_id> USE_PKCE: true PKCE_METHOD: "S256" PUBLIC_CLIENT: true # ...Restart your Red Hat Quay deployment or reconcile the Operator so the updated configuration is applied.
Note-
Set
OIDC_SERVERto the v2.0 endpoint. The v2.0 JWKS endpoint includes v1.0 signing keys, so one discovery URL supports both token versions. -
If you set
OIDC_ALLOWED_CLIENTS, include your Red Hat Quay application’s ownCLIENT_ID. Direct user logins setazpto the application’s client ID. OmitOIDC_ALLOWED_CLIENTSif you do not need to restrict OBO clients. -
Do not request Microsoft Graph scopes such as
openid profile emailwhen you need tokens with a custom audience. Use application-specific scopes such asapi://quay-api/registry.accessinstead.
-
Set
9.3. Migrating from Entra ID v1.0 to v2.0
To migrate from Microsoft Entra ID v1.0 to v2.0 without interrupting clients in Red Hat Quay, you can set the v2.0 discovery endpoint and temporarily list both issuers in OIDC_ISSUERS.
Procedure
-
Set
OIDC_SERVERto the v2.0 endpoint (Content from login.microsoftonline.com is not included.https://login.microsoftonline.com/<tenant-id>/v2.0/). Add both issuer URLs to
OIDC_ISSUERS:OIDC_ISSUERS: - https://sts.windows.net/<tenant-id>/ - https://login.microsoftonline.com/<tenant-id>/v2.0- Update upstream clients to v2.0 tokens.
-
After all clients use v2.0, remove the v1.0 issuer from
OIDC_ISSUERS.
9.4. Configuring On-Behalf-Of (OBO) flows
To allow an upstream service to call Red Hat Quay APIs on behalf of authenticated users, you can configure On-Behalf-Of (OBO) audiences and allowed clients in your Entra ID OIDC settings.
Procedure
-
In the Azure Portal, expose an API on the Red Hat Quay app registration and add a scope, for example
registry.accessunderapi://quay-api. - Create a second app registration for the upstream service and grant it permission to the Red Hat Quay API scope.
-
Add the exposed API identifier to
OIDC_AUDIENCESin your Red Hat Quay configuration, for exampleapi://quay-api. Add the upstream application’s client ID to
OIDC_ALLOWED_CLIENTS.OBO tokens have
aud: api://quay-apiandazp: <upstream_client_id>. Red Hat Quay validates both claims.
9.5. Troubleshooting Microsoft Entra ID OIDC
Use this reference to resolve common Microsoft Entra ID OIDC errors in Red Hat Quay, including issuer, audience, allowed client, and JWKS signature failures.
| Error or symptom | Resolution |
|---|---|
| Issuer not configured |
The token |
| Audience doesn’t match |
The token |
| Client is not in the allowed clients list |
The token |
| Signature verification failed |
JWKS keys from |
| OIDC discovery fails |
|
Additional resources
9.6. Configuring Red Hat Single Sign-On for Red Hat Quay
You can configure Red Hat Single Sign-On (RH-SSO) as an OpenID Connect provider for Red Hat Quay on OpenShift Container Platform. Create an RH-SSO client, then add an RHSSO_LOGIN_CONFIG block to your Operator config bundle.
Based on the Keycloak project, Red Hat Single Sign-On (RH-SSO) is an open source identity and access management (IAM) solution provided by Red Hat. RH-SSO allows organizations to manage user identities, secure applications, and enforce access control policies across their systems and applications. It also provides a unified authentication and authorization framework, which allows users to log in one time and gain access to multiple applications and resources without needing to re-authenticate.
By configuring Red Hat Single Sign-On on Red Hat Quay, you can create a seamless authentication integration between Red Hat Quay and other application platforms like OpenShift Container Platform.
Additional resources
9.6.1. Configuring the Red Hat Single Sign-On Operator for use with the Red Hat Quay Operator
To prepare Red Hat Single Sign-On for Red Hat Quay on OpenShift Container Platform, you can create a confidential OIDC client in the RH-SSO Admin Console and copy the client secret.
Prerequisites
- You have configured the Red Hat Single Sign-On Operator.
- You have configured SSL/TLS for your Red Hat Quay on OpenShift Container Platform deployment and for Red Hat Single Sign-On.
- You have generated a single Certificate Authority (CA) and uploaded it to your Red Hat Single Sign-On Operator and to your Red Hat Quay configuration.
Procedure
Navigate to the Red Hat Single Sign-On Admin Console.
- On the OpenShift Container Platform Web Console, navigate to Network → Route.
- Select the Red Hat Single Sign-On project from the drop-down list.
- Find the Red Hat Single Sign-On Admin Console in the Routes table.
- Select the Realm that you use to configure Red Hat Quay.
- Click Clients under the Configure section of the navigation panel, and then click Create to add a new OIDC client for Red Hat Quay.
Enter the following information:
-
Client ID:
quay-enterprise -
Client Protocol:
openid-connect -
Root URL:
https://<quay_endpoint>/
-
Client ID:
- Click Save. This results in a redirect to the Clients setting panel.
- Navigate to Access Type and select Confidential.
Navigate to Valid Redirect URIs. You must provide three redirect URIs. The value should be the fully qualified domain name of the Red Hat Quay registry appended with
/oauth2/redhatsso/callback. For example:-
https://<quay_endpoint>/oauth2/redhatsso/callback -
https://<quay_endpoint>/oauth2/redhatsso/callback/attach -
https://<quay_endpoint>/oauth2/redhatsso/callback/cli
-
- Click Save and navigate to the new Credentials setting.
- Copy the value of the Secret.
9.6.2. Configuring the Red Hat Quay Operator to use Red Hat Single Sign-On
To enable Red Hat Single Sign-On authentication for an Operator-based Red Hat Quay deployment, you can add an RHSSO_LOGIN_CONFIG block to your config bundle and restart the registry.
Prerequisites
- You have configured the Red Hat Single Sign-On Operator.
- You have configured SSL/TLS for your Red Hat Quay on OpenShift Container Platform deployment and for Red Hat Single Sign-On.
- You have generated a single Certificate Authority (CA) and uploaded it to your Red Hat Single Sign-On Operator and to your Red Hat Quay configuration.
Procedure
-
Edit your Red Hat Quay
config.yamlfile by navigating to Operators → Installed Operators → Red Hat Quay → Quay Registry → Config Bundle Secret. Then, click Actions → Edit Secret. Alternatively, you can update theconfig.yamlfile locally. Add the following information to your Red Hat Quay on OpenShift Container Platform
config.yamlfile:# ... RHSSO_LOGIN_CONFIG: CLIENT_ID: <client_id> CLIENT_SECRET: <client_secret> OIDC_SERVER: <oidc_server_url> SERVICE_NAME: <service_name> SERVICE_ICON: <service_icon> VERIFIED_EMAIL_CLAIM_NAME: <example_email_address> PREFERRED_USERNAME_CLAIM_NAME: <preferred_username> LOGIN_SCOPES: [ 'openid', 'roles' ] USE_PKCE: true PKCE_METHOD: "S256" # ...
where:
RHSSO_LOGIN_CONFIG-
Specifies the parent key that holds the OIDC configuration settings. In this example, the parent key used is
RHSSO_LOGIN_CONFIG. The string can be replaced with any arbitrary string based on your specific needs, for exampleABC123. However, the stringsGOOGLEandGITHUBare not accepted. These strings are reserved for their respective identity platforms and require a specificconfig.yamlentry contingent upon which platform you are using. CLIENT_ID-
Specifies the client ID of the application that is being registered with the identity provider. For example,
quay. CLIENT_SECRET- Specifies the client secret.
OIDC_SERVER-
Specifies the fully qualified domain name (FQDN) of the Red Hat Single Sign-On instance, appended with
/auth/realms/and the Realm name. You must include the forward slash at the end, for example,https://sso-redhat.example.com/auth/realms/<your_realm_name>/. SERVICE_NAME-
Specifies the name that is displayed on the Red Hat Quay login page, for example,
Red Hat Single Sign-On. SERVICE_ICON-
Specifies the icon on the login screen. For example,
/static/img/RedHat.svg. VERIFIED_EMAIL_CLAIM_NAME- Specifies the name of the claim that is used to verify the email address of the user.
PREFERRED_USERNAME_CLAIM_NAME- Specifies the name of the claim that is used for the preferred username of the user.
LOGIN_SCOPES-
Specifies the scopes to send to the OIDC provider when performing the login flow, for example,
openid. USE_PKCE-
Specifies whether to enable Proof Key for Code Exchange (PKCE). Defaults to
false. PKCE_METHOD-
Specifies the code challenge method used to generate the
code_challengesent in the initial authorization request. Defaults toS256.
- Restart your Red Hat Quay on OpenShift Container Platform deployment with Red Hat Single Sign-On enabled.
9.7. Team synchronization for Red Hat Quay OIDC deployments
You can sync Red Hat Quay team membership with groups from an OpenID Connect (OIDC) identity provider. Enable team syncing in your config.yaml file, then configure directory sync for a team in the UI.
9.7.1. Enabling synchronization for Red Hat Quay OIDC deployments
To enable team synchronization when your Red Hat Quay deployment uses an OIDC authenticator, you can set the team syncing fields in your config.yaml file and restart the registry.
The following procedure does not use a specific OIDC provider. Instead, it provides a general outline of how best to approach team synchronization between an OIDC provider and Red Hat Quay. Any OIDC provider can be used to enable team synchronization, however, setup might vary depending on your provider.
Procedure
Update your
config.yamlfile with the following information:AUTHENTICATION_TYPE: OIDC # ... OIDC_LOGIN_CONFIG: CLIENT_ID: CLIENT_SECRET: OIDC_SERVER: SERVICE_NAME: PREFERRED_GROUP_CLAIM_NAME: LOGIN_SCOPES: [ 'openid', '<example_scope>' ] OIDC_DISABLE_USER_ENDPOINT: false # ... FEATURE_TEAM_SYNCING: true FEATURE_NONSUPERUSER_TEAM_SYNCING_SETUP: true FEATURE_UI_V2: true # ...
where:
CLIENT_ID- Specifies the registered OIDC client ID for this Red Hat Quay instance. This field is required.
CLIENT_SECRET- Specifies the registered OIDC client secret for this Red Hat Quay instance. This field is required.
OIDC_SERVER-
Specifies the address of the OIDC server that is being used for authentication. This URL should be such that a
GETrequest to<OIDC_SERVER>/.well-known/openid-configurationreturns the provider’s configuration information. This field is required. SERVICE_NAME- Specifies the name of the service that is being authenticated. This field is required.
PREFERRED_GROUP_CLAIM_NAME- Specifies the key name within the OIDC token payload that holds information about the user’s group memberships. This field allows the authentication system to extract group membership information from the OIDC token so that it can be used with Red Hat Quay. This field is required.
LOGIN_SCOPES-
Specifies the scopes Red Hat Quay requests during login. Must include
'openid'. Each scope must also be listed in the identity provider’sscopes_supportedfrom/.well-known/openid-configuration. This field is required. OIDC_DISABLE_USER_ENDPOINT-
Specifies whether to allow or disable the
/userinfoendpoint. If using Azure Entra ID, set this field totrue. Defaults tofalse. FEATURE_TEAM_SYNCING- Specifies whether to allow team membership to be synced from a backing group in the authentication engine. This field is required.
FEATURE_NONSUPERUSER_TEAM_SYNCING_SETUP- Optional. If enabled, non-superusers can configure team synchronization.
- Restart your Red Hat Quay registry.
9.7.2. Setting up your Red Hat Quay deployment for team synchronization
To sync a Red Hat Quay team with an OIDC group, you can create an organization and team in the UI, enable directory sync, and verify membership changes from the identity provider.
Prerequisites
- You have enabled team synchronization for your OIDC-authenticated Red Hat Quay deployment.
Procedure
- Log in to your Red Hat Quay registry by using your OIDC provider.
- On the Red Hat Quay v2 UI dashboard, click Create Organization.
-
Enter an organization name, for example,
test-org. - Click the name of the organization.
- In the navigation pane, click Teams and membership.
-
Click Create new team and enter a name, for example,
testteam. On the Create team pop-up:
- Optional. Add this team to a repository.
-
Add a team member, for example,
user1, by typing in the user’s account name. - Add a robot account to this team. This page provides the option to create a robot account.
- Click Next.
- On the Review and Finish page, review the information that you have provided and click Review and Finish.
- To enable team synchronization for your Red Hat Quay OIDC deployment, click Enable Directory Sync on the Teams and membership page.
You are prompted to enter the group Object ID if your OIDC authenticator is Azure Entra ID, or the group name if using a different provider.
WarningAfter you enable team syncing, membership of users who are already part of the team is revoked. The OIDC group is the single source of truth. This action is not reversible. Team user membership from within Red Hat Quay is read-only.
- Click Enable Sync.
You are returned to the Teams and membership page. Note that users of this team are removed and are re-added upon logging back in. At this stage, only the robot account is still part of the team.
A banner at the top of the page confirms that the team is synced:
This team is synchronized with a group in OIDC and its user membership is therefore read-only.
By clicking the Directory Synchronization Config accordion, the OIDC group that your deployment syncs with appears.
- Log out of your Red Hat Quay registry.
Verification
- Log back in to your Red Hat Quay registry.
-
Click Organizations → test-org → test-team → Teams and memberships.
user1now appears as a team member for this team. - Navigate to your OIDC provider’s administration console.
- Navigate to the Users page of your OIDC provider. The name of this page varies depending on your provider.
-
Click the name of the user associated with Red Hat Quay, for example,
user1. - Remove the user from the group in the configured identity provider.
- Remove, or unassign, the access permissions from the user.
- Log in to your Red Hat Quay registry.
-
Click Organizations → test-org → test-team → Teams and memberships.
user1has been removed from this team.
Chapter 10. Keyless authentication with robot accounts
With keyless authentication in Red Hat Quay, you can exchange an OIDC token for a short-lived robot account token that expires after one hour.
In previous versions of Red Hat Quay, robot account tokens were valid for the lifetime of the token unless deleted or regenerated. Tokens that do not expire have security implications for users who do not want to store long-term passwords or manage the deletion or regeneration of authentication tokens.
Keyless authentication reduces the risk of robot token exposure by removing exchanged tokens after one hour.
Configuring keyless authentication with robot accounts is a multi-step procedure that requires setting a robot federation, generating an OAuth2 token from your OIDC provider, and exchanging the OAuth2 token for a robot account access token.
10.1. Generating an OAuth2 token with Red Hat Single Sign-On
To exchange an external OIDC token for a Red Hat Quay robot account token, you can first generate an OAuth2 token by using Red Hat Single Sign-On.
Procedure
On the Red Hat Single Sign-On UI:
- Click Clients and then the name of the application or service that can request authentication of a user.
On the Settings page of your client, ensure that the following options are set or enabled:
- Client ID
- Valid redirect URI
- Client authentication
- Authorization
- Standard flow
Direct access grants
NoteSettings can differ depending on your setup.
- On the Credentials page, store the Client Secret for future use.
-
On the Users page, click Add user and enter a username, for example,
service-account-quaydev. Then, click Create. - Click the name of the user, for example service-account-quaydev on the Users page.
- Click the Credentials tab → Set password → and provide a password for the user. If warranted, you can make this password temporary by selecting the Temporary option.
Click the Realm settings tab → OpenID Endpoint Configuration. Store the
/protocol/openid-connect/tokenendpoint. For example:http://localhost:8080/realms/master/protocol/openid-connect/token
On a web browser, navigate to the following URL:
http://<keycloak_url>/realms/<realm_name>/protocol/openid-connect/auth?response_type=code&client_id=<client_id>
- When prompted, log in with the service-account-quaydev user and the temporary password you set. Complete the login by providing the required information and setting a permanent password if necessary.
You are redirected to the URI address provided for your client. For example:
https://localhost:3000/cb?session_state=5c9bce22-6b85-4654-b716-e9bbb3e755bc&iss=http%3A%2F%2Flocalhost%3A8080%2Frealms%2Fmaster&code=ea5b76eb-47a5-4e5d-8f71-0892178250db.5c9bce22-6b85-4654-b716-e9bbb3e755bc.cdffafbc-20fb-42b9-b254-866017057f43
Take note of the
codeprovided in the address. For example:code=ea5b76eb-47a5-4e5d-8f71-0892178250db.5c9bce22-6b85-4654-b716-e9bbb3e755bc.cdffafbc-20fb-42b9-b254-866017057f43
NoteThis is a temporary code that can only be used one time. If necessary, you can refresh the page or revisit the URL to obtain another code.
On your terminal, use the following
curl -X POSTcommand to generate a temporary OAuth2 access token:$ curl -X POST "http://localhost:8080/realms/master/protocol/openid-connect/token" \ -H "Content-Type: application/x-www-form-urlencoded" \ -d "client_id=quaydev" \ -d "client_secret=g8gPsBLxVrLo2PjmZkYBdKvcB9C7fmBz" \ -d "grant_type=authorization_code" \ -d "code=ea5b76eb-47a5-4e5d-8f71-0892178250db.5c9bce22-6b85-4654-b716-e9bbb3e755bc.cdffafbc-20fb-42b9-b254-866017057f43"
where:
http://localhost:8080/realms/master/protocol/openid-connect/token-
Specifies the
protocol/openid-connect/tokenendpoint found on the Realm settings page of the Red Hat Single Sign-On UI. quaydev- Specifies the Client ID used for this procedure.
g8gPsBLxVrLo2PjmZkYBdKvcB9C7fmBz- Specifies the Client Secret for the Client ID.
ea5b76eb-47a5-4e5d-8f71-0892178250db.5c9bce22-6b85-4654-b716-e9bbb3e755bc.cdffafbc-20fb-42b9-b254-866017057f43Specifies the code returned from the redirect URI.
Example output
{"access_token":"<access_token>...",
"expires_in":60,"refresh_expires_in":1800,"refresh_token":"<refresh_token>","token_type":"Bearer","not-before-policy":0,"session_state":"5c9bce22-6b85-4654-b716-e9bbb3e755bc","scope":"profile email"}
-
Store the
access_tokenfrom the previous step so that you can exchange it for a Red Hat Quay robot account token in the following procedure.
10.2. Setting up a robot account federation by using the Red Hat Quay v2 UI
To configure robot account federation in Red Hat Quay, you can map an OIDC issuer and subject to a robot account in the v2 UI.
This procedure uses Red Hat Single Sign-On, which is based on the Keycloak project. The steps, and the information used to configure a robot account federation, vary depending on your OIDC provider.
Prerequisites
-
You have created an organization. The following example uses
fed_test. -
You have created a robot account. The following example uses
fest_test+robot1. - You have configured OIDC for your Red Hat Quay deployment. The following example uses Red Hat Single Sign-On.
Procedure
On the Red Hat Single Sign-On main page:
-
Select the appropriate realm that is authenticated for use with Red Hat Quay. Store the issuer URL, for example,
https://keycloak-auth-realm.quayadmin.org/realms/quayrealm. - Click Users → the name of the user to be linked with the robot account for authentication. You must use the same user account that you used when generating the OAuth2 access token.
On the Details page, store the ID of the user, for example,
449e14f8-9eb5-4d59-a63e-b7a77c75f770.NoteThe information collected in this step varies depending on your OIDC provider. For example, with Red Hat Single Sign-On, the ID of a user is used as the Subject to configure the robot account federation in a subsequent step. For a different OIDC provider, like Microsoft Entra ID, this information is stored as the Subject.
-
Select the appropriate realm that is authenticated for use with Red Hat Quay. Store the issuer URL, for example,
On your Red Hat Quay registry:
- Navigate to Organizations and click the name of your organization, for example, fed_test.
- Click Robot Accounts.
- Click the menu kebab → Set robot federation.
- Click the + symbol.
In the popup window, include the following information:
-
Issuer URL:
https://keycloak-auth-realm.quayadmin.org/realms/quayrealm. For Red Hat Single Sign-On, this is the URL of your Red Hat Single Sign-On realm. This might vary depending on your OIDC provider. -
Subject:
449e14f8-9eb5-4d59-a63e-b7a77c75f770. For Red Hat Single Sign-On, the Subject is the ID of your Red Hat Single Sign-On user. This varies depending on your OIDC provider. For example, if you are using Microsoft Entra ID, the Subject is the Subject of your Entra ID user.
-
Issuer URL:
Click Save.
NoteThe Red Hat Quay v2 UI federation modal accepts Issuer URL and Subject only.
10.3. Configuring federation audiences
To manage robot federation entries in Red Hat Quay, you can use the robot federation API to set the issuer and subject that map an OIDC identity to a robot account.
Each robot federation entry maps an external OIDC identity (issuer and subject) to a Red Hat Quay robot account. Starting in Red Hat Quay 3.18, robot federation supports an optional audiences array on each entry for token audience validation during federated robot token exchange (GET /oauth2/federation/robot/token).
In Red Hat Quay 3.18, create and update requests persist issuer and subject only. The optional audiences field is not stored from API requests, and the Red Hat Quay v2 UI federation modal does not provide an audiences field. Until API support is available, federated robot token exchange skips audience validation and logs a deprecation warning when audiences is not stored for the matching federation entry. A later release requires audiences for federated robot authentication.
When audiences is present in stored federation configuration, configure it to match the aud claim values your OIDC provider issues—for example, a custom API audience such as api://quay-api for Microsoft Entra ID v2.0 tokens, or your OIDC client ID for standard flows. For Microsoft Entra ID v2.0, use an application-specific audience rather than the Microsoft Graph audience.
Prerequisites
- You have created an organization and robot account.
- You have configured OIDC for your Red Hat Quay deployment.
- You have the issuer URL and subject identifier from your OIDC provider.
Procedure
Create or update the robot federation configuration by using
POST /api/v1/organization/{orgname}/robots/{robot_shortname}/federation. Includeissuerandsubjectin each federation entry. For example:$ curl -X POST "https://<quay-server.example.com>/api/v1/organization/fed_test/robots/robot1/federation" \ -H "Authorization: Bearer <your_access_token>" \ -H "Content-Type: application/json" \ -d '[ { "issuer": "https://login.microsoftonline.com/<tenant-id>/v2.0", "subject": "<user-object-id>" } ]'- After you configure federation, exchange an external OIDC access token for a Red Hat Quay robot token.
Additional resources
10.4. Exchanging an OAuth2 access token for a Red Hat Quay robot account token
To authenticate with a federated robot account in Red Hat Quay, you can exchange an OAuth2 access token for a short-lived robot token by using a Python script.
The following example uses a Python script to exchange the OAuth2 access token for a Red Hat Quay robot account token.
Prerequisites
-
You have the
python3CLI tool installed.
Procedure
Save the following Python script in a
.pyfile, for example,robot_fed_token_auth.py:import requests import os TOKEN=os.environ.get('TOKEN') robot_user = "fed-test+robot1" def get_quay_robot_token(fed_token): URL = "https://<quay-server.example.com>/oauth2/federation/robot/token" response = requests.get(URL, auth=(robot_user,fed_token)) print(response) print(response.text) if __name__ == "__main__": get_quay_robot_token(TOKEN)where:
response = requests.get(URL, auth=(robot_user,fed_token))-
Specifies the request that retrieves the robot token. If your Red Hat Quay deployment is using custom SSL/TLS certificates, the response must be
response = requests.get(URL,auth=(robot_user,fed_token),verify=False), which includes theverify=Falseflag.
Export the OAuth2 access token as
TOKEN. For example:$ export TOKEN=<export_token>...
Run the
robot_fed_token_auth.pyscript by entering the following command:$ python3 robot_fed_token_auth.py
Example output
<Response [200]> {"token": "string..."}ImportantThis token expires after one hour. After one hour, you must generate a new token.
Export the robot account access token as
QUAY_TOKEN. For example:$ export QUAY_TOKEN=<quay_token>
10.5. Pushing and pulling images
To verify federated robot account access in Red Hat Quay, you can log in with the robot token and pull images that the robot is allowed to access.
Prerequisites
- You have exported the OAuth2 access token into a new robot account access token.
Procedure
Log in to your Red Hat Quay registry by using the
fed_test+robot1robot account and theQUAY_TOKENaccess token. For example:$ podman login <quay-server.example.com> -u fed_test+robot1 -p $QUAY_TOKEN
Pull an image from a Red Hat Quay repository for which the robot account has the proper permissions. For example:
$ podman pull <quay-server.example.com>/<repository_name>/<image_name>
Example output
Getting image source signatures
Copying blob 900e6061671b done
Copying config 8135583d97 done
Writing manifest to image destination
Storing signatures
8135583d97feb82398909c9c97607159e6db2c4ca2c885c0b8f590ee0f9fe90d
0.57user 0.11system 0:00.99elapsed 68%CPU (0avgtext+0avgdata 78716maxresident)k
800inputs+15424outputs (18major+6528minor)pagefaults 0swaps
Attempt to pull an image from a Red Hat Quay repository for which the robot account does not have the proper permissions. For example:
$ podman pull <quay-server.example.com>/<different_repository_name>/<image_name>
Example output
Error: initializing source docker://quay-server.example.com/example_repository/busybox:latest: reading manifest in quay-server.example.com/example_repository/busybox: unauthorized: access to the requested resource is not authorized
After one hour, the credentials for this robot account expire. Afterwards, you must generate a new access token for this robot account.
Chapter 11. Configuring AWS STS for Red Hat Quay
You can configure AWS Security Token Service (STS) with Red Hat Quay to authenticate to Amazon S3 by using temporary credentials. STS is available for standalone deployments, Red Hat Quay on OpenShift Container Platform, and Red Hat Quay on Red Hat OpenShift Service on AWS (ROSA).
AWS STS provides temporary, limited-privilege credentials for AWS Identity and Access Management (IAM) users. When Red Hat Quay uses Amazon S3 as object storage, STS protocols can authenticate access so that sensitive data remains properly authenticated and authorized.
Configuring AWS STS for OpenShift Container Platform or ROSA requires creating an AWS IAM user, creating an S3 role, and configuring your Red Hat Quay config.yaml file to include the proper resources.
11.1. Configuring Red Hat Quay to use AWS STS
To configure Red Hat Quay to use AWS STS for Amazon S3 storage, you can update the DISTRIBUTED_STORAGE_CONFIG block in your config.yaml file and restart the registry.
Procedure
Update your
config.yamlfile for Red Hat Quay to include the following information:# ... DISTRIBUTED_STORAGE_CONFIG: default: - STSS3Storage - sts_role_arn: <role_arn> s3_bucket: <s3_bucket_name> storage_path: <storage_path> s3_region: <region> sts_user_access_key: <s3_user_access_key> sts_user_secret_key: <s3_user_secret_key> # ...where:
sts_role_arn- Specifies the unique Amazon Resource Name (ARN) required when configuring AWS STS.
s3_bucket- Specifies the name of your S3 bucket.
storage_path-
Specifies the storage path for data. Usually
/datastorage. s3_region-
Specifies the Amazon Web Services region. Defaults to
us-east-1. sts_user_access_key- Specifies the generated AWS S3 user access key required when configuring AWS STS.
sts_user_secret_key- Specifies the generated AWS S3 user secret key required when configuring AWS STS.
- Restart your Red Hat Quay deployment.
Verification
Tag a sample image, for example,
busybox, that you push to the repository. For example:$ podman tag docker.io/library/busybox <quay-server.example.com>/<organization_name>/busybox:test
Push the sample image by running the following command:
$ podman push <quay-server.example.com>/<organization_name>/busybox:test
- Verify that the push was successful by navigating to the Organization that you pushed the image to in your Red Hat Quay registry → Tags.
- Navigate to the Amazon Web Services (AWS) console and locate your S3 bucket.
- Click the name of your S3 bucket.
- On the Objects page, click datastorage/.
On the datastorage/ page, the following resources should appear:
- sha256/
uploads/
These resources indicate that the push was successful, and that AWS STS is properly configured.
Chapter 12. Prometheus and Grafana metrics under Red Hat Quay
Red Hat Quay exports a Prometheus- and Grafana-compatible metrics endpoint on each instance so that you can monitor and alert on registry activity.
Additional resources
12.1. Standalone Red Hat Quay
To expose Prometheus metrics for a standalone Red Hat Quay deployment, you can publish port 9091 when you start the Quay container.
Procedure
When using
podman runto start theQuaycontainer, expose the metrics port9091:$ sudo podman run -d --rm -p 80:8080 -p 443:8443 -p 9091:9091\ --name=quay \ -v $QUAY/config:/conf/stack:Z \ -v $QUAY/storage:/datastorage:Z \ registry.redhat.io/quay/quay-rhel9:v3.18.0
Verify that the metrics are available:
$ curl quay.example.com:9091/metrics
12.2. Red Hat Quay Operator
To access Prometheus metrics for an Operator-managed Red Hat Quay deployment, you can use the cluster IP of the quay-metrics service.
Procedure
Determine the cluster IP for the
quay-metricsservice:$ oc get services -n quay-enterprise NAME TYPE CLUSTER-IP EXTERNAL-IP PORT(S) AGE example-registry-clair-app ClusterIP 172.30.61.161 <none> 80/TCP,8089/TCP 18h example-registry-clair-postgres ClusterIP 172.30.122.136 <none> 5432/TCP 18h example-registry-quay-app ClusterIP 172.30.72.79 <none> 443/TCP,80/TCP,8081/TCP,55443/TCP 18h example-registry-quay-config-editor ClusterIP 172.30.185.61 <none> 80/TCP 18h example-registry-quay-database ClusterIP 172.30.114.192 <none> 5432/TCP 18h example-registry-quay-metrics ClusterIP 172.30.37.76 <none> 9091/TCP 18h example-registry-quay-redis ClusterIP 172.30.157.248 <none> 6379/TCP 18h
Connect to your cluster and access the metrics using the cluster IP and port for the
quay-metricsservice:$ oc debug node/master-0 sh-4.4# curl 172.30.37.76:9091/metrics # HELP go_gc_duration_seconds A summary of the pause duration of garbage collection cycles. # TYPE go_gc_duration_seconds summary go_gc_duration_seconds{quantile="0"} 4.0447e-05 go_gc_duration_seconds{quantile="0.25"} 6.2203e-05 ...
12.3. Setting up Prometheus to consume metrics
To allow Prometheus to scrape metrics from every Red Hat Quay instance in a cluster, you can publish the instances under a single DNS name that Prometheus can resolve.
12.3.1. DNS configuration under Kubernetes
To provide a DNS entry for Prometheus on Kubernetes, you can configure a simple Kubernetes service that resolves to your Red Hat Quay instances.
Additional resources
12.3.2. DNS configuration for a manual cluster
To manage a Prometheus DNS record outside Kubernetes, you can use SkyDNS with an etcd cluster to track Red Hat Quay instance addresses.
SkyDNS can run on an etcd cluster. Entries for each Red Hat Quay instance in the cluster can be added and removed in the etcd store. SkyDNS regularly reads them from there and updates the list of Red Hat Quay instances in the DNS record accordingly.
12.4. Introduction to metrics
Red Hat Quay exposes metrics to help monitor the registry, including metrics for general registry usage, uploads, downloads, garbage collection, and authentication.
12.4.1. General registry statistics
Use these general registry statistics metrics to track how large a Red Hat Quay deployment has grown, including users, robots, organizations, repositories, and unscanned images.
| Metric name | Description |
|---|---|
| quay_user_rows | Number of users in the database |
| quay_robot_rows | Number of robot accounts in the database |
| quay_org_rows | Number of organizations in the database |
| quay_repository_rows | Number of repositories in the database |
| quay_security_scanning_unscanned_images_remaining_total | Number of images that are not scanned by the latest security scanner |
Sample metrics output
# HELP quay_user_rows number of users in the database
# TYPE quay_user_rows gauge
quay_user_rows{host="example-registry-quay-app-6df87f7b66-9tfn6",instance="",job="quay",pid="65",process_name="globalpromstats.py"} 3

# HELP quay_robot_rows number of robot accounts in the database
# TYPE quay_robot_rows gauge
quay_robot_rows{host="example-registry-quay-app-6df87f7b66-9tfn6",instance="",job="quay",pid="65",process_name="globalpromstats.py"} 2

# HELP quay_org_rows number of organizations in the database
# TYPE quay_org_rows gauge
quay_org_rows{host="example-registry-quay-app-6df87f7b66-9tfn6",instance="",job="quay",pid="65",process_name="globalpromstats.py"} 2

# HELP quay_repository_rows number of repositories in the database
# TYPE quay_repository_rows gauge
quay_repository_rows{host="example-registry-quay-app-6df87f7b66-9tfn6",instance="",job="quay",pid="65",process_name="globalpromstats.py"} 4

# HELP quay_security_scanning_unscanned_images_remaining number of images that are not scanned by the latest security scanner
# TYPE quay_security_scanning_unscanned_images_remaining gauge
quay_security_scanning_unscanned_images_remaining{host="example-registry-quay-app-6df87f7b66-9tfn6",instance="",job="quay",pid="208",process_name="secscan:application"} 512.4.2. Queue items
Use these queue items metrics to monitor the work queues that Red Hat Quay uses for exports, garbage collection, notifications, builds, and storage replication.
| Metric name | Description |
|---|---|
| quay_queue_items_available | Number of items in a specific queue |
| quay_queue_items_locked | Number of items that are running |
| quay_queue_items_available_unlocked | Number of items that are waiting to be processed |
Metric labels:
queue_nameThe name of the queue. One of:
exportactionlogs- Queued requests to export action logs. These logs are then processed and put in storage. A link is then sent to the requester by email.
namespacegc- Queued namespaces to be garbage collected.
notification- Queue for repository notifications to be sent out.
repositorygc- Queued repositories to be garbage collected.
secscanv4- Notification queue specific for Clair V4.
dockerfilebuild- Queue for Red Hat Quay container image builds.
imagestoragereplication- Queued blob to be replicated across multiple storages.
chunk_cleanup- Queued blob segments that need to be deleted. This is only used by some storage implementations, for example, Swift.
For example, the queue labeled repositorygc contains the repositories marked for deletion by the repository garbage collection worker. For metrics with a queue_name label of repositorygc:
-
quay_queue_items_lockedis the number of repositories currently being deleted. -
quay_queue_items_available_unlockedis the number of repositories waiting to get processed by the worker.
Sample metrics output
# HELP quay_queue_items_available number of queue items that have not expired
# TYPE quay_queue_items_available gauge
quay_queue_items_available{host="example-registry-quay-app-6df87f7b66-9tfn6",instance="",job="quay",pid="63",process_name="exportactionlogsworker.py",queue_name="exportactionlogs"} 0
...

# HELP quay_queue_items_available_unlocked number of queue items that have not expired and are not locked
# TYPE quay_queue_items_available_unlocked gauge
quay_queue_items_available_unlocked{host="example-registry-quay-app-6df87f7b66-9tfn6",instance="",job="quay",pid="63",process_name="exportactionlogsworker.py",queue_name="exportactionlogs"} 0
...

# HELP quay_queue_items_locked number of queue items that have been acquired
# TYPE quay_queue_items_locked gauge
quay_queue_items_locked{host="example-registry-quay-app-6df87f7b66-9tfn6",instance="",job="quay",pid="63",process_name="exportactionlogsworker.py",queue_name="exportactionlogs"} 012.4.3. Garbage collection metrics
Use these garbage collection metrics to track how often garbage collection workers run and how many namespaces, repositories, and blobs they remove.
| Metric name | Description |
|---|---|
| quay_gc_iterations_total | Number of iterations by the GCWorker |
| quay_gc_namespaces_purged_total | Number of namespaces purged by the NamespaceGCWorker |
| quay_gc_repos_purged_total | Number of repositories purged by the RepositoryGCWorker or NamespaceGCWorker |
| quay_gc_storage_blobs_deleted_total | Number of storage blobs deleted |
Sample metrics output
# TYPE quay_gc_iterations_created gauge
quay_gc_iterations_created{host="example-registry-quay-app-6df87f7b66-9tfn6",instance="",job="quay",pid="208",process_name="secscan:application"} 1.6317823190189714e+09
...

# HELP quay_gc_iterations_total number of iterations by the GCWorker
# TYPE quay_gc_iterations_total counter
quay_gc_iterations_total{host="example-registry-quay-app-6df87f7b66-9tfn6",instance="",job="quay",pid="208",process_name="secscan:application"} 0
...

# TYPE quay_gc_namespaces_purged_created gauge
quay_gc_namespaces_purged_created{host="example-registry-quay-app-6df87f7b66-9tfn6",instance="",job="quay",pid="208",process_name="secscan:application"} 1.6317823190189433e+09
...

# HELP quay_gc_namespaces_purged_total number of namespaces purged by the NamespaceGCWorker
# TYPE quay_gc_namespaces_purged_total counter
quay_gc_namespaces_purged_total{host="example-registry-quay-app-6df87f7b66-9tfn6",instance="",job="quay",pid="208",process_name="secscan:application"} 0
....

# TYPE quay_gc_repos_purged_created gauge
quay_gc_repos_purged_created{host="example-registry-quay-app-6df87f7b66-9tfn6",instance="",job="quay",pid="208",process_name="secscan:application"} 1.631782319018925e+09
...

# HELP quay_gc_repos_purged_total number of repositories purged by the RepositoryGCWorker or NamespaceGCWorker
# TYPE quay_gc_repos_purged_total counter
quay_gc_repos_purged_total{host="example-registry-quay-app-6df87f7b66-9tfn6",instance="",job="quay",pid="208",process_name="secscan:application"} 0
...

# TYPE quay_gc_storage_blobs_deleted_created gauge
quay_gc_storage_blobs_deleted_created{host="example-registry-quay-app-6df87f7b66-9tfn6",instance="",job="quay",pid="208",process_name="secscan:application"} 1.6317823190189059e+09
...

# HELP quay_gc_storage_blobs_deleted_total number of storage blobs deleted
# TYPE quay_gc_storage_blobs_deleted_total counter
quay_gc_storage_blobs_deleted_total{host="example-registry-quay-app-6df87f7b66-9tfn6",instance="",job="quay",pid="208",process_name="secscan:application"} 0
...12.4.4. Multipart uploads metrics
Use these multipart upload metrics to monitor blob uploads to object storage and to help identify failures when Red Hat Quay cannot complete an upload.
The multipart uploads metrics show the number of blob uploads to storage (S3, Rados, GoogleCloudStorage, RHOCS).
| Metric name | Description |
|---|---|
| quay_multipart_uploads_started_total | Number of multipart uploads to Red Hat Quay storage that started |
| quay_multipart_uploads_completed_total | Number of multipart uploads to Red Hat Quay storage that completed |
Sample metrics output
# TYPE quay_multipart_uploads_completed_created gauge
quay_multipart_uploads_completed_created{host="example-registry-quay-app-6df87f7b66-9tfn6",instance="",job="quay",pid="208",process_name="secscan:application"} 1.6317823308284895e+09
...

# HELP quay_multipart_uploads_completed_total number of multipart uploads to Quay storage that completed
# TYPE quay_multipart_uploads_completed_total counter
quay_multipart_uploads_completed_total{host="example-registry-quay-app-6df87f7b66-9tfn6",instance="",job="quay",pid="208",process_name="secscan:application"} 0

# TYPE quay_multipart_uploads_started_created gauge
quay_multipart_uploads_started_created{host="example-registry-quay-app-6df87f7b66-9tfn6",instance="",job="quay",pid="208",process_name="secscan:application"} 1.6317823308284352e+09
...

# HELP quay_multipart_uploads_started_total number of multipart uploads to Quay storage that started
# TYPE quay_multipart_uploads_started_total counter
quay_multipart_uploads_started_total{host="example-registry-quay-app-6df87f7b66-9tfn6",instance="",job="quay",pid="208",process_name="secscan:application"} 0
...12.4.5. Image push and pull metrics
Use these image push and pull metrics to track how many images and bytes clients upload to or download from the Red Hat Quay registry.
12.4.5.1. Image pulls total
| Metric name | Description |
|---|---|
| quay_registry_image_pulls_total | The number of images downloaded from the registry. |
Metric labels:
protocol-
The registry protocol used (should always be
v2). ref- Reference used to pull - tag, manifest.
status- HTTP return code of the request.
12.4.5.2. Image bytes pulled
| Metric name | Description |
|---|---|
| quay_registry_image_pulled_estimated_bytes_total | The number of bytes downloaded from the registry. |
Metric labels:
protocol-
The registry protocol used (should always be
v2).
12.4.5.3. Image pushes total
| Metric name | Description |
|---|---|
| quay_registry_image_pushes_total | The number of images uploaded to the registry. |
Metric labels:
protocol-
The registry protocol used (should always be
v2). pstatus- HTTP return code of the request.
pmedia_type- The uploaded manifest type.
12.4.5.4. Image bytes pushed
| Metric name | Description |
|---|---|
| quay_registry_image_pushed_bytes_total | The number of bytes uploaded to the registry. |
Sample metrics output
# HELP quay_registry_image_pushed_bytes_total number of bytes pushed to the registry
# TYPE quay_registry_image_pushed_bytes_total counter
quay_registry_image_pushed_bytes_total{host="example-registry-quay-app-6df87f7b66-9tfn6",instance="",job="quay",pid="221",process_name="registry:application"} 0
...12.4.6. Authentication metrics
Use these authentication metrics to count registry and API authentication requests by type and by whether each request succeeded or failed.
| Metric name | Description |
|---|---|
| quay_authentication_attempts_total | Number of authentication attempts across the registry and API |
Metric labels:
auth_kindThe type of authentication used, including:
-
basic -
oauth -
credentials
-
success-
trueorfalse.
Sample metrics output
# TYPE quay_authentication_attempts_created gauge
quay_authentication_attempts_created{auth_kind="basic",host="example-registry-quay-app-6df87f7b66-9tfn6",instance="",job="quay",pid="221",process_name="registry:application",success="True"} 1.6317843039374158e+09
...

# HELP quay_authentication_attempts_total number of authentication attempts across the registry and API
# TYPE quay_authentication_attempts_total counter
quay_authentication_attempts_total{auth_kind="basic",host="example-registry-quay-app-6df87f7b66-9tfn6",instance="",job="quay",pid="221",process_name="registry:application",success="True"} 2
...Chapter 13. Red Hat Quay quota management and enforcement overview
With Red Hat Quay quota management, superusers can track storage consumption and set soft or hard limits for organizations, repositories, or the entire registry.
Red Hat Quay superusers can manage capacity limits in the following ways:
- Quota reporting: An administrator can track the storage consumption of all organizations. Users can track the storage consumption of their assigned organization.
- Quota management: An administrator can define soft and hard checks for Red Hat Quay users. Soft checks tell users if the storage consumption of an organization reaches their configured threshold. Hard checks prevent users from pushing to the registry when storage consumption reaches the configured limit.
These features help service owners of a Red Hat Quay registry define service level agreements and support a healthy resource budget.
13.1. Quota management limitations
Quota management in Red Hat Quay has limits related to push-time calculation and database-backed maximum sizes. Review these constraints before you set organization quotas.
One limitation of the quota management feature is that calculating resource consumption on the push of an artifact results in the calculation becoming part of the push’s critical path. Without this, usage data might drift.
The maximum storage quota size depends on the selected database:
Table 13.1. Maximum storage quota by database
| Database | Maximum quota size |
|---|---|
| Postgres | 8388608 TB |
| MySQL | 8388608 TB |
| SQL Server | 16777216 TB |
13.2. Setting a system-wide default quota
To specify a system-wide default storage quota that is applied to every organization and user, you can use the DEFAULT_SYSTEM_REJECT_QUOTA_BYTES configuration flag. When this field is set, and the quota limit has been met, the system automatically rejects new artifacts. By default, this configuration field is disabled.
If you configure a specific quota for an organization or user, and then delete that quota, the system-wide default quota applies if one has been set. Similarly, if you have configured a specific quota for an organization or user, and then modify the system-wide default quota, the updated system-wide default overrides any specific settings.
The following procedure shows you how to configure a system-wide default quota.
Procedure
Set a system-wide default storage quota by including the
DEFAULT_SYSTEM_REJECT_QUOTA_BYTESfield in yourconfig.yamlfile. For example:# ... DEFAULT_SYSTEM_REJECT_QUOTA_BYTES: 100gb # ...
- Restart your Red Hat Quay registry.
13.3. Establishing quota for an organization by using the Red Hat Quay UI
To establishing quota for an organization by using the Red Hat Quay UI in Red Hat Quay, you can follow the steps in this procedure.
The following procedure describes how you can report storage consumption and establish storage quota limits for a repository.
Prerequisites
- A superuser account.
- Enough storage to meet the demands of quota limitations.
Procedure
Set
FEATURE_QUOTA_MANAGEMENT: Truein yourconfig.yamlfile and then restart your registry. For example:# ... FEATURE_QUOTA_MANAGEMENT: True # ...
- Create a new organization or choose an existing one.
- Log in to the registry as a superuser and navigate to the Manage Organizations tab on the Super User Admin Panel. Click the Options icon of the organization for which you want to create storage quota limits.
- Click Configure Quota.
- For Set storage quota, enter the initial quota, for example, 10 MiB. You can then click Apply.
Optional: For Quota policy select one of the following Actions. You can then enter a Quota Threshold and click Add Limit.
- Reject: When this option is selected, any artifact that exceeds the established quota is rejected.
Warning: When this option is selected, users are notified of pushed artifacts that exceed the configured quota, however, the artifact successfully pushes.
NoteThe quota threshold percent determines when Red Hat Quay starts warning users that the repository is approaching its assigned storage quota.
Verification
Pull a sample artifact by entering the following command:
$ podman pull busybox
Tag the sample artifact by entering the following command:
$ podman tag docker.io/library/busybox quay-server.example.com/testorg/busybox:test
Push the sample artifact to the organization by entering the following command:
$ podman push --tls-verify=false quay-server.example.com/testorg/busybox:test
- Navigate to the Super User Admin Panel on the Red Hat Quay UI, then click Manage Organizations. The Organizations page shows the total proportion of the quota used by the artifact.
Optional: Pull a second sample artifact with intentions of exceeding the established quota by entering the following command:
$ podman pull nginx
Optional: Tag the second artifact by entering the following command:
$ podman tag docker.io/library/nginx quay-server.example.com/testorg/nginx
Optional: Push the second artifact to the organization by entering the following command:
$ podman push --tls-verify=false quay-server.example.com/testorg/nginx
If the artifact exceeds the defined quota, and you set the Quota policy to Reject, the following error message is returned:
denied: Quota has been exceeded on namespace
If the artifact exceeds the defined quota, and you set the Quota policy to Warning, no error message is returned, and the image is successfully pushed.
Notifications for both Reject and Warning policies are also returned on the Red Hat Quay UI by clicking the bell icon.
13.4. Configuring quota notifications
After you set FEATURE_QUOTA_NOTIFICATIONS to true, you can configure external notification channels to receive alerts when quota thresholds are reached.
Prerequisites
-
You have a superuser account so that you can configure the
config.yamlfile. -
You have an account with
org:adminaccess so that you can configure notifications. - You have administrative privileges for the organization or user namespace.
Procedure
Set
FEATURE_QUOTA_NOTIFICATIONS: truein yourconfig.yamlfile and then restart your registry.# ... FEATURE_QUOTA_NOTIFICATIONS: true # ...
- Configure quota limits for your organization or user namespace. See "Establishing quota for an organization by using the Red Hat Quay UI".
- In the Red Hat Quay UI, open your organization or user settings page.
- Click Create Notification.
Select one of the following notification events:
-
Quota Warning: Triggers when storage usage crosses a Warning quota limit (
quota_warningevent). -
Quota Error: Triggers when storage usage crosses a Reject quota limit (
quota_errorevent).
-
Quota Warning: Triggers when storage usage crosses a Warning quota limit (
Select one of the following notification methods:
- Email: Sends a notification to an organization contact email or admin email address.
- Slack: Sends a notification to a Slack webhook.
- Webhook: Sends a notification to a custom webhook URL.
- Quay Notification: Creates an in-app notification in Red Hat Quay.
- Configure the method-specific settings for your chosen notification method.
- Click the Create Notification button.
Verification
- Verify that the notification shows in the Notifications list for your namespace.
- If quota thresholds are exceeded, notifications get sent to configured channels. Check the Failures count to verify notification delivery status.
13.5. Managing quota limits by using the API
You can use the Red Hat Quay API to check, create, change, or delete organization quota limits when an organization does not yet have a quota configured.
Before you begin, you must have generated an OAuth access token.
13.5.1. Setting quota by using the API
To create, view, or update an organization storage quota in Red Hat Quay, you can call the organization quota API endpoints with an OAuth access token.
Procedure
To set a quota for an organization, you can use the
POST /api/v1/organization/{orgname}/quotaendpoint:$ curl -X POST "https://<quay-server.example.com>/api/v1/organization/<orgname>/quota" \ -H "Authorization: Bearer <access_token>" \ -H "Content-Type: application/json" \ -d '{ "limit_bytes": 10737418240, "limits": "10 Gi" }'Example output:
"Created"
Use the
GET /api/v1/organization/{orgname}/quotacommand to see if your organization already has an established quota:$ curl -k -X GET -H "Authorization: Bearer <token>" -H 'Content-Type: application/json' https://<quay-server.example.com>/api/v1/organization/<organization_name>/quota | jq
Example output:
[{"id": 1, "limit_bytes": 10737418240, "limit": "10.0 GiB", "default_config": false, "limits": [], "default_config_exists": false}]You can use the
PUT /api/v1/organization/{orgname}/quota/{quota_id}command to modify the existing quota limitation. For example:$ curl -X PUT "https://<quay-server.example.com>/api/v1/organization/<orgname>/quota/<quota_id>" \ -H "Authorization: Bearer <access_token>" \ -H "Content-Type: application/json" \ -d '{ "limit_bytes": <limit_in_bytes> }'Example output:
{"id": 1, "limit_bytes": 21474836480, "limit": "20.0 GiB", "default_config": false, "limits": [], "default_config_exists": false}
13.5.2. Viewing quota usage by using the API
To view organization and repository storage consumption in Red Hat Quay, you can query the repository list and organization API endpoints.
Procedure
To view storage consumed by repositories in an organization, send a
GETrequest to the/api/v1/repositoryendpoint:$ curl -k -X GET -H "Authorization: Bearer <token>" -H 'Content-Type: application/json' 'https://<quay-server.example.com>/api/v1/repository?last_modified=true&namespace=<organization_name>&popularity=true&public=true' | jq
Example output:
{ "repositories": [ { "namespace": "testorg", "name": "ubuntu", "description": null, "is_public": false, "kind": "image", "state": "NORMAL", "quota_report": { "quota_bytes": 27959066, "configured_quota": 104857600 }, "last_modified": 1651225630, "popularity": 0, "is_starred": false } ] }To view the quota report for multiple repositories in the organization, send a
GETrequest to the/api/v1/repositoryendpoint:$ curl -k -X GET -H "Authorization: Bearer <token>" -H 'Content-Type: application/json' 'https://<quay-server.example.com>/api/v1/repository?last_modified=true&namespace=<organization_name>&popularity=true&public=true'
Example output:
{ "repositories": [ { "namespace": "testorg", "name": "ubuntu", "description": null, "is_public": false, "kind": "image", "state": "NORMAL", "quota_report": { "quota_bytes": 27959066, "configured_quota": 104857600 }, "last_modified": 1651225630, "popularity": 0, "is_starred": false }, { "namespace": "testorg", "name": "nginx", "description": null, "is_public": false, "kind": "image", "state": "NORMAL", "quota_report": { "quota_bytes": 59231659, "configured_quota": 104857600 }, "last_modified": 1651229507, "popularity": 0, "is_starred": false } ] }To view quota information in the organization details, send a
GETrequest to the/api/v1/organization/<organization_name>endpoint:$ curl -k -X GET -H "Authorization: Bearer <token>" -H 'Content-Type: application/json' 'https://<quay-server.example.com>/api/v1/organization/<organization_name>' | jq
Example output:
{
  "name": "testorg",
  ...
  "quotas": [
    {
      "id": 1,
      "limit_bytes": 104857600,
      "limits": []
    }
  ],
  "quota_report": {
    "quota_bytes": 87190725,
    "configured_quota": 104857600
  }
}
13.5.3. Setting reject and warning limits by using the API
To configure reject and warning thresholds for an organization quota in Red Hat Quay, you can post limit definitions to the organization quota limit API endpoint.
Procedure
To set a reject limit, send a
POSTrequest to the/api/v1/organization/<organization_name>/quota/<quota_id>/limitendpoint. For example:$ curl -k -X POST -H "Authorization: Bearer <token>" -H 'Content-Type: application/json' -d '{"type":"Reject","threshold_percent":80}' https://<quay-server.example.com>/api/v1/organization/<organization_name>/quota/1/limitTo set a warning limit, send a
POSTrequest to the same endpoint. For example:$ curl -k -X POST -H "Authorization: Bearer <token>" -H 'Content-Type: application/json' -d '{"type":"Warning","threshold_percent":50}' https://<quay-server.example.com>/api/v1/organization/<organization_name>/quota/1/limit
13.5.4. Viewing reject and warning limits by using the API
To view reject and warning thresholds configured for an organization quota in Red Hat Quay, you can send a GET request to the organization quota API endpoint.
Procedure
View the reject and warning limits by using the
/api/v1/organization/<organization_name>/quotaendpoint. For example:$ curl -k -X GET -H "Authorization: Bearer <token>" -H 'Content-Type: application/json' https://<quay-server.example.com>/api/v1/organization/<organization_name>/quota | jq
Example output:
[
  {
    "id": 1,
    "limit_bytes": 104857600,
    "default_config": false,
    "limits": [
      {
        "id": 2,
        "type": "Warning",
        "limit_percent": 50
      },
      {
        "id": 1,
        "type": "Reject",
        "limit_percent": 80
      }
    ],
    "default_config_exists": false
  }
]
13.6. Calculating the total registry size
To calculate the total size of a Red Hat Quay registry, you can run an on-demand calculation from the Super User Admin Panel.
This feature is done on-demand. Calculating a registry total is database intensive. Use with caution.
Prerequisites
- You are logged in as a Red Hat Quay superuser.
Procedure
- On the Red Hat Quay UI, click your username → Super User Admin Panel.
- In the navigation pane, click Manage Organizations.
- Click Calculate → Ok.
- After a few minutes, depending on the size of your registry, refresh the page. The Total Registry Size is now calculated.
13.7. Permanently deleting an image tag
In Red Hat Quay, you can permanently delete an image tag outside of the time machine window when soft deletion is not enough.
Permanent tag deletion cannot be undone. Use with caution.
13.7.1. Permanently deleting an image tag using the Red Hat Quay v2 UI
To permanently delete an image tag in Red Hat Quay by using the v2 UI, you can select the tag in a repository and choose Permanently Delete.
Prerequisites
-
You have set
FEATURE_UI_V2totruein yourconfig.yamlfile.
Procedure
Ensure that the
PERMANENTLY_DELETE_TAGSandRESET_CHILD_MANIFEST_EXPIRATIONparameters are set totruein yourconfig.yamlfile. For example:PERMANENTLY_DELETE_TAGS: true RESET_CHILD_MANIFEST_EXPIRATION: true
- In the navigation pane, click Repositories.
- Click the name of the repository, for example, quayadmin/busybox.
- Select the check box of the image tag that you want to delete, for example, test.
Click Actions → Permanently Delete.
ImportantThis action is permanent and cannot be undone.
Chapter 14. Red Hat Quay auto-pruning overview
Red Hat Quay auto-pruning deletes image tags in organizations and repositories by tag count or age so that owners can stay under storage quotas. You can configure policies at the organization, repository, or registry level.
Red Hat Quay administrators can configure multiple auto-pruning policies on organizations and repositories. Administrators can also configure auto-pruning policies at the registry level so that they apply to all organizations, including newly created organizations.
Currently, two policies are available:
- Prune images by the number of tags. For this policy, when the actual number of tags exceeds the desired number of tags, the auto-pruner deletes the oldest tags by creation date until the desired number of tags is achieved.
- Prune image tags by creation date. For this policy, any tags with a creation date older than the given time span, for example, 10 days, are deleted.
After tags are automatically pruned, they go into the Red Hat Quay time machine, or the amount of time after a tag is deleted that the tag is accessible before being garbage collected. The expiration time of an image tag depends on your organization’s settings.
Users can configure multiple policies per namespace or repository through the Red Hat Quay v2 UI. Policies can also be set by using the API endpoints through the command-line interface (CLI).
Additional resources
14.1. Prerequisites and limitations for auto-pruning and multiple policies
Review these prerequisites and limitations before you configure Red Hat Quay auto-pruning policies for organizations or repositories.
The following prerequisites and limitations apply to the auto-pruning feature:
- Auto-pruning is not available when using the Red Hat Quay legacy UI. You must use the v2 UI to create, view, or modify auto-pruning policies.
-
Auto-pruning is only supported in databases that support the
FOR UPDATE SKIP LOCKEDSQL command. - Auto-pruning is unavailable on mirrored repositories and read-only repositories.
If you are configuring multiple auto-prune policies, rules are processed without particular order, and individual result sets are processed immediately before moving on to the next rule.
- For example, if an image is already subject to garbage collection by one rule, it cannot be excluded from pruning by another rule.
- If you have both an auto-pruning policy for an organization and a repository, the auto-pruning policies set at the organization level are executed first.
14.2. Regular expressions with auto-pruning
You can use regular expressions with organization- and repository-level auto-pruning policies in Red Hat Quay to match a subset of tags for removal.
Consider the following when using regular expressions with the auto-pruning feature:
- Regular expressions are optional.
- If a regular expression is not provided, the auto-pruner defaults to pruning all image tags in the organization or the repository. These are user-supplied and must be protected against ReDoS attacks.
- Registry-wide policies do not currently support regular expressions. Only organization- and repository-level auto-pruning policies support regular expressions.
- Regular expressions can be configured to prune images that either do, or do not, match the provided regex pattern.
Some of the following procedures provide example auto-pruning policies that use regular expressions that you can use as a reference when creating an auto-prune policy.
14.3. Managing auto-pruning policies using the Red Hat Quay UI
You can manage most Red Hat Quay auto-pruning policies from the v2 UI or the API after you enable auto-pruning and the v2 UI in your config.yaml file. Registry-wide policies are configured only in the config.yaml file.
14.3.1. Enabling image pull activity tracking
To enable image pull activity tracking in Red Hat Quay, you can set FEATURE_IMAGE_PULL_STATS in your config.yaml file and configure Redis for pull metrics.
Procedure
In your Red Hat Quay
config.yamlfile, setFEATURE_IMAGE_PULL_STATS: true. For example:# ... FEATURE_IMAGE_PULL_STATS: true REDIS_FLUSH_INTERVAL_SECONDS: 30 PULL_METRICS_REDIS: host: <redis_host> password: <redis_password> port: 6379 db: 1 # ...where:
FEATURE_IMAGE_PULL_STATS- Specifies whether image pull tracking activity is enabled.
REDIS_FLUSH_INTERVAL_SECONDS- Specifies the time, in seconds, at which the Redis flush worker clears old data. Shorter intervals keep data fresher and help prevent Redis from bloating, while longer intervals reduce flush frequency.
PULL_METRICS_REDIS- Specifies the connection settings for the Redis database used to store image pull metrics.
- Restart your Red Hat Quay deployment.
Verification
Push an image to your registry by entering the following command. Following this step, you can use your browser to see the tagged image in your repository.
$ podman push <quay-server.example.com>/<organization>/<image>:<tag>
Pull the image from your Red Hat Quay registry by entering the following command:
$ podman pull <quay-server.example.com>/<organization>/<image>:<tag>
- On the Red Hat Quay UI, navigate to Repositories, and then click the name of your repository.
Click Tags. The Last Pulled and Pull Count categories show you information about when the image was last pulled, and how many times it has been pulled, respectively. For example:
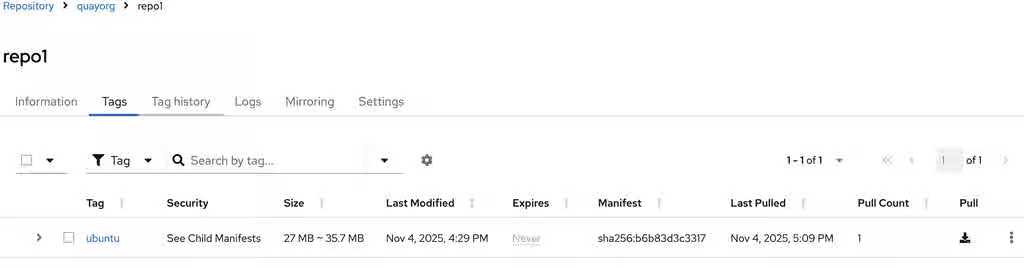
14.3.2. Configuring the Red Hat Quay auto-pruning feature
To enable auto-pruning in Red Hat Quay, you can set FEATURE_AUTO_PRUNE to true in your config.yaml file.
Prerequisites
-
You have set
FEATURE_UI_V2totruein yourconfig.yamlfile.
Procedure
In your Red Hat Quay
config.yamlfile, add and set theFEATURE_AUTO_PRUNEenvironment variable totrue. For example:# ... FEATURE_AUTO_PRUNE: true # ...
14.3.3. Creating a registry-wide auto-pruning policy
To apply an auto-prune policy to all organizations in a Red Hat Quay registry, you can configure DEFAULT_NAMESPACE_AUTOPRUNE_POLICY in your config.yaml file.
Registry-wide auto-pruning policies can apply to new and existing organizations. Red Hat Quay administrators enable this feature by adding the DEFAULT_NAMESPACE_AUTOPRUNE_POLICY configuration field with either the number_of_tags or creation_date method. Currently, you cannot enable this feature by using the v2 UI or the API.
Prerequisites
-
You have enabled the
FEATURE_AUTO_PRUNEfeature.
Procedure
Update your
config.yamlfile to add theDEFAULT_NAMESPACE_AUTOPRUNE_POLICYconfiguration field:To set the policy method to remove the oldest tags by their creation date until the number of tags provided is left, use the
number_of_tagsmethod:# ... DEFAULT_NAMESPACE_AUTOPRUNE_POLICY: method: number_of_tags value: 2 # ...
where:
value:: Specifies the number of tags to keep. In this example, two tags remain.To set the policy method to remove tags with a creation date older than the provided time span, for example,
5d, use thecreation_datemethod:DEFAULT_NAMESPACE_AUTOPRUNE_POLICY: method: creation_date value: 5d
- Restart your Red Hat Quay deployment.
Optional. If you need to tag and push images to test this feature:
Tag four sample images that you push to a Red Hat Quay registry. For example:
$ podman tag docker.io/library/busybox <quay-server.example.com>/<quayadmin>/busybox:test
$ podman tag docker.io/library/busybox <quay-server.example.com>/<quayadmin>/busybox:test2
$ podman tag docker.io/library/busybox <quay-server.example.com>/<quayadmin>/busybox:test3
$ podman tag docker.io/library/busybox <quay-server.example.com>/<quayadmin>/busybox:test4
Push the four sample images to the registry with auto-pruning enabled by entering the following commands:
$ podman push <quay-server.example.com>/quayadmin/busybox:test
$ podman push <quay-server.example.com>/<quayadmin>/busybox:test2
$ podman push <quay-server.example.com>/<quayadmin>/busybox:test3
$ podman push <quay-server.example.com>/<quayadmin>/busybox:test4
- Check that the registry that you pushed the images to shows four tags.
-
By default, the auto-pruner worker at the registry level runs every 24 hours. After 24 hours, the two oldest image tags are removed, leaving the
test3andtest4tags if you followed these instructions. Check your Red Hat Quay organization to ensure that the two oldest tags were removed.
14.3.4. Creating an auto-prune policy for an organization by using the Red Hat Quay v2 UI
To create an organization auto-prune policy in Red Hat Quay, you can configure Auto-Prune Policies on the organization Settings page in the v2 UI.
Prerequisites
-
You have enabled the
FEATURE_AUTO_PRUNEfeature. - Your organization has image tags that have been pushed to it.
Procedure
- On the Red Hat Quay v2 UI, click Organizations in the navigation pane.
-
Select the name of an organization to which you apply the auto-pruning feature, for example,
test_organization. - Click Settings.
Click Auto-Prune Policies. For example:
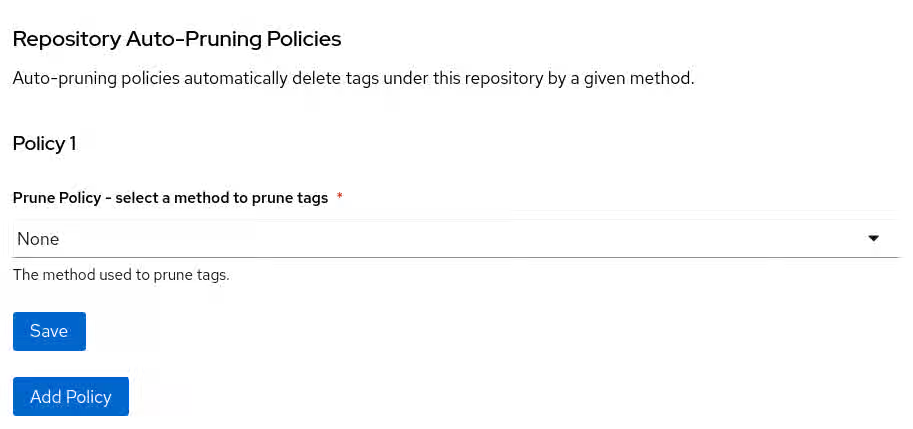
- Click the drop-down menu and select the desired policy, for example, By number of tags.
- Select the desired number of tags to keep. By default, this is set at 20 tags. For this example, the number of tags to keep is set at 3.
Optional. With the introduction of regular expressions, you are provided the following options to fine-tune your auto-pruning policy:
- Match: When selecting this option, the auto-pruner prunes all tags that match the given regex pattern.
Does not match: When selecting this option, the auto-pruner prunes all tags that do not match the regex pattern.
If you do not select an option, the auto-pruner defaults to pruning all image tags.
For this example, click the Tag pattern box and select match. In the regex box, enter a pattern to match tags against. For example, to automatically prune all
testtags, enter^test.*.
- Optional. You can create a second auto-prune policy by clicking Add Policy and entering the required information.
Click Save. A notification that your auto-prune policy has been updated appears.
With this example, the organization is configured to keep the three latest tags that are named
^test.*.
Verification
Navigate to the Tags page of your Organization’s repository. After a few minutes, the auto-pruner worker removes tags that no longer fit within the established criteria. In this example, it removes the
busybox:testtag, and keeps thebusybox:test2,busybox:test3, andbusybox:test4tag.After tags are automatically pruned, they go into the Red Hat Quay time machine, or the amount of time after a tag is deleted that the tag is accessible before being garbage collected. The expiration time of an image tag depends on your organization’s settings.
14.3.5. Creating an auto-prune policy for a namespace by using the Red Hat Quay API
To create, update, view, or delete an organization auto-prune policy in Red Hat Quay, you can use the organization autoprunepolicy API endpoints.
Prerequisites
- You have created an OAuth access token.
- You have logged into Red Hat Quay.
Procedure
Enter the following
POST /api/v1/organization/<organization_name>/autoprunepolicy/command to create a new policy that limits the number of tags allowed in an organization:$ curl -X POST -H "Authorization: Bearer <access_token>" -H "Content-Type: application/json" -d '{"method": "number_of_tags", "value": 10}' http://<quay-server.example.com>/api/v1/organization/<organization_name>/autoprunepolicy/Alternatively, you can set tags to expire for a specified time after their creation date:
$ curl -X POST -H "Authorization: Bearer <access_token>" -H "Content-Type: application/json" -d '{ "method": "creation_date", "value": "7d"}' http://<quay-server.example.com>/api/v1/organization/<organization_name>/autoprunepolicy/Example output:
{"uuid": "73d64f05-d587-42d9-af6d-e726a4a80d6e"}Optional. You can add an additional policy to an organization and pass in the
tagPatternandtagPatternMatchesfields to prune only tags that match the given regex pattern. For example:$ curl -X POST \ -H "Authorization: Bearer <bearer_token>" \ -H "Content-Type: application/json" \ -d '{ "method": "creation_date", "value": "7d", "tagPattern": "^v*", "tagPatternMatches": <true> }' \ "https://<quay-server.example.com>/api/v1/organization/<organization_name>/autoprunepolicy/"where:
tagPatternMatchesSpecifies whether tags that match the regex pattern are pruned. Set to
trueto prune matching tags. In this example, tags that match^v*are pruned.Example output:
{"uuid": "ebf7448b-93c3-4f14-bf2f-25aa6857c7b0"}
You can update your organization’s auto-prune policy by using the
PUT /api/v1/organization/<organization_name>/autoprunepolicy/<policy_uuid>command. For example:$ curl -X PUT -H "Authorization: Bearer <bearer_token>" -H "Content-Type: application/json" -d '{ "method": "creation_date", "value": "4d", "tagPattern": "^v*", "tagPatternMatches": true }' "<quay-server.example.com>/api/v1/organization/<organization_name>/autoprunepolicy/<uuid>"This command does not return output. Continue to the next step.
Check your auto-prune policy by entering the following command:
$ curl -X GET -H "Authorization: Bearer <access_token>" http://<quay-server.example.com>/api/v1/organization/<organization_name>/autoprunepolicy/
Example output:
{"policies": [{"uuid": "ebf7448b-93c3-4f14-bf2f-25aa6857c7b0", "method": "creation_date", "value": "4d", "tagPattern": "^v*", "tagPatternMatches": true}, {"uuid": "da4d0ad7-3c2d-4be8-af63-9c51f9a501bc", "method": "number_of_tags", "value": 10, "tagPattern": null, "tagPatternMatches": true}, {"uuid": "17b9fd96-1537-4462-a830-7f53b43f94c2", "method": "creation_date", "value": "7d", "tagPattern": "^v*", "tagPatternMatches": true}]}You can delete the auto-prune policy for your organization by entering the following command. Note that deleting the policy requires the UUID.
$ curl -X DELETE -H "Authorization: Bearer <access_token>" http://<quay-server.example.com>/api/v1/organization/<organization_name>/autoprunepolicy/73d64f05-d587-42d9-af6d-e726a4a80d6e
14.3.6. Creating an auto-prune policy for a namespace for the current user by using the API
To manage auto-prune policies for your own user namespace in Red Hat Quay, you can use the /api/v1/user/autoprunepolicy/ API endpoints.
The use of /user/ in the following commands represents the user that is currently logged into Red Hat Quay.
Prerequisites
- You have created an OAuth access token.
- You have logged into Red Hat Quay.
Procedure
Enter the following
POSTcommand to create a new policy that limits the number of tags for the current user:$ curl -X POST -H "Authorization: Bearer <access_token>" -H "Content-Type: application/json" -d '{"method": "number_of_tags", "value": 10}' http://<quay-server.example.com>/api/v1/user/autoprunepolicy/Example output
{"uuid": "8c03f995-ca6f-4928-b98d-d75ed8c14859"}Check your auto-prune policy by entering the following command:
$ curl -X GET -H "Authorization: Bearer <access_token>" http://<quay-server.example.com>/api/v1/user/autoprunepolicy/
Alternatively, you can include the UUID:
$ curl -X GET -H "Authorization: Bearer <access_token>" http://<quay-server.example.com>/api/v1/user/autoprunepolicy/8c03f995-ca6f-4928-b98d-d75ed8c14859
Example output
{"policies": [{"uuid": "8c03f995-ca6f-4928-b98d-d75ed8c14859", "method": "number_of_tags", "value": 10}]}You can delete the auto-prune policy by entering the following command. Note that deleting the policy requires the UUID.
$ curl -X DELETE -H "Authorization: Bearer <access_token>" http://<quay-server.example.com>/api/v1/user/autoprunepolicy/8c03f995-ca6f-4928-b98d-d75ed8c14859
Example output
{"uuid": "8c03f995-ca6f-4928-b98d-d75ed8c14859"}
14.3.7. Creating an auto-prune policy for a repository using the Red Hat Quay v2 UI
To create a repository auto-prune policy in Red Hat Quay, you can configure Repository Auto-Prune Policies on the repository Settings page in the v2 UI.
Prerequisites
-
You have enabled the
FEATURE_AUTO_PRUNEfeature. - You have pushed image tags to your repository.
Procedure
- On the Red Hat Quay v2 UI, click Repository in the navigation pane.
-
Select the name of a repository to which you apply the auto-pruning feature, for example,
<organization_name>/<repository_name>. - Click Settings.
- Click Repository Auto-Prune Policies.
- Click the drop-down menu and select the desired policy, for example, By age of tags.
-
Set a time, for example,
5and an interval, for exampleminutesto delete tags older than the specified time frame. For this example, tags older than 5 minutes are marked for deletion. Optional. With the introduction of regular expressions, you are provided the following options to fine-tune your auto-pruning policy:
- Match: When selecting this option, the auto-pruner prunes all tags that match the given regex pattern.
Does not match: When selecting this option, the auto-pruner prunes all tags that do not match the regex pattern.
If you do not select an option, the auto-pruner defaults to pruning all image tags.
For this example, click the Tag pattern box and select Does not match. In the regex box, enter a pattern to match tags against. For example, to automatically prune all tags that do not match the
testtag, enter^test.*.
- Optional. You can create a second auto-prune policy by clicking Add Policy and entering the required information.
- Click Save. A notification that your auto-prune policy has been updated appears.
Verification
Navigate to the Tags page of your Organization’s repository. With this example, Tags that are older than 5 minutes that do not match the
^test.*regex tag are automatically pruned when the pruner runs.After tags are automatically pruned, they go into the Red Hat Quay time machine, or the amount of time after a tag is deleted that the tag is accessible before being garbage collected. The expiration time of an image tag depends on your organization’s settings.
14.3.8. Creating an auto-prune policy for a repository using the Red Hat Quay API
To create, update, view, or delete a repository auto-prune policy in Red Hat Quay, you can use the repository autoprunepolicy API endpoints.
Prerequisites
- You have created an OAuth access token.
- You have logged into Red Hat Quay.
Procedure
Enter the following
POST /api/v1/repository/<repository>/autoprunepolicy/command to create a new policy that limits the number of tags allowed in a repository:$ curl -X POST -H "Authorization: Bearer <access_token>" -H "Content-Type: application/json" -d '{"method": "number_of_tags","value": 2}' http://<quay-server.example.com>/api/v1/repository/<organization_name>/<repository_name>/autoprunepolicy/Alternatively, you can set tags to expire for a specified time after their creation date:
$ curl -X POST -H "Authorization: Bearer <access_token>" -H "Content-Type: application/json" -d '{"method": "creation_date", "value": "7d"}' http://<quay-server.example.com>/api/v1/repository/<organization_name>/<repository_name>/autoprunepolicy/Example output
{"uuid": "ce2bdcc0-ced2-4a1a-ac36-78a9c1bed8c7"}Optional. You can add an additional policy and pass in the
tagPatternandtagPatternMatchesfields to prune only tags that match the given regex pattern. For example:$ curl -X POST \ -H "Authorization: Bearer <access_token>" \ -H "Content-Type: application/json" \ -d '{ "method": "creation_date", "value": "7d", "tagPattern": "^test.", "tagPatternMatches": false }' \ "https://<quay-server.example.com>/api/v1/repository/<organization_name>/<repository_name>/autoprunepolicy/"Where:
tagPatternMatches-
Specifies that the
falsevalue prunes tags that do not match the given regex pattern. In this example, all tags except those that match^test.are pruned.
You can update your policy for the repository by using the
PUT /api/v1/repository/<repository>/autoprunepolicy/<policy_uuid>command and passing in the UUID. For example:$ curl -X PUT \ -H "Authorization: Bearer <bearer_token>" \ -H "Content-Type: application/json" \ -d '{ "method": "number_of_tags", "value": "5", "tagPattern": "^test.*", "tagPatternMatches": true }' \ "https://quay-server.example.com/api/v1/repository/<namespace>/<repo_name>/autoprunepolicy/<uuid>"This command does not return output. Continue to the next step to check your auto-prune policy.
Check your auto-prune policy by entering the following command:
$ curl -X GET -H "Authorization: Bearer <access_token>" http://<quay-server.example.com>/api/v1/repository/<organization_name>/<repository_name>/autoprunepolicy/
Alternatively, you can include the UUID:
$ curl -X GET -H "Authorization: Bearer <access_token>" http://<quay-server.example.com>/api/v1/repository/<organization_name>/<repository_name>/autoprunepolicy/ce2bdcc0-ced2-4a1a-ac36-78a9c1bed8c7
Example output
{"policies": [{"uuid": "ce2bdcc0-ced2-4a1a-ac36-78a9c1bed8c7", "method": "number_of_tags", "value": 10}]}You can delete the auto-prune policy by entering the following command. Note that deleting the policy requires the UUID.
$ curl -X DELETE -H "Authorization: Bearer <access_token>" http://<quay-server.example.com>/api/v1/repository/<organization_name>/<repository_name>/autoprunepolicy/ce2bdcc0-ced2-4a1a-ac36-78a9c1bed8c7
Example output
{"uuid": "ce2bdcc0-ced2-4a1a-ac36-78a9c1bed8c7"}
14.3.9. Creating an auto-prune policy on a repository for a user with the API
To manage auto-prune policies on another user repository in Red Hat Quay, you can use the repository autoprunepolicy API endpoints when you have admin privileges.
Prerequisites
- You have created an OAuth access token.
- You have logged into Red Hat Quay.
-
You have
adminprivileges on the repository that you are creating the policy for.
Procedure
Enter the following
POST /api/v1/repository/<user_account>/<user_repository>/autoprunepolicy/command to create a new policy that limits the number of tags for the user:$ curl -X POST -H "Authorization: Bearer <access_token>" -H "Content-Type: application/json" -d '{"method": "number_of_tags","value": 2}' https://<quay-server.example.com>/api/v1/repository/<user_account>/<user_repository>/autoprunepolicy/Example output
{"uuid": "7726f79c-cbc7-490e-98dd-becdc6fefce7"}Optional. You can add an additional policy for the current user and pass in the
tagPatternandtagPatternMatchesfields to prune only tags that match the given regex pattern. For example:$ curl -X POST \ -H "Authorization: Bearer <bearer_token>" \ -H "Content-Type: application/json" \ -d '{ "method": "creation_date", "value": "7d", "tagPattern": "^v*", "tagPatternMatches": true }' \ "http://<quay-server.example.com>/api/v1/repository/<user_account>/<user_repository>/autoprunepolicy/"Example output
{"uuid": "b3797bcd-de72-4b71-9b1e-726dabc971be"}You can update your policy for the current user by using the
PUT /api/v1/repository/<user_account>/<user_repository>/autoprunepolicy/<policy_uuid>command. For example:$ curl -X PUT -H "Authorization: Bearer <bearer_token>" -H "Content-Type: application/json" -d '{ "method": "creation_date", "value": "4d", "tagPattern": "^test.", "tagPatternMatches": true }' "https://<quay-server.example.com>/api/v1/repository/<user_account>/<user_repository>/autoprunepolicy/<policy_uuid>"Updating a policy does not return output in the CLI.
Check your auto-prune policy by entering the following command:
$ curl -X GET -H "Authorization: Bearer <access_token>" http://<quay-server.example.com>/api/v1/repository/<user_account>/<user_repository>/autoprunepolicy/
Alternatively, you can include the UUID:
$ curl -X GET -H "Authorization: Bearer <access_token>" http://<quay-server.example.com>/api/v1/repository/<user_account>/<user_repository>/autoprunepolicy/7726f79c-cbc7-490e-98dd-becdc6fefce7
Example output
{"uuid": "81ee77ec-496a-4a0a-9241-eca49437d15b", "method": "creation_date", "value": "7d", "tagPattern": "^v*", "tagPatternMatches": true}You can delete the auto-prune policy by entering the following command. Note that deleting the policy requires the UUID.
$ curl -X DELETE -H "Authorization: Bearer <access_token>" http://<quay-server.example.com>/api/v1/repository/<user_account>/<user_repository>/autoprunepolicy/<policy_uuid>
Example output
{"uuid": "7726f79c-cbc7-490e-98dd-becdc6fefce7"}
Additional resources
- Red Hat Quay garbage collection
-
POST /api/v1/organization/{orgname}/autoprunepolicy/ -
PUT /api/v1/organization/{orgname}/autoprunepolicy/{policy_uuid} -
PUT /api/v1/repository/{repository}/autoprunepolicy/{policy_uuid} -
POST /api/v1/repository/<user_account>/<user_repository>/autoprunepolicy/ -
PUT /api/v1/repository/<user_account>/<user_repository>/autoprunepolicy/<policy_uuid>
Chapter 15. Geo-replication
Geo-replication connects multiple geographically distributed Red Hat Quay deployments so that clients use them as a single registry. Standalone and Operator-based deployments support geo-replication.
15.1. Geo-replication features
With geo-replication in Red Hat Quay, image pushes go to the nearest storage backend and data replicates in the background so that pulls can use the closest available engine.
The following are the key features of geo-replication:
- When geo-replication is configured, container image pushes are written to the preferred storage engine for that Red Hat Quay instance. This is typically the nearest storage backend within the region.
- After the initial push, image data is replicated in the background to other storage engines.
- The list of replication locations is configurable and those can be different storage backends.
- An image pull always uses the closest available storage engine to maximize pull performance.
- If replication has not been completed yet, the pull uses the source storage backend instead.
15.2. Geo-replication requirements and constraints
Red Hat Quay geo-replication requires shared storage, database, Redis, network access between regions, and a global load balancer. Review these constraints before you deploy.
The following are the requirements and constraints for geo-replication:
- In geo-replicated setups, Red Hat Quay requires that all regions are able to read and write to all other regions' object storage. Object storage must be geographically accessible by all other regions.
- In case of an object storage system failure of one geo-replicating site, that site’s Red Hat Quay deployment must be shut down so that clients are redirected to the remaining site with intact storage systems by a global load balancer. Otherwise, clients experience pull and push failures.
- Red Hat Quay has no internal awareness of the health or availability of the connected object storage system. Users must configure a global load balancer (LB) to monitor the health of your distributed system and to route traffic to different sites based on their storage status.
-
To check the status of your geo-replication deployment, you must use the
/health/endtoendcheckpoint, which is used for global health monitoring. You must configure the redirect manually using the/health/endtoendendpoint. The/health/instanceendpoint only checks local instance health. - If the object storage system of one site becomes unavailable, geo-replication does not automatically redirect to the remaining storage system, or systems, of the remaining site, or sites.
- Geo-replication is asynchronous. The permanent loss of a site incurs the loss of the data that has been saved in that site’s object storage system but has not yet been replicated to the remaining sites at the time of failure.
A single database, and therefore all metadata and Red Hat Quay configuration, is shared across all regions.
Geo-replication does not replicate the database. In the event of an outage, Red Hat Quay with geo-replication enabled does not fail over to another database.
- A single Redis cache is shared across the entire Red Hat Quay setup and needs to be accessible by all Red Hat Quay pods.
-
The exact same configuration should be used across all regions, with exception of the storage backend, which can be configured explicitly using the
QUAY_DISTRIBUTED_STORAGE_PREFERENCEenvironment variable. - Geo-replication requires object storage in each region. It does not work with local storage.
- Each region must be able to access every storage engine in each region, which requires a network path.
- Alternatively, the storage proxy option can be used.
- The entire storage backend, for example, all blobs, is replicated. Repository mirroring, by contrast, can be limited to a repository, or an image.
- All Red Hat Quay instances must share the same entrypoint, typically through a load balancer.
- All Red Hat Quay instances must have the same set of superusers, as they are defined inside the common configuration file.
In geo-replication environments, your Clair configuration can be set to
unmanaged. An unmanaged Clair database allows the Red Hat Quay Operator to work in a geo-replicated environment where multiple instances of the Operator must communicate with the same database.If you keep your Clair configuration
managed, you must retrieve the configuration file for the deployed Clair instance that the Operator deploys.- Geo-replication requires SSL/TLS certificates and keys.
If the above requirements cannot be met, you should instead use two or more distinct Red Hat Quay deployments and take advantage of repository mirroring functions.
Additional resources
15.2.1. Enabling storage replication for standalone Red Hat Quay
To enable storage replication for a standalone Red Hat Quay deployment, you can configure distributed storage engines in config.yaml and backfill existing image data.
Procedure
Update your
config.yamlfile to include the storage engines to which data is replicated. You must list all storage engines to be used:# ... FEATURE_STORAGE_REPLICATION: true # ... DISTRIBUTED_STORAGE_CONFIG: usstorage: - RHOCSStorage - access_key: <access_key> bucket_name: <example_bucket> hostname: my.noobaa.hostname is_secure: false port: "443" secret_key: <secret_key> storage_path: /datastorage/registry eustorage: - S3Storage - host: s3.amazon.com port: "443" s3_access_key: <access_key> s3_bucket: <example bucket> s3_secret_key: <secret_key> storage_path: /datastorage/registry DISTRIBUTED_STORAGE_DEFAULT_LOCATIONS: [] DISTRIBUTED_STORAGE_PREFERENCE: - usstorage - eustorage # ...Optional. If complete replication of all images to all storage engines is required, you can replicate images to the storage engine by manually setting the
DISTRIBUTED_STORAGE_DEFAULT_LOCATIONSfield. This ensures that all images are replicated to that storage engine. For example:# ... DISTRIBUTED_STORAGE_DEFAULT_LOCATIONS: - usstorage - eustorage # ...NoteTo enable per-namespace replication, contact Red Hat Quay support.
After adding storage and enabling Replicate to storage engine by default for geo-replication, you must sync existing image data across all storage. To do this, you must execute into the container by running the following command:
$ podman exec -it <container_id>
To sync the content after adding new storage, enter the following commands:
# scl enable python27 bash
# python -m util.backfillreplication
NoteThis is a one time operation to sync content after adding new storage.
15.2.2. Run Red Hat Quay with storage preferences
To run a standalone Red Hat Quay instance with a regional storage preference, you can set the QUAY_DISTRIBUTED_STORAGE_PREFERENCE environment variable when you start the container.
Procedure
-
Copy the
config.yamlfile to all machines running Red Hat Quay. For each machine in each region, add a
QUAY_DISTRIBUTED_STORAGE_PREFERENCEenvironment variable with the preferred storage engine for the region in which the machine is running.For example, for a machine running in Europe with the config directory on the host available from
$QUAY/config:$ sudo podman run -d --rm -p 80:8080 -p 443:8443 \ --name=quay \ -v $QUAY/config:/conf/stack:Z \ -e QUAY_DISTRIBUTED_STORAGE_PREFERENCE=europestorage \ registry.redhat.io/quay/quay-rhel9:v3.18.0
NoteThe value of the environment variable specified must match the name of a Location ID as defined in the config panel.
- Restart all Red Hat Quay containers.
15.2.3. Removing a geo-replicated site from your standalone Red Hat Quay deployment
To remove a geo-replicated site from a standalone Red Hat Quay deployment, you can sync blobs between sites, update config.yaml, and run the removelocation utility.
Prerequisites
-
You have configured Red Hat Quay geo-replication with at least two sites, for example,
usstorageandeustorage. - Each site has its own Organization, Repository, and image tags.
Procedure
Sync the blobs between all of your defined sites by running the following command:
$ python -m util.backfillreplication
WarningPrior to removing storage engines from your Red Hat Quay
config.yamlfile, you must ensure that all blobs are synced between all defined sites. Complete this step before proceeding.-
In your Red Hat Quay
config.yamlfile for siteusstorage, remove theDISTRIBUTED_STORAGE_CONFIGentry for theeustoragesite. Enter the following command to obtain a list of running containers:
$ podman ps
Example output:
CONTAINER ID  IMAGE                                                                     COMMAND         CREATED         STATUS             PORTS                                        NAMES
92c5321cde38  registry.redhat.io/rhel8/redis-5:1                                        run-redis       11 days ago     Up 11 days ago     0.0.0.0:6379->6379/tcp                       redis
4e6d1ecd3811  registry.redhat.io/rhel8/postgresql-13:1-109                              run-postgresql  33 seconds ago  Up 34 seconds ago  0.0.0.0:5432->5432/tcp                       postgresql-quay
d2eadac74fda  registry-proxy.engineering.redhat.com/rh-osbs/quay-quay-rhel8:v3.9.0-131  registry        4 seconds ago   Up 4 seconds ago   0.0.0.0:80->8080/tcp, 0.0.0.0:443->8443/tcp  quay
Enter the following command to execute a shell inside of the PostgreSQL container:
$ podman exec -it postgresql-quay -- /bin/bash
Enter psql by running the following command:
bash-4.4$ psql
Enter the following command to reveal a list of sites in your geo-replicated deployment:
quay=# select * from imagestoragelocation;
Example output:
 id |       name
----+-------------------
  1 | usstorage
  2 | eustorage
Enter the following command to exit the postgres CLI to re-enter bash-4.4:
\q
Enter the following command to permanently remove the
eustoragesite:ImportantThe following action cannot be undone. Use with caution.
bash-4.4$ python -m util.removelocation eustorage
Example output:
WARNING: This is a destructive operation. Are you sure you want to remove eustorage from your storage locations? [y/n] y
Deleted placement 30
Deleted placement 31
Deleted placement 32
Deleted placement 33
Deleted location eustorage
15.2.4. Preparing your OpenShift Container Platform environment for geo-replication
To prepare your OpenShift Container Platform environment for Red Hat Quay geo-replication, you can deploy shared PostgreSQL and Redis instances, create object storage backends, and configure a load balancer.
Procedure
- Deploy a PostgreSQL instance for Red Hat Quay.
Log in to the database by entering the following command:
psql -U <username> -h <hostname> -p <port> -d <database_name>
Create a database for Red Hat Quay named
quay. For example:CREATE DATABASE quay;
Enable the
pg_trgmextension inside the database:\c quay; CREATE EXTENSION IF NOT EXISTS pg_trgm;
Deploy a Redis instance:
Note- Deploying a Redis instance might be unnecessary if your cloud provider has its own service.
- Deploying a Redis instance is required if you are leveraging Builders.
- Deploy a VM for Redis.
- Verify that the Redis instance is accessible from the clusters where Red Hat Quay is running.
- Port 6379/TCP must be open.
Run Redis inside the instance:
sudo dnf install -y podman
podman run -d --name redis -p 6379:6379 redis
- Create two object storage backends, one for each cluster. Ideally, one object storage bucket is close to the first, or primary, cluster, and the other runs closer to the second, or secondary, cluster.
- Deploy the clusters with the same config bundle, using environment variable overrides to select the appropriate storage backend for an individual cluster.
- Configure a load balancer to provide a single entry point to the clusters.
15.2.5. Removing a geo-replicated site from your Red Hat Quay on OpenShift Container Platform deployment
To remove a geo-replicated site from a Red Hat Quay on OpenShift Container Platform deployment, you can sync blobs between sites, update storage configuration, and run the removelocation utility.
Prerequisites
- You are logged into OpenShift Container Platform.
-
You have configured Red Hat Quay geo-replication with at least two sites, for example,
usstorageandeustorage. - Each site has its own Organization, Repository, and image tags.
Procedure
Sync the blobs between all of your defined sites by running the following command:
$ python -m util.backfillreplication
WarningPrior to removing storage engines from your Red Hat Quay
config.yamlfile, you must ensure that all blobs are synced between all defined sites.When running this command, replication jobs are created which are picked up by the replication worker. If blobs need to be replicated, the script returns UUIDs of blobs that are replicated. If you run this command multiple times, and the output from the return script is empty, it does not mean that the replication process is done; it means that no more blobs remain to be queued for replication. Customers should use appropriate judgement before proceeding, as the allotted time replication takes depends on the number of blobs detected.
Alternatively, you could use a third party cloud tool, such as Microsoft Azure, to check the synchronization status.
This step must be completed before proceeding.
-
In your Red Hat Quay
config.yamlfile for siteusstorage, remove theDISTRIBUTED_STORAGE_CONFIGentry for theeustoragesite. Identify your Red Hat Quay application pods by entering the following command:
$ oc get pod -n <quay_namespace>
Example output:
quay390usstorage-quay-app-5779ddc886-2drh2
quay390eustorage-quay-app-66969cd859-n2ssm
Open an interactive shell session in the
usstoragepod by entering the following command:$ oc rsh quay390usstorage-quay-app-5779ddc886-2drh2
Permanently remove the
eustoragesite by entering the following command:ImportantThe following action cannot be undone. Use with caution.
sh-4.4$ python -m util.removelocation eustorage
Example output:
WARNING: This is a destructive operation. Are you sure you want to remove eustorage from your storage locations? [y/n] y
Deleted placement 30
Deleted placement 31
Deleted placement 32
Deleted placement 33
Deleted location eustorage
15.3. Mixed storage for geo-replication
Geo-replication in Red Hat Quay can use mixed storage backends, such as public-cloud object storage and on-premise Ceph, when you secure cross-site access appropriately.
Because geo-replication supports multiple replication targets, Red Hat recommends that you use a VPN or token pair with bucket-specific access to meet security requirements. This results in the public cloud instance of Red Hat Quay having access to on-premise storage, but the network is encrypted, protected, and uses ACLs, thereby meeting security requirements. If you cannot implement these security measures, it might be preferable to deploy two distinct Red Hat Quay registries and to use repository mirroring as an alternative to geo-replication.
Chapter 16. Backing up and restoring Red Hat Quay on a standalone deployment
You can back up and restore a standalone Red Hat Quay deployment, including optional read-only mode during maintenance.
16.1. Enabling read-only mode for Red Hat Quay
You can enable read-only mode for a standalone Red Hat Quay deployment to restrict writes during maintenance while the registry continues to serve images.
Red Hat Quay administrators can enable read-only mode to restrict write access to the registry, which helps ensure data integrity, mitigate risks during maintenance windows, and provide a safeguard against unintended modifications to registry data. Read-only mode also helps keep your Red Hat Quay registry online and available to serve images to users.
In some cases, you cannot use a read-only option for Red Hat Quay because read-only mode requires inserting a service key and other manual configuration changes. As an alternative to read-only mode, Red Hat Quay administrators might consider enabling the DISABLE_PUSHES feature. When this field is set to true, users are unable to push images or image tags to the registry when using the CLI. Enabling DISABLE_PUSHES differs from read-only mode because the database is not set as read-only when that feature is enabled.
This field might be useful in some situations such as when Red Hat Quay administrators want to calculate their registry’s quota and disable image pushing until after calculation has completed. With this method, administrators can avoid putting the whole registry in read-only mode, which affects the database, so that most operations can still be done.
16.1.1. Creating service keys for standalone Red Hat Quay
To create service keys for standalone Red Hat Quay read-only mode, you can generate a key pair inside the Quay container or in a local Python virtual environment.
Red Hat Quay uses service keys to communicate with various components. These keys are used to sign completed requests, such as requesting to scan images, login, storage access, and so on.
Prerequisites
If you are using Red Hat Enterprise Linux (RHEL) 7.x:
- You have enabled the Red Hat Software Collections List (RHSCL).
- You have installed Python 3.6.
-
You have downloaded the
virtualenvpackage. -
You have installed the
gitCLI.
If you are using Red Hat Enterprise Linux (RHEL) 8:
- You have installed Python 3 on your machine.
-
You have downloaded the
python3-virtualenvpackage. -
You have installed the
gitCLI.
-
You have cloned the
quay/quayrepository from GitHub.
Procedure
If your Red Hat Quay registry is readily available, you can generate service keys inside of the
Quayregistry container.Enter the following command to generate a key pair inside of the
Quaycontainer:$ podman exec quay python3 tools/generatekeypair.py quay-readonly
If your Red Hat Quay is not readily available, you must generate your service keys inside of a virtual environment.
Change into the directory of your Red Hat Quay deployment and create a virtual environment inside of that directory:
$ cd <$QUAY>/quay && virtualenv -v venv
Activate the virtual environment by entering the following command:
$ source venv/bin/activate
Optional. Install the
pipCLI tool if you do not have it installed:$ venv/bin/pip install --upgrade pip
In your Red Hat Quay directory, create a
requirements-generatekeys.txtfile with the following content:$ cat << EOF > requirements-generatekeys.txt cryptography==3.4.7 pycparser==2.19 pycryptodome==3.9.4 pycryptodomex==3.9.4 pyjwkest==1.4.2 PyJWT==1.7.1 Authlib==1.0.0a2 EOF
Enter the following command to install the Python dependencies defined in the
requirements-generatekeys.txtfile:$ venv/bin/pip install -r requirements-generatekeys.txt
Enter the following command to create the necessary service keys:
$ PYTHONPATH=. venv/bin/python /<path_to_cloned_repo>/tools/generatekeypair.py quay-readonly
Example output:
Writing public key to quay-readonly.jwk
Writing key ID to quay-readonly.kid
Writing private key to quay-readonly.pem
Enter the following command to deactivate the virtual environment:
$ deactivate
16.1.2. Adding keys to the PostgreSQL database
To register read-only service keys with Red Hat Quay, you can insert the key and approval records into the PostgreSQL database.
Prerequisites
- You have created the service keys.
Procedure
Enter the following command to enter your Red Hat Quay database environment:
$ podman exec -it postgresql-quay psql -U postgres -d quay
Display the approval types and associated notes of the
servicekeyapprovalby entering the following command:quay=# select * from servicekeyapproval;
Example output:
 id | approver_id |          approval_type           |       approved_date        | notes
----+-------------+----------------------------------+----------------------------+-------
  1 |             | ServiceKeyApprovalType.AUTOMATIC | 2024-05-07 03:47:48.181347 |
  2 |             | ServiceKeyApprovalType.AUTOMATIC | 2024-05-07 03:47:55.808087 |
  3 |             | ServiceKeyApprovalType.AUTOMATIC | 2024-05-07 03:49:04.27095  |
  4 |             | ServiceKeyApprovalType.AUTOMATIC | 2024-05-07 03:49:05.46235  |
  5 |           1 | ServiceKeyApprovalType.SUPERUSER | 2024-05-07 04:05:10.296796 |
...
Add the service key to your Red Hat Quay database by entering the following query:
quay=# INSERT INTO servicekey (name, service, metadata, kid, jwk, created_date, expiration_date) VALUES ('quay-readonly', 'quay', '{}', '<contents_of_.kid_file>', '<contents_of_.jwk_file>', '<created_date_of_read-only>', '<expiration_date_of_read-only>');Example output:
INSERT 0 1
Next, add the key approval with the following query:
quay=# INSERT INTO servicekeyapproval ('approval_type', 'approved_date', 'notes') VALUES ("ServiceKeyApprovalType.SUPERUSER", "CURRENT_DATE", <include_notes_here_on_why_this_is_being_added>);Example output:
INSERT 0 1
Set the
approval_idfield on the created service key row to theidfield from the created service key approval. You can use the followingSELECTstatements to get the necessary IDs:UPDATE servicekey SET approval_id = (SELECT id FROM servicekeyapproval WHERE approval_type = 'ServiceKeyApprovalType.SUPERUSER') WHERE name = 'quay-readonly';
UPDATE 1
16.1.3. Configuring read-only mode for standalone Red Hat Quay
To put a standalone Red Hat Quay deployment into read-only mode, you can add the service key files and REGISTRY_STATE settings to your configuration bundle and restart Quay.
After the service keys have been created and added to your PostgreSQL database, you must restart the Quay container on your standalone deployment.
Prerequisites
- You have created the service keys and added them to your PostgreSQL database.
Procedure
Shut down all Red Hat Quay instances on all virtual machines. For example:
$ podman stop <quay_container_name_on_virtual_machine_a>
$ podman stop <quay_container_name_on_virtual_machine_b>
Enter the following command to copy the contents of the
quay-readonly.kidfile and thequay-readonly.pemfile to the directory that holds your Red Hat Quay configuration bundle:$ cp quay-readonly.kid quay-readonly.pem $Quay/config
Enter the following command to set file permissions on all files in your configuration bundle folder:
$ setfacl -m user:1001:rw $Quay/config/*
Modify your Red Hat Quay
config.yamlfile and add the following information:# ... REGISTRY_STATE: readonly INSTANCE_SERVICE_KEY_KID_LOCATION: 'conf/stack/quay-readonly.kid' INSTANCE_SERVICE_KEY_LOCATION: 'conf/stack/quay-readonly.pem' # ...
- Distribute the new configuration bundle to all Red Hat Quay instances.
Start Red Hat Quay by entering the following command:
$ podman run -d --rm -p 80:8080 -p 443:8443 \ --name=quay-main-app \ -v $QUAY/config:/conf/stack:Z \ -v $QUAY/storage:/datastorage:Z \ {productrepo}/{quayimage}:{productminv}After starting Red Hat Quay, a banner inside your instance informs users that Red Hat Quay is running in read-only mode. Pushes should be rejected and a 405 error should be logged. You can test this by running the following command:
$ podman push <quay-server.example.com>/quayadmin/busybox:test
Example output:
613be09ab3c0: Preparing
denied: System is currently read-only. Pulls will succeed but all write operations are currently suspended.
With your Red Hat Quay deployment on read-only mode, you can safely manage your registry’s operations and perform such actions as backup and restore.
Optional. After you finish with read-only mode, you can return to normal operations by removing the following information from your
config.yamlfile. Then, restart your Red Hat Quay deployment:# ... REGISTRY_STATE: readonly INSTANCE_SERVICE_KEY_KID_LOCATION: 'conf/stack/quay-readonly.kid' INSTANCE_SERVICE_KEY_LOCATION: 'conf/stack/quay-readonly.pem' # ...
$ podman restart <container_id>
16.1.4. Updating read-only expiration time
To extend the lifetime of a Red Hat Quay read-only service key, you can update the key expiration date in the PostgreSQL database.
The Red Hat Quay read-only key has an expiration date, and when that date passes the key is deactivated. Before the key expires, you can update its expiration time in the database.
Procedure
- Connect to your Red Hat Quay production database by using the methods described earlier.
Optional. List service key IDs by running the following query:
SELECT id, name, expiration_date FROM servicekey;
Update the key expiration by issuing the following query:
quay=# UPDATE servicekey SET expiration_date = 'new-date' WHERE id = servicekey_id;
Additional resources
16.2. Backing up Red Hat Quay on standalone deployments
To back up a standalone Red Hat Quay deployment, you can archive configuration files, dump the PostgreSQL database, and sync object storage blobs.
Procedure
Create a temporary backup directory, for example,
quay-backup:$ mkdir /tmp/quay-backup
The following example command denotes the local directory that the Red Hat Quay was started in, for example,
/opt/quay-install:$ podman run --name quay-app \ -v /opt/quay-install/config:/conf/stack:Z \ -v /opt/quay-install/storage:/datastorage:Z \ registry.redhat.io/quay/quay-rhel9:v3.18.0
Change into the directory that bind-mounts to
/conf/stackinside of the container, for example,/opt/quay-install, by running the following command:$ cd /opt/quay-install
Compress the contents of your Red Hat Quay deployment into an archive in the
quay-backupdirectory by entering the following command:$ tar cvf /tmp/quay-backup/quay-backup.tar.gz *
Example output:
config.yaml
config.yaml.bak
extra_ca_certs/
extra_ca_certs/ca.crt
ssl.cert
ssl.key
Back up the Quay container service by entering the following command:
$ podman inspect quay-app | jq -r '.[0].Config.CreateCommand | .[]' | paste -s -d ' ' -

  /usr/bin/podman run --name quay-app \
  -v /opt/quay-install/config:/conf/stack:Z \
  -v /opt/quay-install/storage:/datastorage:Z \
  registry.redhat.io/quay/quay-rhel9:v3.18.0
Redirect the contents of your
conf/stack/config.yamlfile to your temporaryquay-config.yamlfile by entering the following command:$ podman exec -it quay cat /conf/stack/config.yaml > /tmp/quay-backup/quay-config.yaml
Obtain the
DB_URIlocated in your temporaryquay-config.yamlby entering the following command:$ grep DB_URI /tmp/quay-backup/quay-config.yaml
Example output:
$ postgresql://<username>:test123@172.24.10.50/quay
Extract the PostgreSQL contents to your temporary backup directory in a backup
.sqlfile by entering the following command:$ pg_dump -h 172.24.10.50 -p 5432 -d quay -U <username> -W -O > /tmp/quay-backup/quay-backup.sql
Print the contents of your
DISTRIBUTED_STORAGE_CONFIGby entering the following command:DISTRIBUTED_STORAGE_CONFIG: default: - S3Storage - s3_bucket: <bucket_name> storage_path: /registry s3_access_key: <s3_access_key> s3_secret_key: <s3_secret_key> host: <host_name> s3_region: <region>Export the
AWS_ACCESS_KEY_IDby using theaccess_keycredential obtained in Step 7:$ export AWS_ACCESS_KEY_ID=<access_key>
Export the
AWS_SECRET_ACCESS_KEYby using thesecret_keyobtained in Step 7:$ export AWS_SECRET_ACCESS_KEY=<secret_key>
Sync the
quaybucket to the/tmp/quay-backup/blob-backup/directory from thehostnameof yourDISTRIBUTED_STORAGE_CONFIG:$ aws s3 sync s3://<bucket_name> /tmp/quay-backup/blob-backup/ --source-region us-east-2
Example output:
download: s3://<user_name>/registry/sha256/9c/9c3181779a868e09698b567a3c42f3744584ddb1398efe2c4ba569a99b823f7a to registry/sha256/9c/9c3181779a868e09698b567a3c42f3744584ddb1398efe2c4ba569a99b823f7a
download: s3://<user_name>/registry/sha256/e9/e9c5463f15f0fd62df3898b36ace8d15386a6813ffb470f332698ecb34af5b0d to registry/sha256/e9/e9c5463f15f0fd62df3898b36ace8d15386a6813ffb470f332698ecb34af5b0d
NoteDelete the
quay-config.yamlfile after syncing thequaybucket because that file contains sensitive information. Thequay-config.yamlfile remains available in thequay-backup.tar.gzarchive.
16.3. Restoring Red Hat Quay on standalone deployments
To restore a standalone Red Hat Quay deployment from backup, you can restore configuration files, recreate the PostgreSQL database, and sync blobs to object storage.
Prerequisites
- You have backed up your Red Hat Quay deployment.
Procedure
Create a new directory that bind-mounts to
/conf/stackinside of the Red Hat Quay container:$ mkdir /opt/new-quay-install
Copy the contents of your temporary backup directory created in the backup procedure to the
new-quay-installdirectory created in Step 1:$ cp /tmp/quay-backup/quay-backup.tar.gz /opt/new-quay-install/
Change into the
new-quay-installdirectory by entering the following command:$ cd /opt/new-quay-install/
Extract the contents of your Red Hat Quay directory:
$ tar xvf /tmp/quay-backup/quay-backup.tar.gz *
Example output:
config.yaml
config.yaml.bak
extra_ca_certs/
extra_ca_certs/ca.crt
ssl.cert
ssl.key
Recall the
DB_URIfrom your backed-upconfig.yamlfile by entering the following command:$ grep DB_URI config.yaml
Example output:
postgresql://<username>:test123@172.24.10.50/quay
Run the following command to enter the PostgreSQL database server:
$ sudo postgres
Enter psql and create a new database in 172.24.10.50 to restore the quay databases, for example,
example_restore_registry_quay_database, by entering the following command:$ psql "host=172.24.10.50 port=5432 dbname=postgres user=<username> password=test123" postgres=> CREATE DATABASE example_restore_registry_quay_database;
Example output:
CREATE DATABASE
Connect to the database by running the following command:
postgres=# \c "example-restore-registry-quay-database";
Example output:
You are now connected to database "example-restore-registry-quay-database" as user "postgres".
Create a
pg_trgmextension of your Quay database by running the following command:example_restore_registry_quay_database=> CREATE EXTENSION IF NOT EXISTS pg_trgm;
Example output:
CREATE EXTENSION
Exit the postgres CLI by entering the following command:
\q
Import the database backup to your new database by running the following command:
$ psql "host=172.24.10.50 port=5432 dbname=example_restore_registry_quay_database user=<username> password=test123" -W < /tmp/quay-backup/quay-backup.sql
Example output:
SET
SET
SET
SET
SET
Update the value of
DB_URIin yourconfig.yamlfrompostgresql://<username>:test123@172.24.10.50/quaytopostgresql://<username>:test123@172.24.10.50/example-restore-registry-quay-databasebefore restarting the Red Hat Quay deployment.NoteThe DB_URI format is
DB_URI postgresql://<login_user_name>:<login_user_password>@<postgresql_host>/<quay_database>. If you are moving from one PostgreSQL server to another PostgreSQL server, update the value of<login_user_name>,<login_user_password>and<postgresql_host>at the same time.In the
/opt/new-quay-installdirectory, print the contents of yourDISTRIBUTED_STORAGE_CONFIGbundle:$ cat config.yaml | grep DISTRIBUTED_STORAGE_CONFIG -A10
Example output:
DISTRIBUTED_STORAGE_CONFIG: default: DISTRIBUTED_STORAGE_CONFIG: default: - S3Storage - s3_bucket: <bucket_name> storage_path: /registry s3_access_key: <s3_access_key> s3_region: <region> s3_secret_key: <s3_secret_key> host: <host_name>NoteYour
DISTRIBUTED_STORAGE_CONFIGin/opt/new-quay-installmust be updated before restarting your Red Hat Quay deployment.Export the
AWS_ACCESS_KEY_IDby using theaccess_keycredential obtained in Step 13:$ export AWS_ACCESS_KEY_ID=<access_key>
Export the
AWS_SECRET_ACCESS_KEYby using thesecret_keyobtained in Step 13:$ export AWS_SECRET_ACCESS_KEY=<secret_key>
Create a new s3 bucket by entering the following command:
$ aws s3 mb s3://<new_bucket_name> --region us-east-2
Example output:
$ make_bucket: quay
Upload all blobs to the new s3 bucket by entering the following command:
$ aws s3 sync --no-verify-ssl \
--endpoint-url <example_endpoint_url>
/tmp/quay-backup/blob-backup/. s3://quay/
where:
<example_endpoint_url>Specifies the Red Hat Quay registry endpoint. The endpoint must be the same before backup and after restore.
Example output:
upload: ../../tmp/quay-backup/blob-backup/datastorage/registry/sha256/50/505edb46ea5d32b5cbe275eb766d960842a52ee77ac225e4dc8abb12f409a30d to s3://quay/datastorage/registry/sha256/50/505edb46ea5d32b5cbe275eb766d960842a52ee77ac225e4dc8abb12f409a30d
upload: ../../tmp/quay-backup/blob-backup/datastorage/registry/sha256/27/27930dc06c2ee27ac6f543ba0e93640dd21eea458eac47355e8e5989dea087d0 to s3://quay/datastorage/registry/sha256/27/27930dc06c2ee27ac6f543ba0e93640dd21eea458eac47355e8e5989dea087d0
upload: ../../tmp/quay-backup/blob-backup/datastorage/registry/sha256/8c/8c7daf5e20eee45ffe4b36761c4bb6729fb3ee60d4f588f712989939323110ec to s3://quay/datastorage/registry/sha256/8c/8c7daf5e20eee45ffe4b36761c4bb6729fb3ee60d4f588f712989939323110ec
...
Before restarting your Red Hat Quay deployment, update the storage settings in your
config.yamlfile:DISTRIBUTED_STORAGE_CONFIG: default: DISTRIBUTED_STORAGE_CONFIG: default: - S3Storage - s3_bucket: <new_bucket_name> storage_path: /registry s3_access_key: <s3_access_key> s3_secret_key: <s3_secret_key> s3_region: <region> host: <host_name>
Chapter 17. Migrating a standalone Red Hat Quay deployment to a Red Hat Quay Operator deployment
You can back up a standalone Red Hat Quay deployment and migrate it to a Red Hat Quay Operator deployment on OpenShift Container Platform.
17.1. Backing up a standalone deployment of Red Hat Quay
To back up a standalone Red Hat Quay deployment before Operator migration, you can copy config.yaml, dump the database, and sync object storage blobs.
Procedure
Back up the
config.yamlof your standalone Red Hat Quay deployment:$ mkdir /tmp/quay-backup $ cp /path/to/Quay/config/directory/config.yaml /tmp/quay-backup
Create a backup of the database that your standalone Red Hat Quay deployment is using:
$ pg_dump -h DB_HOST -p 5432 -d QUAY_DATABASE_NAME -U QUAY_DATABASE_USER -W -O > /tmp/quay-backup/quay-database-backup.sql
- Install the AWS CLI if you do not have it already.
Create an
~/.aws/directory:$ mkdir ~/.aws/
Obtain the
access_keyandsecret_keyfrom theconfig.yamlof your standalone deployment:$ grep -i DISTRIBUTED_STORAGE_CONFIG -A10 /tmp/quay-backup/config.yaml
Example output:
DISTRIBUTED_STORAGE_CONFIG: minio-1: - RadosGWStorage - access_key: ########## bucket_name: quay hostname: 172.24.10.50 is_secure: false port: "9000" secret_key: ########## storage_path: /datastorage/registryStore the
access_keyandsecret_keyfrom theconfig.yamlfile in your~/.awsdirectory:$ touch ~/.aws/credentials
Optional: Check that your
access_keyandsecret_keyare stored:$ cat > ~/.aws/credentials << EOF [default] aws_access_key_id = ACCESS_KEY_FROM_QUAY_CONFIG aws_secret_access_key = SECRET_KEY_FROM_QUAY_CONFIG EOF
Example output:
aws_access_key_id = ACCESS_KEY_FROM_QUAY_CONFIG aws_secret_access_key = SECRET_KEY_FROM_QUAY_CONFIG
NoteIf the AWS CLI does not automatically collect the
access_keyandsecret_keyfrom the~/.aws/credentialsfile, you can configure these by runningaws configureand manually entering the credentials.In your
quay-backupdirectory, create abucket_backupdirectory:$ mkdir /tmp/quay-backup/bucket-backup
Back up all blobs from the S3 storage:
$ aws s3 sync --no-verify-ssl --endpoint-url https://PUBLIC_S3_ENDPOINT:PORT s3://QUAY_BUCKET/ /tmp/quay-backup/bucket-backup/
NoteThe
PUBLIC_S3_ENDPOINTcan be read from the Red Hat Quayconfig.yamlfile underhostnamein theDISTRIBUTED_STORAGE_CONFIG. If the endpoint is insecure, usehttpinstead ofhttpsin the endpoint URL.
17.2. Using backed up standalone content to migrate to OpenShift Container Platform
To migrate backed-up standalone Red Hat Quay content to OpenShift Container Platform, you can restore the database, apply a custom configuration bundle, and sync blobs to Object Bucket storage.
Prerequisites
-
Your standalone Red Hat Quay data, blobs, database, and
config.yamlhave been backed up. - Red Hat Quay is deployed on OpenShift Container Platform using the Red Hat Quay Operator.
-
A
QuayRegistrywith all components set tomanaged.
The procedure in this document uses the following namespace: quay-enterprise.
Procedure
Scale down the Red Hat Quay Operator:
$ oc scale --replicas=0 deployment quay-operator.v3.6.2 -n openshift-operators
Scale down the application and mirror deployments:
$ oc scale --replicas=0 deployment QUAY_MAIN_APP_DEPLOYMENT QUAY_MIRROR_DEPLOYMENT
Copy the database SQL backup to the
QuayPostgreSQL database instance:$ oc cp /tmp/user/quay-backup/quay-database-backup.sql quay-enterprise/quayregistry-quay-database-54956cdd54-p7b2w:/var/lib/pgsql/data/userdata
Obtain the database password from the Operator-created
config.yamlfile:$ oc get deployment quay-quay-app -o json | jq '.spec.template.spec.volumes[].projected.sources' | grep -i config-secret
Example output:
"name": "QUAY_CONFIG_SECRET_NAME"
$ oc get secret quay-quay-config-secret-9t77hb84tb -o json | jq '.data."config.yaml"' | cut -d '"' -f2 | base64 -d -w0 > /tmp/quay-backup/operator-quay-config-yaml-backup.yaml
$ cat /tmp/quay-backup/operator-quay-config-yaml-backup.yaml | grep -i DB_URI
Example output:
postgresql://QUAY_DATABASE_OWNER:PASSWORD@DATABASE_HOST/QUAY_DATABASE_NAME
Execute a shell inside of the database pod:
# oc exec -it quay-postgresql-database-pod -- /bin/bash
Enter psql:
bash-4.4$ psql
Drop the database:
postgres=# DROP DATABASE "example-restore-registry-quay-database";
Example output:
DROP DATABASE
Create a new database and set the owner as the same name:
postgres=# CREATE DATABASE "example-restore-registry-quay-database" OWNER "example-restore-registry-quay-database";
Example output:
CREATE DATABASE
Connect to the database:
postgres=# \c "example-restore-registry-quay-database";
Example output:
You are now connected to database "example-restore-registry-quay-database" as user "postgres".
Create a
pg_trgmextension of yourQuaydatabase:example-restore-registry-quay-database=# CREATE EXTENSION IF NOT EXISTS pg_trgm ;
Example output:
CREATE EXTENSION
Exit the postgres CLI to re-enter bash-4.4:
\q
Set the password for your PostgreSQL deployment:
bash-4.4$ psql -h localhost -d "QUAY_DATABASE_NAME" -U QUAY_DATABASE_OWNER -W < /var/lib/pgsql/data/userdata/quay-database-backup.sql
Example output:
SET SET SET SET SET
Exit bash mode:
bash-4.4$ exit
Create a new configuration bundle for the Red Hat Quay Operator.
$ touch config-bundle.yaml
In your new
config-bundle.yaml, include all of the information that the registry requires, such as LDAP configuration, keys, and other modifications that your old registry had. Run the following command to move thesecret_keyto yourconfig-bundle.yaml:$ cat /tmp/quay-backup/config.yaml | grep SECRET_KEY > /tmp/quay-backup/config-bundle.yaml
NoteYou must manually copy all the LDAP, OIDC, and other information and add it to the
/tmp/quay-backup/config-bundle.yamlfile.Create a configuration bundle secret inside of your OpenShift cluster:
$ oc create secret generic new-custom-config-bundle --from-file=config.yaml=/tmp/quay-backup/config-bundle.yaml
Scale up the
Quaypods:$ oc scale --replicas=1 deployment quayregistry-quay-app
Example output:
deployment.apps/quayregistry-quay-app scaled
Scale up the mirror pods:
$ oc scale --replicas=1 deployment quayregistry-quay-mirror
Example output:
deployment.apps/quayregistry-quay-mirror scaled
Patch the
QuayRegistryCRD so that it contains the reference to the new custom configuration bundle:$ oc patch quayregistry QUAY_REGISTRY_NAME --type=merge -p '{"spec":{"configBundleSecret":"new-custom-config-bundle"}}'NoteIf Red Hat Quay returns a
500internal server error, you might have to update thelocationof yourDISTRIBUTED_STORAGE_CONFIGtodefault.Create a new AWS
credentials.yamlin your/.aws/directory and include theaccess_keyandsecret_keyfrom the Operator-createdconfig.yamlfile:$ touch credentials.yaml
$ grep -i DISTRIBUTED_STORAGE_CONFIG -A10 /tmp/quay-backup/operator-quay-config-yaml-backup.yaml
$ cat > ~/.aws/credentials << EOF
[default]
aws_access_key_id = ACCESS_KEY_FROM_QUAY_CONFIG
aws_secret_access_key = SECRET_KEY_FROM_QUAY_CONFIG
EOF
NoteIf the AWS CLI does not automatically collect the
access_keyandsecret_keyfrom the~/.aws/credentialsfile, you can configure these by runningaws configureand manually entering the credentials.Record the NooBaa’s publicly available endpoint:
$ oc get route s3 -n openshift-storage -o yaml -o jsonpath="{.spec.host}{'\n'}"Sync the backup data to the NooBaa backend storage:
$ aws s3 sync --no-verify-ssl --endpoint-url https://NOOBAA_PUBLIC_S3_ROUTE /tmp/quay-backup/bucket-backup/* s3://QUAY_DATASTORE_BUCKET_NAME
Scale the Operator back up to 1 pod:
$ oc scale --replicas=1 deployment quay-operator.v3.6.4 -n openshift-operators
The Operator uses the custom configuration bundle provided and reconciles all secrets and deployments. Your new Red Hat Quay deployment on OpenShift Container Platform contains all of the information that the old deployment had. You can pull all images.
Chapter 18. Red Hat Quay garbage collection
Red Hat Quay garbage collection automatically removes untagged images, unused repositories, and unused blobs so that active registry data uses disk space more efficiently.
18.1. Red Hat Quay garbage collection in practice
Red Hat Quay runs garbage collection continuously in the background. Namespace and repository workers process queues under a global lock, while tagged-image workers search for inactive or expired tags.
Currently, all garbage collection happens discreetly, and Red Hat Quay does not provide commands to manually run garbage collection. Red Hat Quay provides metrics that track the status of the different garbage collection workers.
For namespace and repository garbage collection, the progress is tracked based on the size of their respective queues. Namespace and repository garbage collection workers require a global lock to work. As a result, and for performance reasons, only one worker runs at a time.
Red Hat Quay shares blobs between namespaces and repositories in order to conserve disk space. For example, if the same image is pushed 10 times, only one copy of that image is stored.
Tags can share their layers with different images already stored somewhere in Red Hat Quay. In that case, blobs stay in storage, because deleting shared blobs would make other images unusable.
Blob expiration is independent of the time machine. If you push a tag to Red Hat Quay and the time machine is set to 0 seconds, and then you delete a tag immediately, garbage collection deletes the tag and everything related to that tag, but does not delete the blob storage until the blob expiration time is reached.
Garbage collecting tagged images works differently than garbage collection on namespaces or repositories. Rather than having a queue of items to work with, the garbage collection workers for tagged images actively search for a repository with inactive or expired tags to clean up. Each instance of garbage collection workers grabs a repository lock, which results in one worker per repository.
- In Red Hat Quay, inactive or expired tags are manifests without tags because the last tag was deleted or it expired. The manifest stores information about how the image is composed and stored in the database for each individual tag. When a tag is deleted and the allotted time from Time Machine has been met, Red Hat Quay garbage collects the blobs that are not connected to any other manifests in the registry. If a particular blob is connected to a manifest, Red Hat Quay preserves that blob in storage and removes only its connection to the manifest that is being deleted.
- Expired images disappear after the allotted time, but are still stored in Red Hat Quay. The time in which an image is completely deleted, or collected, depends on the Time Machine setting of your organization. The default time for garbage collection is 14 days unless otherwise specified. Until that time, tags can be pointed to an expired or deleted image.
- For each type of garbage collection, Red Hat Quay provides metrics for the number of rows per table deleted by each garbage collection worker. The following image shows an example of how Red Hat Quay monitors garbage collection with the same metrics:
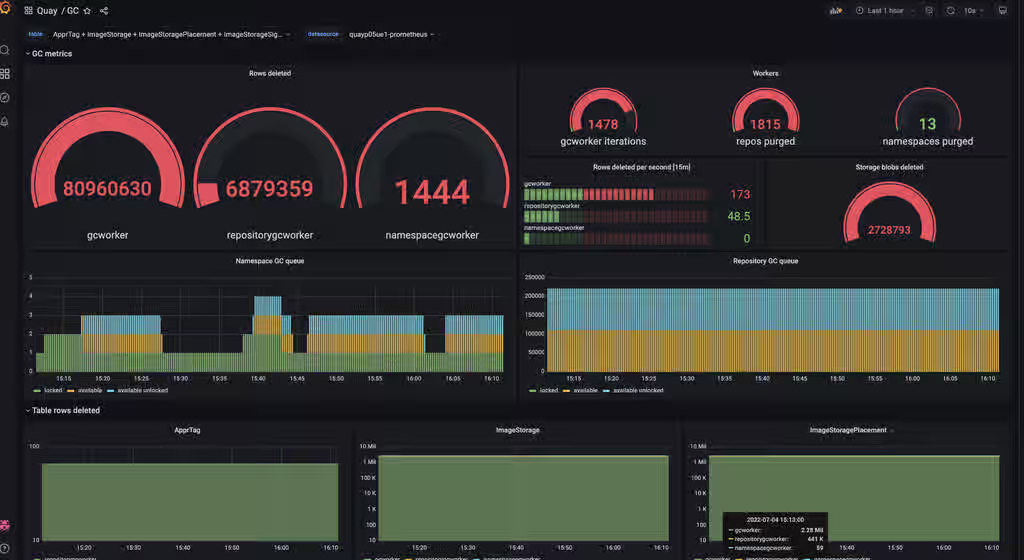
Red Hat Quay does not have a way to track how much space is freed up by garbage collection. Currently, the best indicator of this is by checking how many blobs have been deleted in the provided metrics.
The UploadedBlob table in the Red Hat Quay metrics tracks the various blobs that belong to a repository. When a blob is uploaded, garbage collection does not remove it before the time designated by the PUSH_TEMP_TAG_EXPIRATION_SEC parameter. This delay avoids prematurely deleting blobs that are part of an ongoing push. For example, if garbage collection is set to run often, and a tag is deleted in the span of less than one hour, then the associated blobs might not get cleaned up immediately. Instead, and assuming that the time designated by the PUSH_TEMP_TAG_EXPIRATION_SEC parameter has passed, the associated blobs are removed the next time garbage collection runs because of another expired tag on the same repository.
18.2. Garbage collection configuration fields
Use these configuration fields to enable or disable Red Hat Quay garbage collection features and to control how often garbage collection workers run.
| Name | Description | Schema |
|---|---|---|
| FEATURE_GARBAGE_COLLECTION |
Whether garbage collection is enabled for image tags. Defaults to | Boolean |
| FEATURE_NAMESPACE_GARBAGE_COLLECTION |
Whether garbage collection is enabled for namespaces. Defaults to | Boolean |
| FEATURE_REPOSITORY_GARBAGE_COLLECTION |
Whether garbage collection is enabled for repositories. Defaults to | Boolean |
| GARBAGE_COLLECTION_FREQUENCY | The frequency, in seconds, at which the garbage collection worker runs. Affects only garbage collection workers. Defaults to 30 seconds. | String |
| PUSH_TEMP_TAG_EXPIRATION_SEC | The number of seconds that blobs are not garbage collected after being uploaded. This feature prevents garbage collection from cleaning up blobs that are not referenced yet, but still used as part of an ongoing push. | String |
| TAG_EXPIRATION_OPTIONS | List of valid tag expiration values. | String |
| DEFAULT_TAG_EXPIRATION | Tag expiration time for time machine. | String |
| CLEAN_BLOB_UPLOAD_FOLDER |
Automatically cleans stale blobs left over from an S3 multipart upload. By default, blob files older than two days are cleaned up every hour. Default: | Boolean |
18.3. Disabling garbage collection
You can disable Red Hat Quay garbage collection features in config.yaml when you need to control when dangling images, repositories, and blobs are removed.
The garbage collection features for image tags, namespaces, and repositories are stored in the config.yaml file. These features default to true.
In rare cases, you might want to disable garbage collection, for example, to control when garbage collection is performed. You can disable garbage collection by setting the GARBAGE_COLLECTION features to false. When disabled, dangling or untagged images, repositories, namespaces, layers, and manifests are not removed. This might increase the downtime of your environment.
Red Hat Quay does not provide a command to manually run garbage collection. Instead, disable and then re-enable the garbage collection feature.
18.4. Garbage collection and quota management
With Red Hat Quay quota management, reported storage consumption can differ from disk usage because garbage collection reclaims space after deletion.
Red Hat Quay introduced quota management in 3.7. With quota management, users have the ability to report storage consumption and to contain registry growth by establishing configured storage quota limits.
As of Red Hat Quay 3.7, garbage collection reclaims memory that was allocated to images, repositories, and blobs after deletion. Because the garbage collection feature reclaims memory after deletion, disk usage can differ from the total consumption that quota management reports. No workaround is currently available for this issue.
18.5. Checking garbage collection in practice
To verify that Red Hat Quay garbage collection is running, you can review registry logs after you delete an image tag.
Procedure
Enter the following command to ensure that garbage collection is properly working:
$ sudo podman logs <container_id>
Example output:
gcworker stdout | 2022-11-14 18:46:52,458 [63] [INFO] [apscheduler.executors.default] Job "GarbageCollectionWorker._garbage_collection_repos (trigger: interval[0:00:30], next run at: 2022-11-14 18:47:22 UTC)" executed successfully
- Delete an image tag.
Enter the following command to ensure that the tag was deleted:
$ podman logs quay-app
Example output:
gunicorn-web stdout | 2022-11-14 19:23:44,574 [233] [INFO] [gunicorn.access] 192.168.0.38 - - [14/Nov/2022:19:23:44 +0000] "DELETE /api/v1/repository/quayadmin/busybox/tag/test HTTP/1.0" 204 0 "http://quay-server.example.com/repository/quayadmin/busybox?tab=tags" "Mozilla/5.0 (X11; Linux x86_64; rv:102.0) Gecko/20100101 Firefox/102.0"
18.6. Red Hat Quay garbage collection metrics
Use these metrics to track how often Red Hat Quay garbage collection workers run and how many namespaces, repositories, and blobs they remove.
| Metric name | Description |
|---|---|
| quay_gc_iterations_total | Number of iterations by the GCWorker |
| quay_gc_namespaces_purged_total | Number of namespaces purged by the NamespaceGCWorker |
| quay_gc_repos_purged_total | Number of repositories purged by the RepositoryGCWorker or NamespaceGCWorker |
| quay_gc_storage_blobs_deleted_total | Number of storage blobs deleted |
Sample metrics output
# TYPE quay_gc_iterations_created gauge
quay_gc_iterations_created{host="example-registry-quay-app-6df87f7b66-9tfn6",instance="",job="quay",pid="208",process_name="secscan:application"} 1.6317823190189714e+09
...

# HELP quay_gc_iterations_total number of iterations by the GCWorker
# TYPE quay_gc_iterations_total counter
quay_gc_iterations_total{host="example-registry-quay-app-6df87f7b66-9tfn6",instance="",job="quay",pid="208",process_name="secscan:application"} 0
...

# TYPE quay_gc_namespaces_purged_created gauge
quay_gc_namespaces_purged_created{host="example-registry-quay-app-6df87f7b66-9tfn6",instance="",job="quay",pid="208",process_name="secscan:application"} 1.6317823190189433e+09
...

# HELP quay_gc_namespaces_purged_total number of namespaces purged by the NamespaceGCWorker
# TYPE quay_gc_namespaces_purged_total counter
quay_gc_namespaces_purged_total{host="example-registry-quay-app-6df87f7b66-9tfn6",instance="",job="quay",pid="208",process_name="secscan:application"} 0
....

# TYPE quay_gc_repos_purged_created gauge
quay_gc_repos_purged_created{host="example-registry-quay-app-6df87f7b66-9tfn6",instance="",job="quay",pid="208",process_name="secscan:application"} 1.631782319018925e+09
...

# HELP quay_gc_repos_purged_total number of repositories purged by the RepositoryGCWorker or NamespaceGCWorker
# TYPE quay_gc_repos_purged_total counter
quay_gc_repos_purged_total{host="example-registry-quay-app-6df87f7b66-9tfn6",instance="",job="quay",pid="208",process_name="secscan:application"} 0
...

# TYPE quay_gc_storage_blobs_deleted_created gauge
quay_gc_storage_blobs_deleted_created{host="example-registry-quay-app-6df87f7b66-9tfn6",instance="",job="quay",pid="208",process_name="secscan:application"} 1.6317823190189059e+09
...

# HELP quay_gc_storage_blobs_deleted_total number of storage blobs deleted
# TYPE quay_gc_storage_blobs_deleted_total counter
quay_gc_storage_blobs_deleted_total{host="example-registry-quay-app-6df87f7b66-9tfn6",instance="",job="quay",pid="208",process_name="secscan:application"} 0
...Chapter 19. Performing health checks on Red Hat Quay deployments
Use Red Hat Quay health check endpoints to monitor instance, end-to-end, and warning status before issues become critical.
Health checks help ensure that everything is working correctly, and can be used to identify potential issues before they become critical problems. By monitoring the health of a system, Red Hat Quay administrators can address abnormalities or potential failures for things like geo-replication deployments, Operator deployments, standalone Red Hat Quay deployments, object storage issues, and so on. Performing health checks can also help reduce the likelihood of encountering troubleshooting scenarios.
Links contained herein to any external website(s) are provided for convenience only. Red Hat has not reviewed the links and is not responsible for the content or its availability. The inclusion of any link to an external website does not imply endorsement by Red Hat of the website or its entities, products, or services. You agree that Red Hat is not responsible or liable for any loss or expenses that may result due to your use of (or reliance on) the external site or content.
Red Hat Quay has several health check endpoints. The following table shows you the health check, a description, an endpoint, and an example output.
Table 19.1. Health check endpoints
| Health check | Description | Endpoint | Example output |
|---|---|---|---|
|
|
The |
|
|
|
|
The |
|
|
|
|
The |
|
|
Chapter 20. Branding a Red Hat Quay deployment on the legacy UI
To brand the legacy Red Hat Quay UI, you can set logo, footer, and registry title fields in your config.yaml file and restart the registry.
Procedure
Update your Red Hat Quay
config.yamlfile to add the following parameters:BRANDING: logo: <logo_url> footer_img: <footer_image_url> footer_url: <footer_link_url> --- REGISTRY_TITLE: <long_form_title> REGISTRY_TITLE_SHORT: <short_form_title>where:
logo- Specifies the URL of the image that appears at the top of your Red Hat Quay deployment.
footer_img- Specifies the URL of the image that appears at the bottom of your Red Hat Quay deployment.
footer_url- Specifies the URL of the website that users are directed to when clicking the footer image.
REGISTRY_TITLE- Specifies the long-form title for the registry. This is displayed in the frontend of your Red Hat Quay deployment, for example, at the sign in page of your organization.
REGISTRY_TITLE_SHORT- Specifies the short-form title for the registry. The title is displayed on various pages of your organization, for example, as the title of the tutorial on your organization’s Tutorial page.
- Restart your Red Hat Quay deployment. After you restart, your Red Hat Quay deployment shows the new logo, footer image, and footer image URL.
Chapter 21. Preparing your registry to accept large artifacts
To accept large AI or ML artifacts in Red Hat Quay, you can increase the minimum_chunk_size_mb value in your config.yaml file after you consult Red Hat Support.
Before altering the minimum_chunk_size_mb configuration field, open a support case with Red Hat Support. Altering minimum_chunk_size_mb can have unintended consequences for your registry.
Altering this field can also slow down uploads. You should only alter this field if necessary.
Artificial intelligence (AI) or machine learning (ML) artifacts such as large-language models (LLMs), vector graphics, trained model files, or large datasets often require that Red Hat Quay administrators modify their registry to suit the needs of pushing such larger artifacts. By default, Red Hat Quay uses a minimum chunk size (or the pieces that a large file is split into during upload) of 5 MB. This means that larger layers, for example, 50 GB, result in 10,000 chunks. This can be confirmed based on the following formula:
- 50 GB = 50,000 MB
- 50,000 MB divided by Red Hat Quay’s default minimum chunk size of 5 MB = 10,000 chunks
Some backend storage providers, for example, Amazon Web Services (AWS) S3, are unable to store artifacts larger than 50 GB because of a strict limitation of 10,000 parts per upload; attempting to push an artifact larger than 50 GB with Red Hat Quay’s default of 5 MB results in S3 protocol violations.
As a workaround to this limitation, you can set the minimum_chunk_size_mb field in your config.yaml file to a value larger than 5 MB. For example:
# ...
minimum_chunk_size_mb: 20
# ...
Configuring minimum_chunk_size_mb to more than 5 MB allows your registry backend to accept artifacts larger than 50 GB and up to 200 GB. In the event that your artifact is larger than 200 GB, you could increase the minimum_chunk_size_mb value.
Consult Red Hat Support before you alter the minimum_chunk_size_mb configuration field.
Additional resources
Chapter 22. Schema for Red Hat Quay configuration
Most Red Hat Quay configuration options are stored in the config.yaml file and are documented in the Configuration Guide.
Additional resources