How to Use the Azure Xplat-CLI to Provision a Red Hat Enterprise Linux Virtual Machine for Microsoft Azure
Important: Azure CLI 2.0 is the recommended tool for uploading and provisioning new Red Hat Enterprise Linux (RHEL) VMs for Microsoft Azure. Go to Creating a Red Hat Enterprise Linux Image and Provisioning it to Microsoft Azure if you are creating new resources for Microsoft Azure.
This knowledge article provides information about using the older Azure command-line interface (Xplat-CLI). The Azure Xplat-CLI can be used to upload and provision a Red Hat Enterprise Linux (RHEL) virtual machine (VM) for Microsoft Azure. Note that most customers should use version 2.0 of the Azure command-line interface (Azure CLI 2.0) as described in Creating a Red Hat Enterprise Linux Image and Provisioning it to Microsoft Azure.
Required Administration Server Packages
The following packages are necessary to set up your Azure Administration Server. Some of these packages are already installed as part of your RHEL operating system configuration; others are installed during this procedure. You can use yum info <package> to see if the packages are installed.
Note: The GitHub link to the Azure cross-platform CLI package (Xplat-CLI) is provided as a reference. Updates to this package can be accessed there.
| Package | Repository | Description |
|---|---|---|
| Xplat-CLI | Content from github.com is not included.Content from github.com is not included.https://github.com/Azure/azure-xplat-cli | Azure cross-platform CLI. This package is installed in the following set of steps. |
| libvirt | rhel-7-server-rpms | Open source API, daemon, and management tool for managing platform virtualization. |
| virt-manager | rhel-7-server-rpms | A command line and Gnome desktop virtual machine manager used to create and manage KVM virtual machines. |
| libguestfs | rhel-7-server-rpms | A library for accessing and modifying virtual machine file systems. |
| libguestfs-tools | rhel-7-server-rpms | System administration tools for virtual machines; includes the Guestfish utility. |
| nodejs | rhel-server-rhscl-7-rpms | Open source, cross-platform runtime environment for server-side and networking applications. |
Install the Azure Cross-Platform CLI
You need access to Red Hat Software Collections (rhel-server-rhscl-7-rpms) to install the Azure cross-platform CLI.
-
Display a list of available subscriptions.
subscription-manager list --availableNote: You may need to run
subscription-manager registerfirst. -
Attach the applicable subscription.
subscription-manager attach --pool=<pool_id> -
Display a list of available Red Hat software repositories.
subscription-manager repos --listSearch for Red Hat Software Collections RPMs (
rhel-server-rhscl-7-rpms) in the list of available repositories. -
Enable the Red Hat Software Collections repository.
subscription-manager repos --enable rhel-server-rhscl-7-rpms
Once you have enabled the RHSCL repository, install the nodejs and npm pacakges and the ARM CLI.
-
Install the
nodejsandnpmpackages.yum -y install rh-nodejs4 -
Enable the
nodejssoftware collection.scl enable rh-nodejs4 bashNote: Add the line
source /opt/rh/rh-nodejs4/enableto your~/.bashrcfile to enable the Azure cross-platform CLI to persist. -
Install the Azure cross-platform CLI.
npm install -g azure-cli -
Enter
azure | moreat the command line and review the information displayed. This is a good start to understanding the commands used to manage your Azure VMs and resources.
Once these steps are completed, the Azure cross-platform CLI is installed.
Upload and Provision a Microsoft Azure VM
You can use the Azure Xplat-CLI in two separate deployment modes in Microsoft Azure: Azure Service Management (ASM) mode (sometimes referred to as Azure Classic) and Azure Resource Manager (ARM) mode. The following steps provide instructions for ASM mode. Only use these instructions if you have resources in Microsoft Azure that were created using ASM mode.
The following section provides instructions for using ASM mode. Refer to Azure Xplat-CLI in ARM Mode for ARM mode instructions.
Using the Azure Xplat-CLI in ASM Mode
-
From your Azure Administration Server, list the Azure configuration settings.
# azure config list[root@rhel7admin images] # azure config list info: Executing command config list info: Getting config settings data: Setting Value data: ------- ----- data: mode asm info: config list command OKIf the mode shows asm, go to the next section. If the mode shows arm, enter the command option below.
# azure config mode asm -
Upload the image to Microsoft Azure.
Note: Azure VM image names can contain letters, digits, periods (.), and dashes (-). Names cannot end with a dash (-) or be longer than 512 characters.
# azure vm image create <azure-image-name> --location <azure-region> --os Linux <path-to-azure-image-name>.vhd[root@rhel7admin images]# azure vm image create rhel71g-az --location "East US" --os Linux /var/lib/libvirt/images/rhel71g.vhd info: Executing command vm image create + Retrieving storage accounts info: VHD size : 10 GB info: Uploading 10486784.5 KB Requested:100.0% Completed:100.0% Running: 0 Time: 2m31s Speed: 7840 KB/s info: https://rhel71forazvhd1428436031.blob.core.windows.net/vm-images/rhel72g.vhd was uploaded successfully info: vm image create command OK [root@rhel7admin images]# -
View the image details.
# azure vm image show <azure-image-name>[root@rhel7admin images]# azure vm image show rhel71g-az info: Executing command vm image show + Fetching VM image data: category "User" data: label "rhel71g-az" data: location "East US" data: logicalSizeInGB 11 data: mediaLinkURi "https://rhel71forazvhd1428426031.blob.core.windows.net/vm-images/rhel71g.vhd" data: name "rhel71g-az" data: operatingSystemType "Linux" data: isPremium false data: iOType "Standard" info: vm image show command OK [root@rhel7admin images]# -
Provision a Microsoft Azure VM from the image.
Note: The minimum RHEL VM size in Microsoft Azure is "Medium" (Standard_A2).
azure vm create <virtual-machine-name> <azure-image-name> <username> --location <azure-region> --vm size <vm-size> --ssh[root@rhel7admin images]# azure vm create rhel71g-vml rhel71g-az testuser --location "East US" --vm size "Medium" --ssh info: Executing command vm create + Looking up image rhel71g-az Enter VM 'testuser' password:******** Confirm password:******** +Looking up cloud Service info: cloud service rhel71g-vml not found. + Creating cloud Service + Creating VM info: vm create command OK [root@rhel7admin images]# -
View the Microsoft Azure VM details.
# azure vm show <virtual-machine-name>[root@rhel7admin images]# azure vm show rhel71g-vml info: Executing command vm show + Getting virtual machines data: DNSName "rhel71g-vml.cloudapp.net" data: Location "East US" data: VMName "rhel71g-vml" data: IPAddress "100.73.16.3" data: InstanceStatus "ReadyRole" data: InstanceSize "Medium" data: Image "rhel71g-az" data: OSDisk hostCaching "ReadWrite" data: OSDisk name "rhel71g-vml-rhel71g-vml-0-20150417174839080" data: OSKisk medialink "https://rhel71g-az.blob.core.windows.net/vm-images/2vbrvh2n.lou201504171748380986.vhd" data: OSDisk sourceImageName "rhel71g-az" data: OSDisk operatingSystem "Linux" data: OSDisk iOType "Standard" data: ReservedIPName "" data: VirtualIPAddresses 0 address "104.211.33.32" data: VirtualIPAddresses 0 name "rhel71g-vmlContractContract" data: VirtualIPAddresses 0 isDnsProgrammed true data: Network Endpoints 0 localPort 22 data: Network Endpoints 0 name "ssh" data: Network Endpoints 0 port 22 data: Network Endpoints 0 protocol "tcp" data: Network Endpoints 0 virtualIPAddress "104.211.33.32" data: Network Endpoints 0 enableDirectServerReturn false info: vm show command OK [root@rhel7admin images]# -
Open a terminal SSH session and log in to the Microsoft Azure VM.
ssh username@virtualIPAddress[root@rhel7adm images]# ssh testuser@104.211.33.32 The authenticity of host '104.211.33.32' can't be established. ECDSA key fingerprint is b1:19:03:39:c9:8c:e6:e9:4b:18:69:17:e3:46:b2:7e. Are you sure you want to continue connecting (yes/no)? yes Warning: Permanently added '104.211.33.32' (ECDSA) to the list of known hosts. testuser@104.211.33.32's password: [testuser@rhel71g-vml ~]$
Once you have successfully provisioned the VM, you can view and manage the VM by selecting it from the Virtual Machines (classic) section in the Microsoft Azure portal. Refer to Content from azure.microsoft.com is not included.Azure CLI commands in Azure Service Management (asm) mode for additional commands used to manage Azure classic VMs with the Azure cross-platform CLI.
Using the Azure Xplat-CLI in ARM Mode
Complete the procedures in the following sections to upload, provision, and start a RHEL VM in Microsoft Azure using the Xplat-CLI in ARM mode.
Authenticate your Azure Administration Server
The following steps are completed on your Azure Administration Server.
-
Start an Azure CLI session.
a. Log in to your Microsoft Azure account.
  scl enable rh-nodejs4 bash
azure login
b. To authenticate your device, open the device login page in your browser and enter the code displayed.

c. Enter your account details. Once your device is authorized, you can use the Azure cross-platform CLI to manage your resources in Microsoft Azure.

-
List your Microsoft Azure subscription(s).
azure account list -
View your Microsoft Azure subscription details.
azure account show <subscription ID> -
View the current Azure cross-platform CLI mode.
azure config list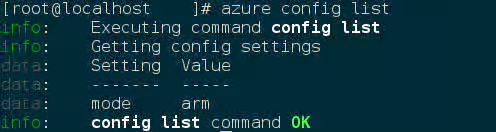
If the mode shows arm, you are ready for the next step. If the mode shows asm, run the following command.
azure config mode armNote: If you are uploading to an existing container created using Azure Service Management (ASM) mode instead of Azure Resource Manager (ARM) mode, refer to Uploading and Provisioning an Azure VM Using Azure Service Management (ASM) Mode.
Export a Storage Account Key
Important: The following steps are only for users who have existing resources for the VM in Microsoft Azure. If you need to create new Azure resources, go to Set Up New Resources in Microsoft Azure.
Complete the steps below to get your storage account key and export it to Microsoft Azure.
-
Get the storage account keys to use in the next step.
azure storage account keys list -g <resource-group> <account-name>
-
Export the key. Copy the key1 string created in the previous step and paste it in the
AccountKey=file.export AZURE_STORAGE_CONNECTION_STRING="DefaultEndpointsProtocol=https;AccountName=<account-name>;AccountKey=<storage-account-key>"
Once you have exported the storage account key, go to Upload the Azure Image to the Storage Container.
Set Up New Resources in Microsoft Azure {#header71}
Before you can upload the Azure VHD, you need to have resources for the VM created in Microsoft Azure. All of the following steps are completed from your Azure Administration Server.
-
Create a resource group.
azure group create -l <azure-region> -n <resource-group>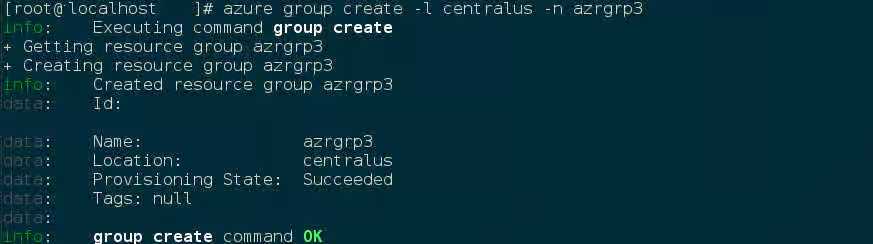
-
Create a storage account. The following command sets up a few details that allow you to identify the replication option you want to use. Refer to Microsoft's article for more details: Content from azure.microsoft.com is not included.Account Replication Options.
azure storage account create --sku-name <LRS, ZRS, GRS, RA-GRS> --kind <Storage, Blob Storage> -l <azure-region> -g <resource-group> <account-name>
-
Get the storage account keys to use in the next step.
azure storage account keys list -g <resource-group> <account-name>Azure generates two keys, both of which allow access to your storage container. Azure generates two keys for key regeneration purposes. During regeneration, you use one key for secure access, while Azure regenerates and creates a new key. Once there is a new key, you switch to that key and regenerate the other key the next time, and so forth. This is like changing your password for your Azure storage container. You should do this periodically, but do not do it now because you just created the two keys. See this Microsoft article on keys and key regeneration for more details: Content from azure.microsoft.com is not included.Storage Connection Strings.
-
Export the key. Copy the key1 string created in the previous step and paste it in the
AccountKey=file.export AZURE_STORAGE_CONNECTION_STRING="DefaultEndpointsProtocol=https;AccountName=<account-name>;AccountKey=<storage-account-key>" -
Create the storage container.
azure storage container create <container-name>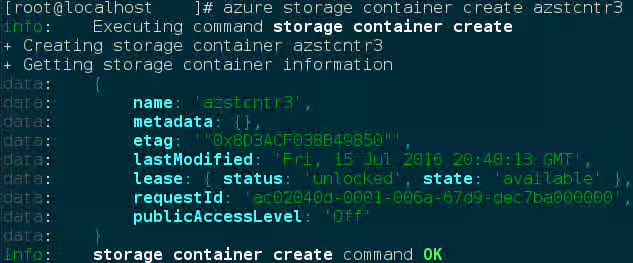
-
Create the Azure virtual network.
azure network vnet create -g <resource-group> -l <azure-region> -a <CIDR-address-prefix-vnet> <vnet-name>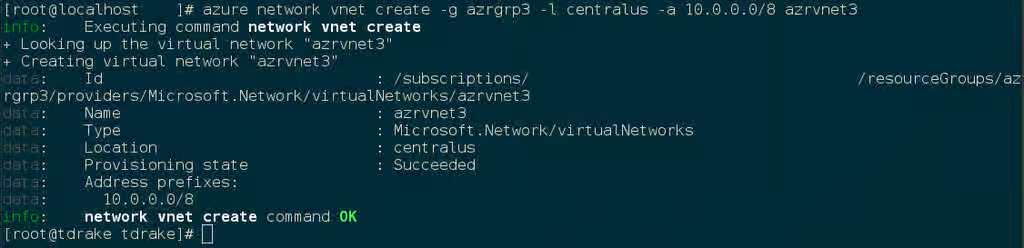
-
Create the subnet for the Azure virtual network.
azure network vnet subnet create -g <resource-group> -e <vnet-name> -a <CIDR-address-prefix-subnet> <subnet-name>
Important: The storage connection key persists through the following procedure if you do not shut down your machine. If you shut down prior to completing the procedure, you need to pass your key (-k "<storage-account-key>") in the following commands. You can add your keys to a configuration file to load them each time your machine boots.
Upload the Azure Image to the Storage Container {#header81}
The last thing to do is upload your image and provision the Azure RHEL VM.
-
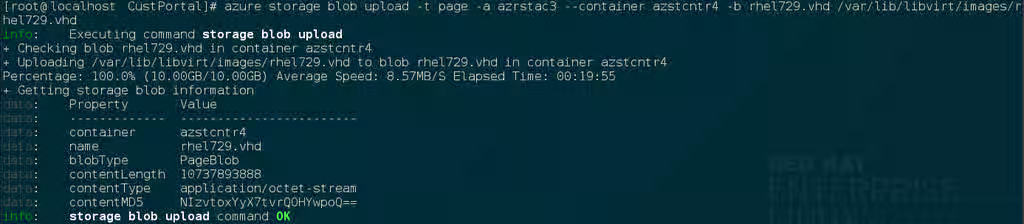
Upload the image to Microsoft Azure.
azure storage blob upload -t page -a <account-name> --container <container-name> -b <azure-image-name>.vhd <path to rhel-image-name>.vhdThis could take some time, depending on how fast your upload speeds are.
-
View the image details.
azure storage blob show --container <container-name> <azure-image-name>.vhd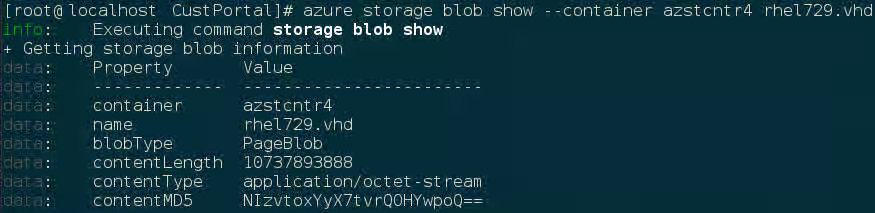
-
Use the verbose
-voption to show the image URL needed for the Azure VMcreate vmcommand used in the next section.azure storage blob show --container <container-name> <azure-image-name>.vhd -v
You can now open the Content from portal.azure.com is not included.Microsoft Azure portal and search for your Resource Group Name. You can see your resource group and account properties. You may want to pin your resource group to the dashboard for quick access later. Come back and finish once you have looked at your Azure account properties.
Provision the Azure RHEL VM and Log In
Now that the RHEL VM template VHD image is available in your Microsoft Azure account, you can create an Azure RHEL VM from the image. You can use this template image to create multiple Azure VMs as you need them going forward.
-
Enter the following command to create the Azure RHEL VM. (For creating multiple VMs, you will likely want to create a script file for this operation.)
Command Notes: The
vnic-name,public-ip-name, andpublic-ip-domain-nameare created when you run this command. Enter the names you want to use, and they will be created when the command runs. Copy and paste the image URL from the previous step for the-Qoption. The-Goption generatessshkeys. Note the path to thekey-pemfile in the resulting displayed details. You need the path to this file tosshinto your Azure VM.Important: Azure virtual machine names can contain letters, digits, a period, and a hyphen. The name cannot start or end with a hyphen, cannot be composed entirely of numbers, or be longer than 512 characters. Refer to Content from docs.microsoft.com is not included.Recommended naming conventions for Azure resources for additional details.
azure vm create -g <resource-group> -l <azure-region> -f <vnic-name> -y <os-type> -Q <image-url> -G -z <vm-size> -i <public-ip-name> -o <storage-account-name> -R <storage-container-name> -m <public-ip-allocation-method> -w <public-ip-domain-name> -t <public-ip-idletimeout> -F <vnet-name> -j <vnet-subnet-name> -u <admin-name> -n <virtual-machine-name>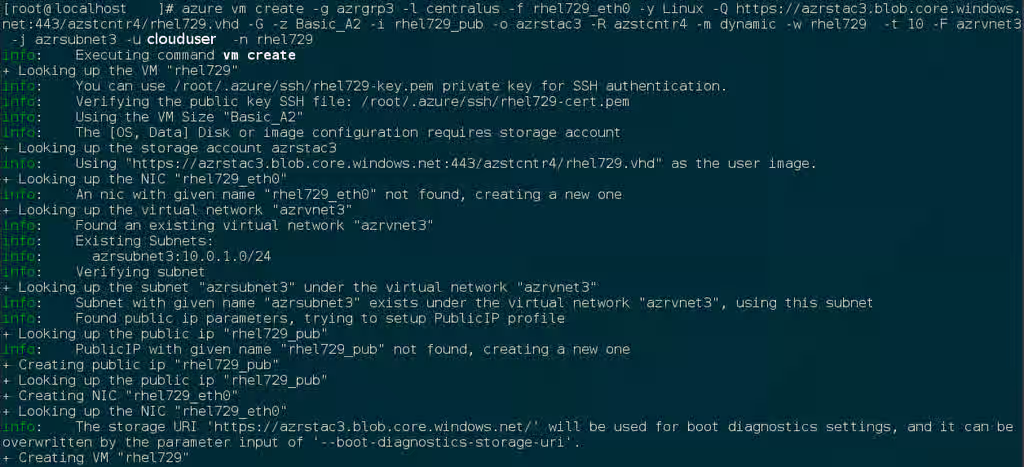
-
View the details of the newly provisioned VM. Note the public IP address you will use to connect to the VM in an SSH session.
azure vm show -g <resource-group> <virtual-machine-name>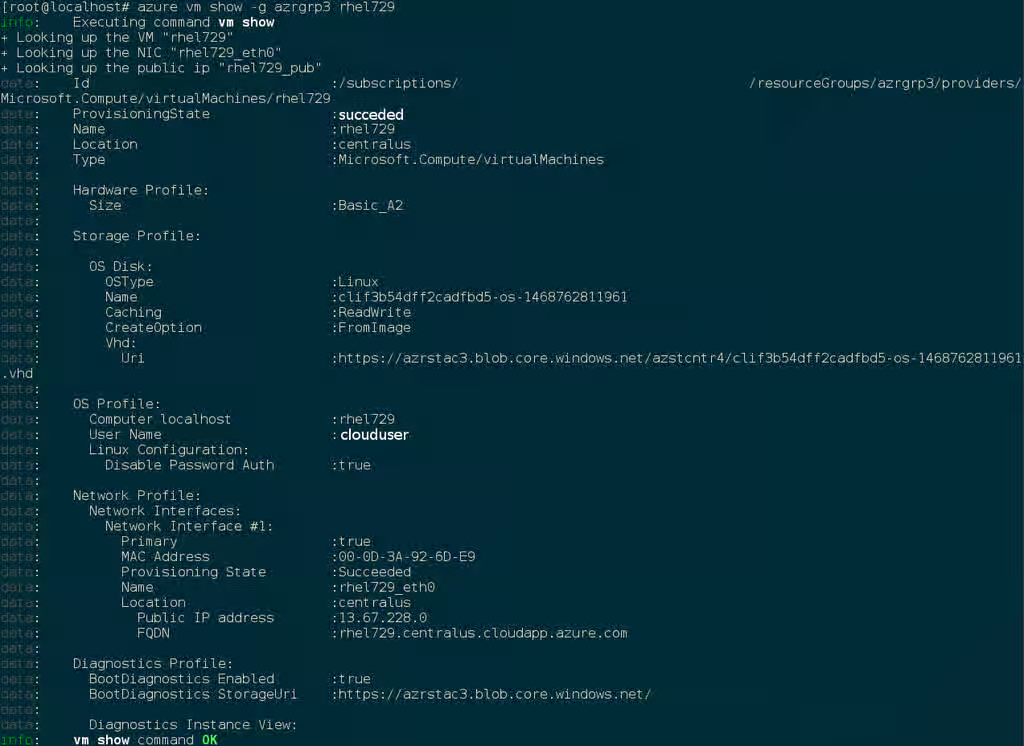
-
Start an SSH session and connect to the running VM using your administrator name and the public key file.
ssh -i <path-to-key-pem> <admin-name@public-ip-address>
Using other Authentication Methods
While recommended for increased security, the use of a public key file with ssh as shown in the example above is not a requirement. The following examples show two other methods for SSH authentication.
Example 1: These command options provision a new Azure VM without generating a public key file. They allow SSH authentication using a password.
```
azure vm create -g <resource-group> -l <azure-region> -f <vnic-name> -y <os-type> -Q <image-url> -z <vm-size> -i <public-ip-name> -o <storage-account-name> -R <storage-container-name> -m <public-ip-allocation-method> -w <public-ip-domain-name> -t <public-ip-idletimeout> -F <vnet-name> -j <vnet-subnet-name> -u <admin-name> -n <virtual-machine-name>
```


Authentication command: ssh <admin-name@public-ip-address>
Example 2: These command options provision a new Azure VM that you can use the SSH protocol to access using an existing public key file ($PUBKEY).
```
azure vm create -g <resource-group> -l <azure-region> -f <vnic-name> -y <os-type> -Q <image-url> -M $PUBKEY -z <vm-size> -i <public-ip-name> -o <storage-account-name> -R <storage-container-name> -m <public-ip-allocation-method> -w <public-ip-domain-name> -t <public-ip-idletimeout> -F <vnet-name> -j <vnet-subnet-name> -u <admin-name> -n <virtual-machine-name>
```


Authentication command: ssh -i $PUBKEY <admin-name@public-ip-address>
If you see your administration login, you have successfully deployed your Azure RHEL VM.
You can now go to the Microsoft Azure portal and check the audit logs and properties of your resources. You can manage your VMs directly in the Microsoft Azure portal. If you are managing multiple VMs, you should use the ARM CLI. The ARM CLI provides a powerful interface to your resources in Microsoft Azure. Enter azure --help in the CLI or go to Content from azure.microsoft.com is not included.ARM CLI Commands to learn more about the commands you use to manage your VMs in Microsoft Azure.